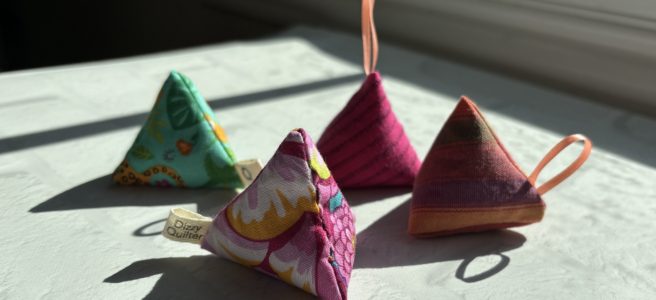
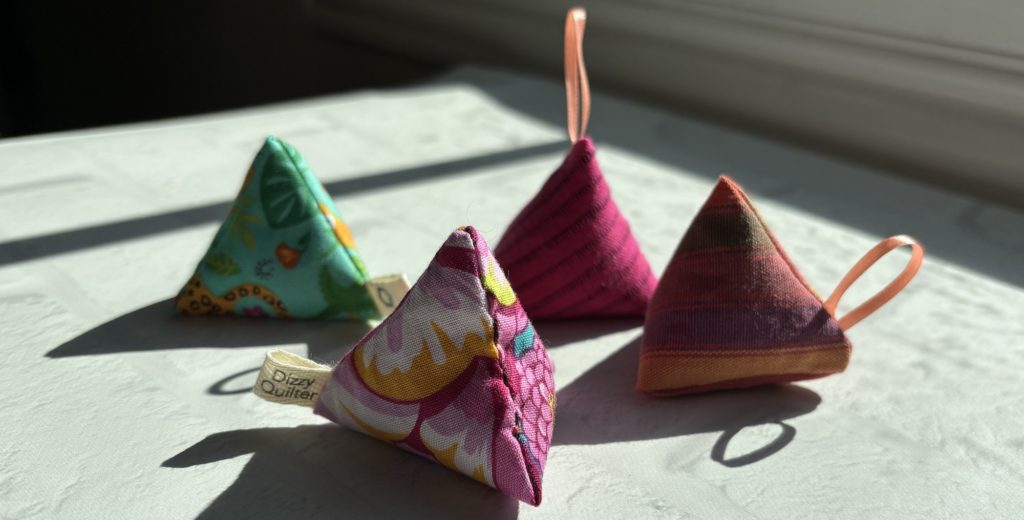
I’ve got a little project to use up scraps to share with you today. These little triangle pincushions are so quick and cute, and I’ve been whipping them up by the handful lately. They are fun and easy, and I think they will make perfect little gifts for students in my live workshops. I thought it would be fun to share, so here is my triangle pincushion tutorial.
* The links I share are affiliate links. If you use one to make a purchase, I will earn a small commission. Thank you! *
When I was teaching at Lancaster last month, I was overwhelmed by how much appreciation I felt for my students. I wanted to be able to give them each a little something, other than the memories of a fun day. It took me a little while to land on these pincushions. They are quick, easy, and with my personalized labels, they are perfect, and I am totally obsessed with making them.
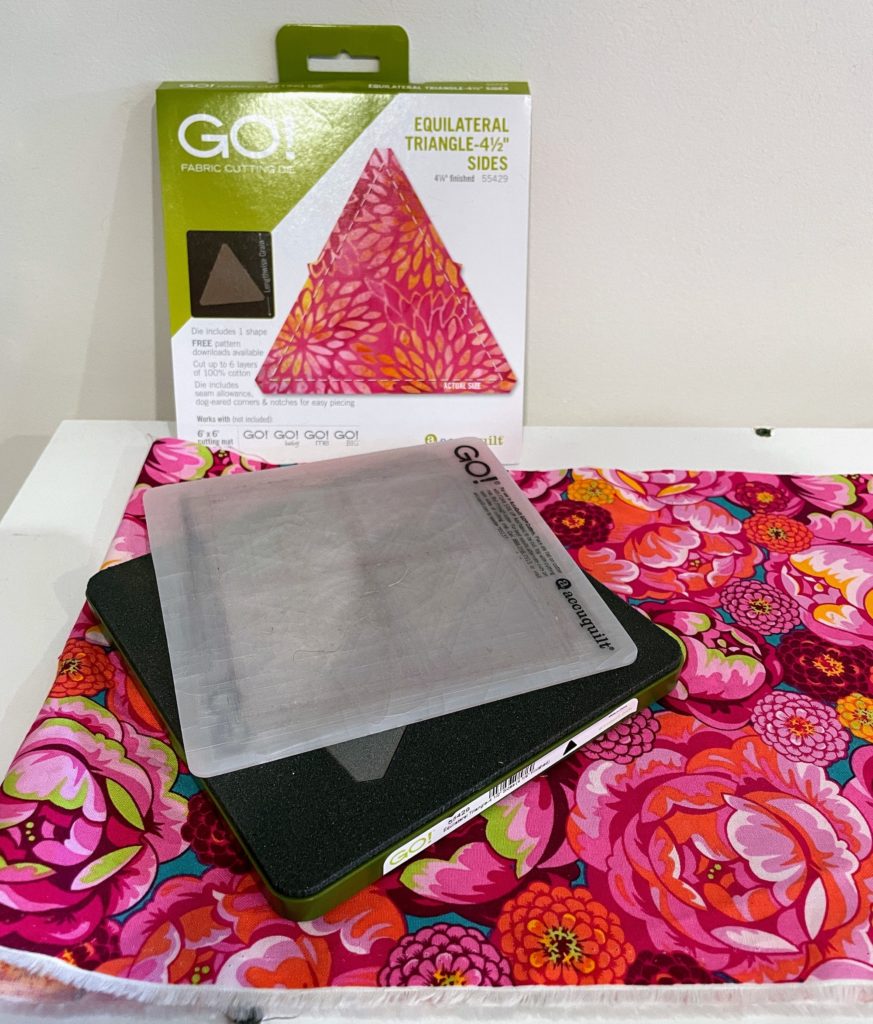
I found the tutorial on the Fancy Tiger website. You can see their original tutorial here. They have several different sizes. I chose to use the 4 1/2″ triangle size.
My friends at AccuQuilt were kind enough to give me a die that will cut my triangles. It’s nice to have industry friends! I’m using die #55429, the Go! Equilateral Triangle with 4 1/2″ sides. It makes the whole process so easy.
For fabric, I’m using up scraps of my favorite yarn-dyed fabrics, charm packs, and whatever else holds still in the scrap bins.
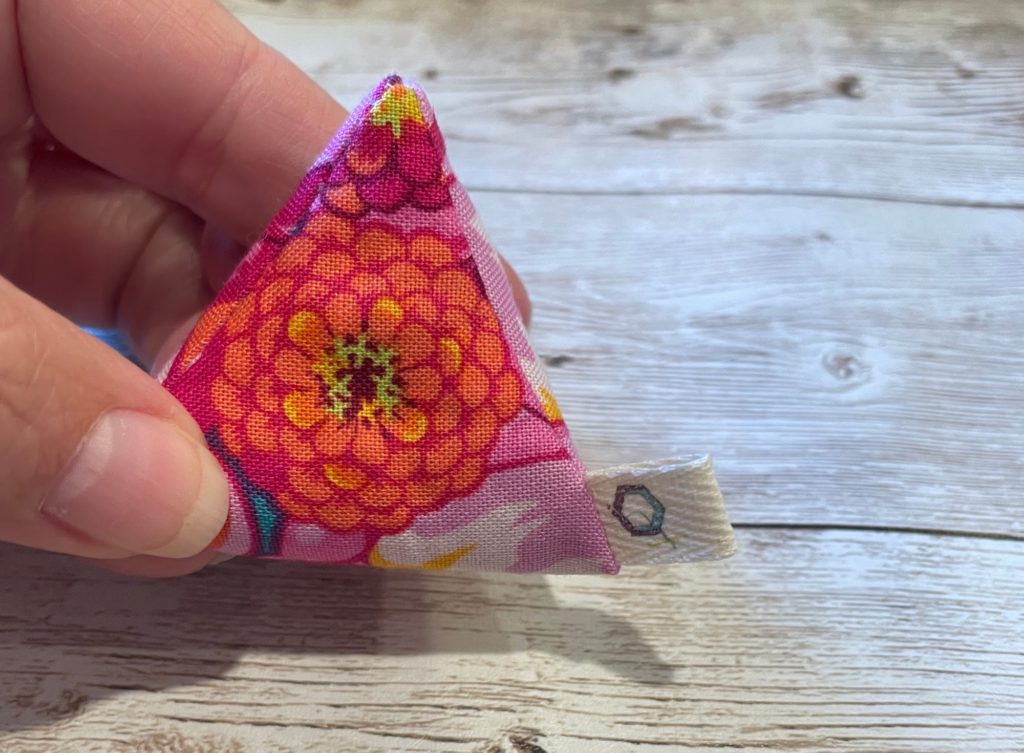
My little labels are from Inked Papers on Etsy. Michelle was so easy to work with. I told her what I wanted, specified the spacing, and she sent me exactly what I asked for. They are so cute they make me giddy.
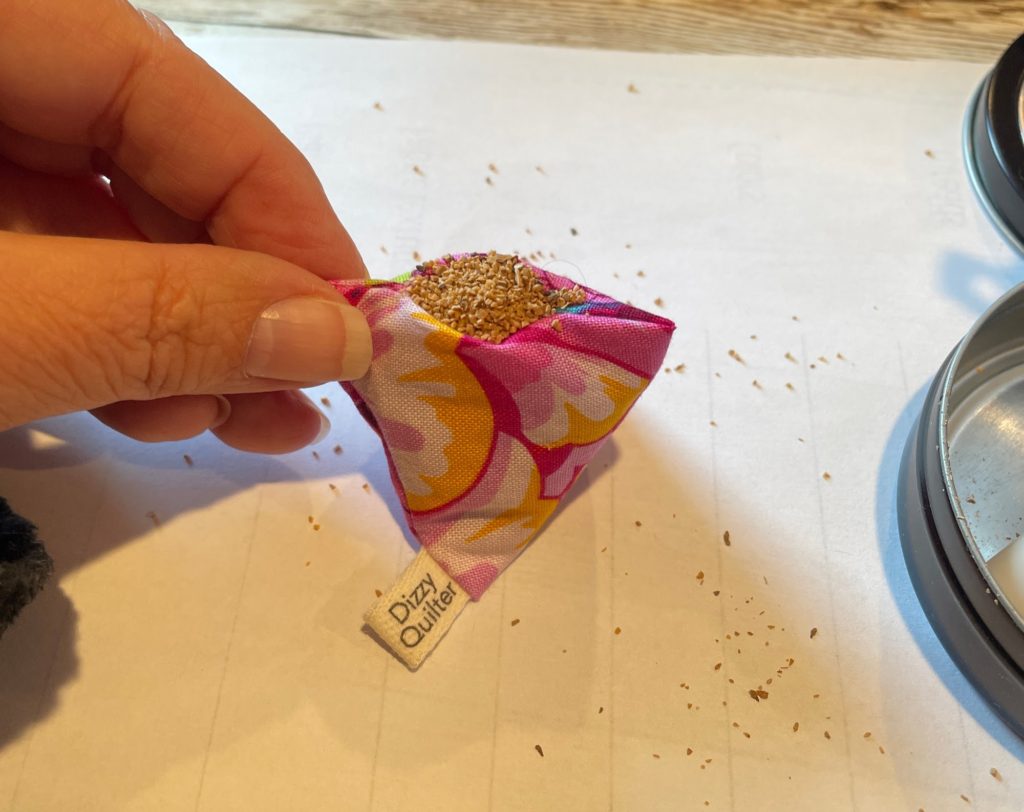
For filling I’m using crushed walnut shells. Rather than spending big bucks on pin cushion filling, I’m using reptile bedding. A tip I learned from my friend, Deb Fisher. Thanks, Deb! I’ve got a 5 quart bag. It seems like I have enough filling for an infinite amount of pincushions. You can use whatever you like. I wanted these to be heavy for their size, so they sit nicely with a few pins in them, and don’t float all over my sewing table.
Okay. Ready to make the most adorable pincushion ever?
Supplies for 1 pincushion
- 5″ square-ish fabric scrap
- 1″ piece of ribbon or sew-in label
- AccuQuilt Go Equilateral Triangle 4 1/2″
- Pin cushion filling
- Sewing machine
- Hand sewing needle
- Matching thread
- Funnel with a wide opening (1/2″ or so)
Select a fun fabric from your scrap bin. You will need something big enough to cut a 4 1/2″ triangle out of it. A 5″ square will work, so if you have some charm pack strays, this is their chance. Press it so it is nice and flat to get started.
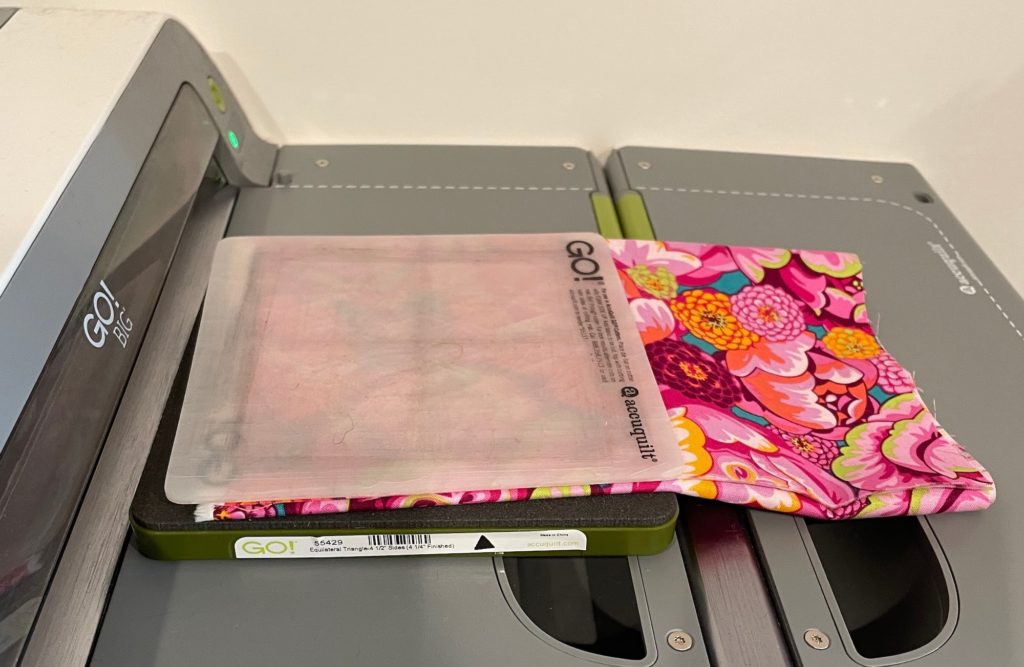
Cut a 4 1/2″ equilateral triangle. Make sure it is an equilateral, or 60° triangle. Be careful if you have one of those special “triangle in a square” or “peaky and spike” rulers. They are close, but no banana. If you don’t have the AccuQuilt die or special triangle ruler, your normal ruler should have a 60° line. Here is a tutorial. Good luck.
Once your triangle is cut, head over to your sewing machine.
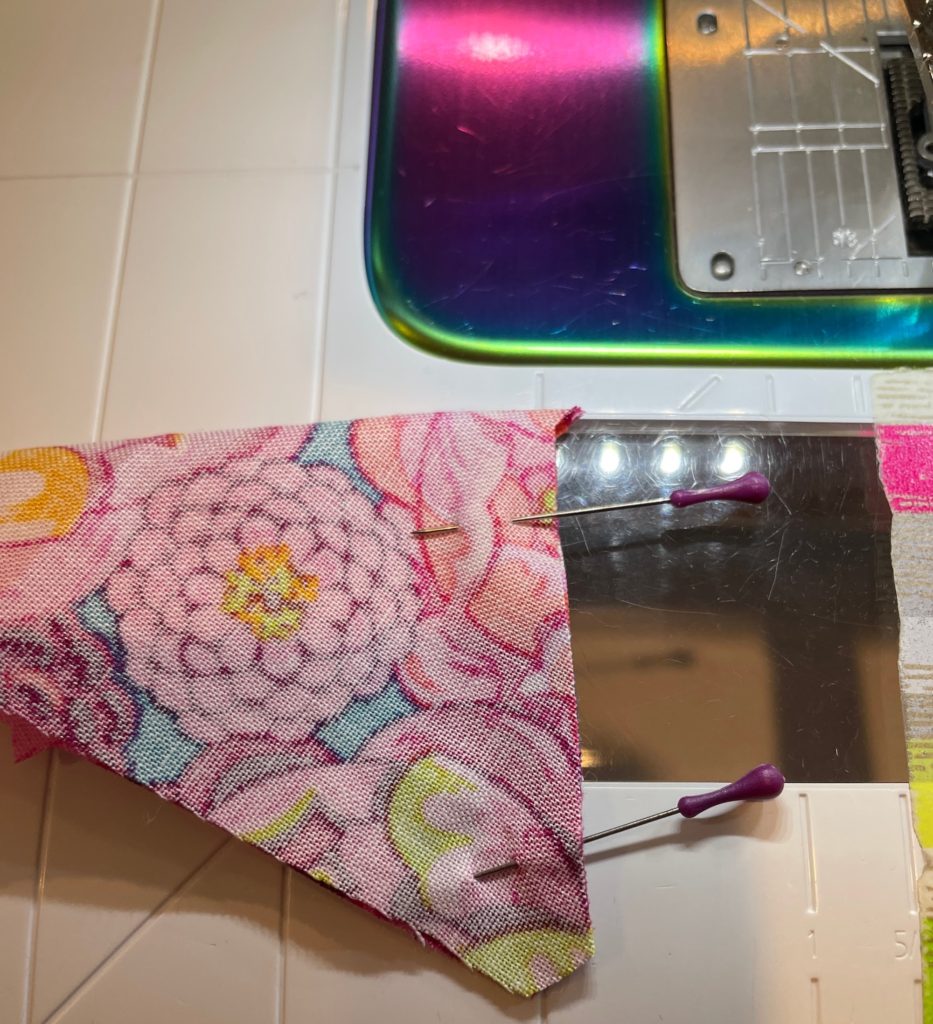
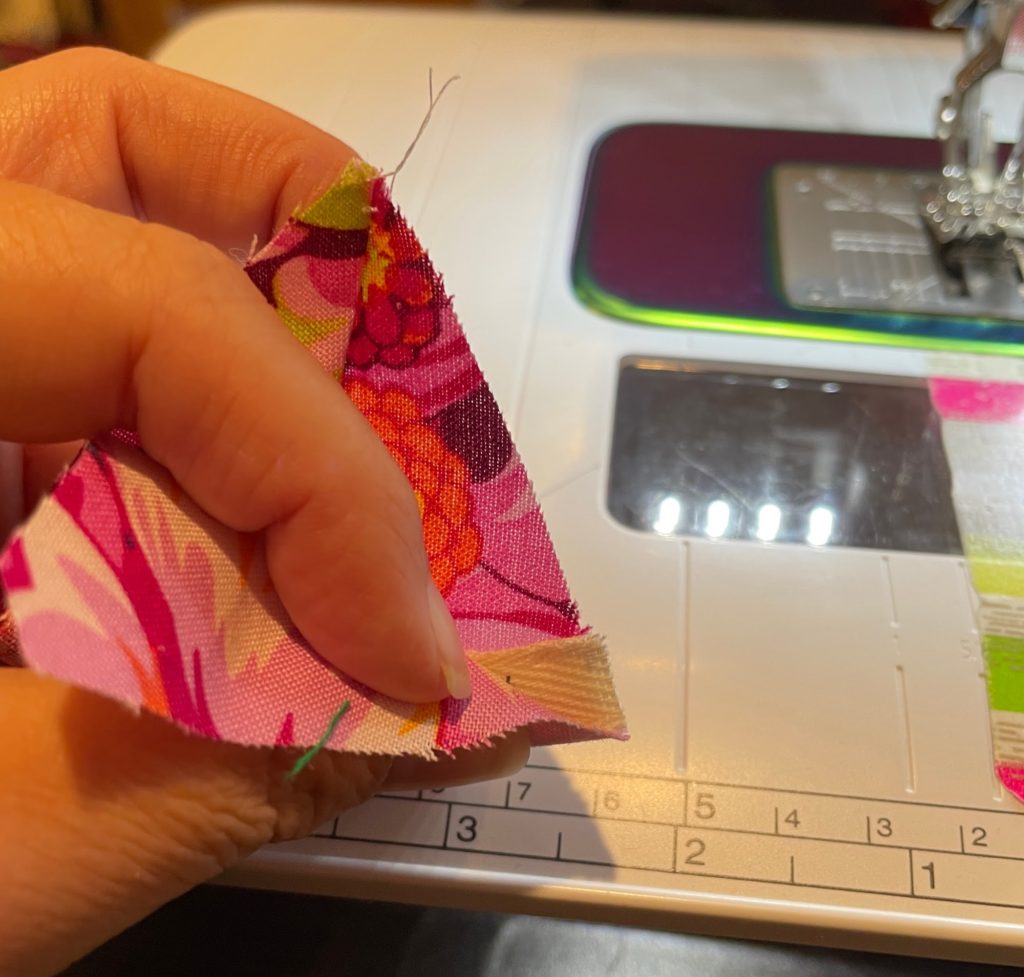
Fold two points together, right sides facing. Pin, then stitch along the short side.
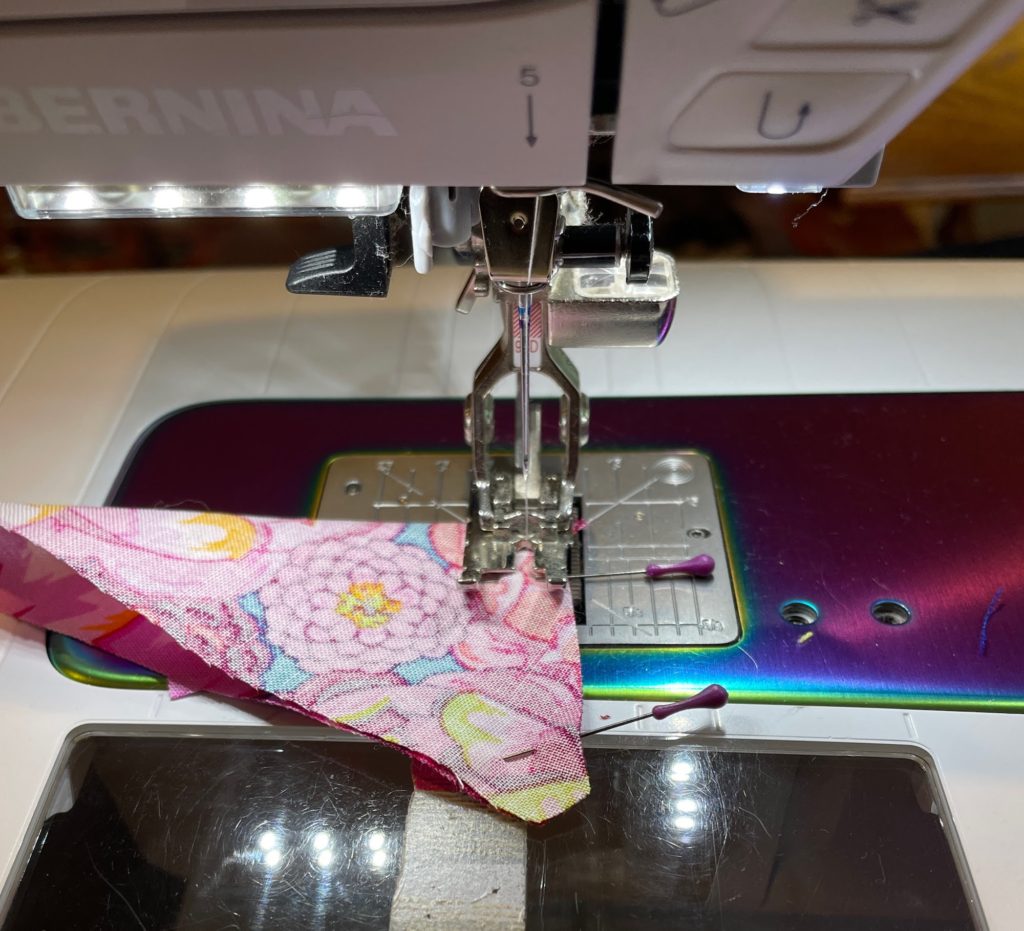
Fold the remaining point up, aligning it with the others. Pinch the midpoint.
Fold your ribbon in half, and tuck it into the triangle, lining it up at the pinched midpoint. The folded part should be inside the triangle, with raw edges aligned to the raw edges of the fabric. Pin and sew.
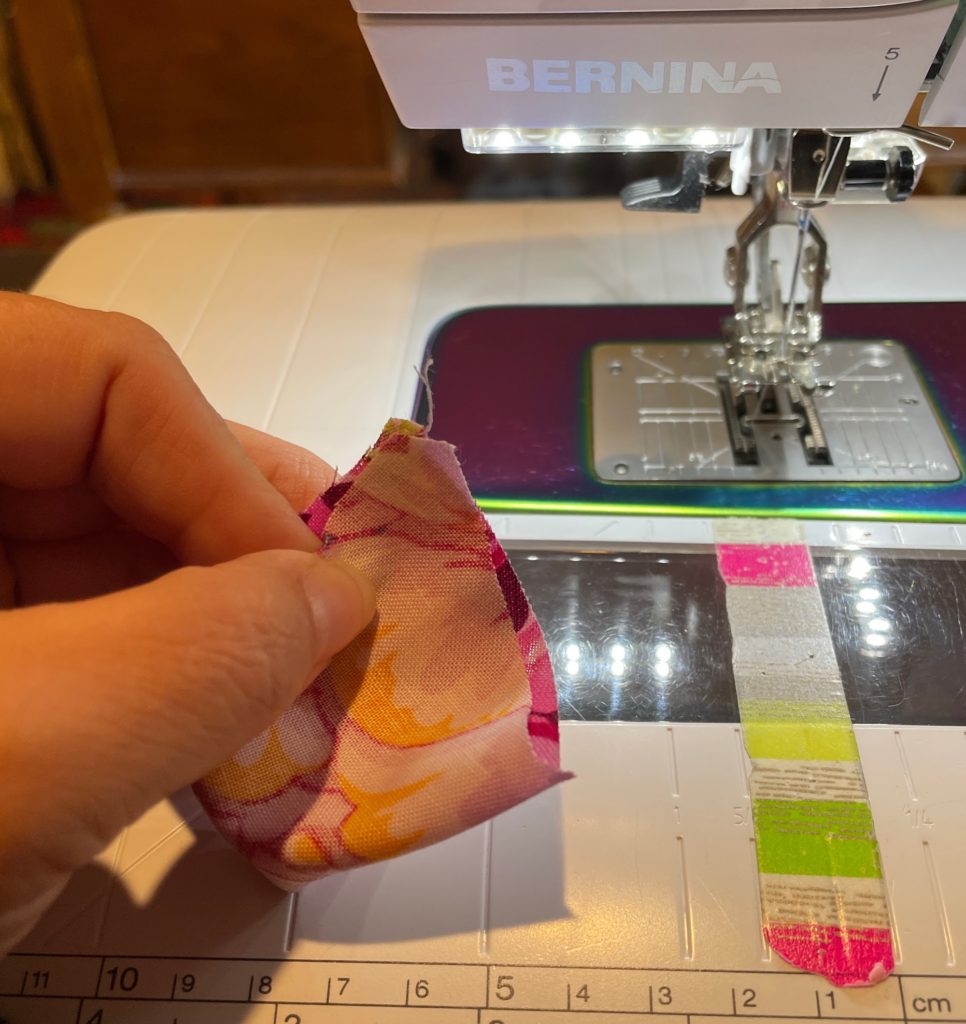
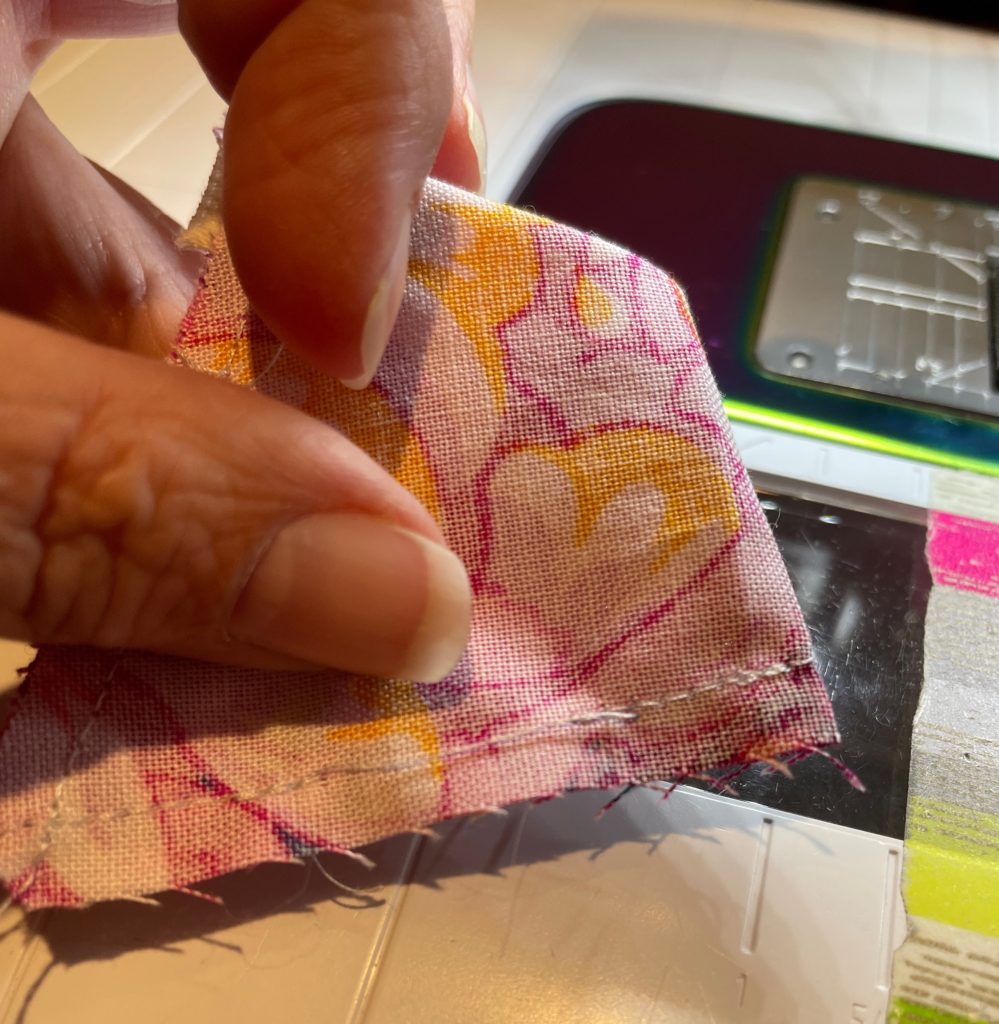
For the third seam, stitch about 3/4″, skip about an inch, then sew the rest. This opening will be for filling.
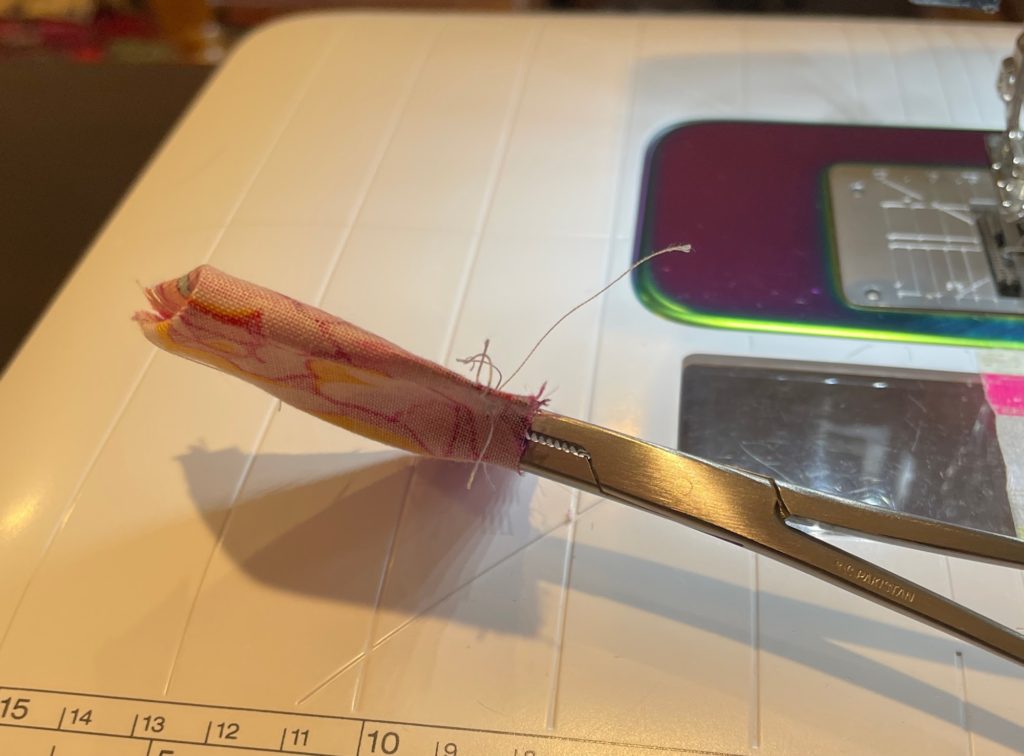
Using a hemostat, tweezers, or your favorite method, turn the triangle right sides out. Use something pointy, like a chopstick to poke out the tips.
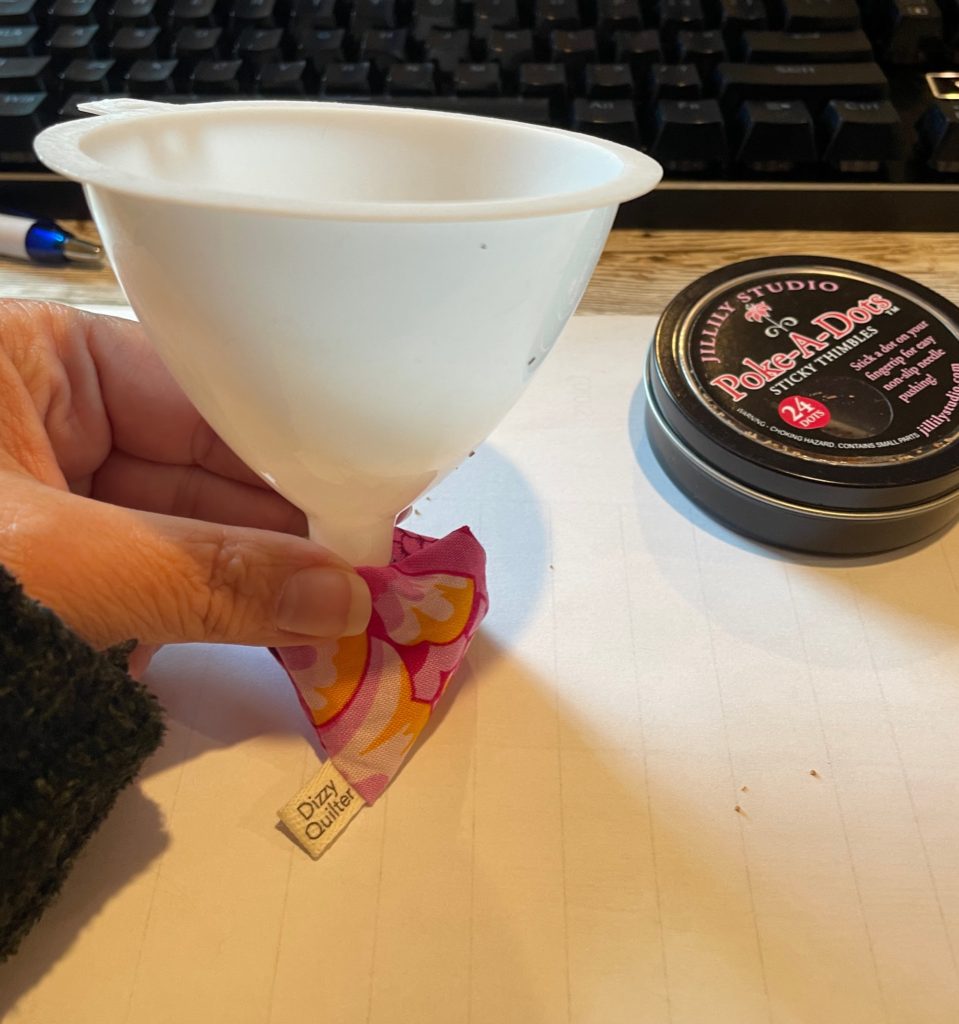
Using a funnel, fill the little pincushion with your filling.
Massage the pin cushion, to fill in the corners.
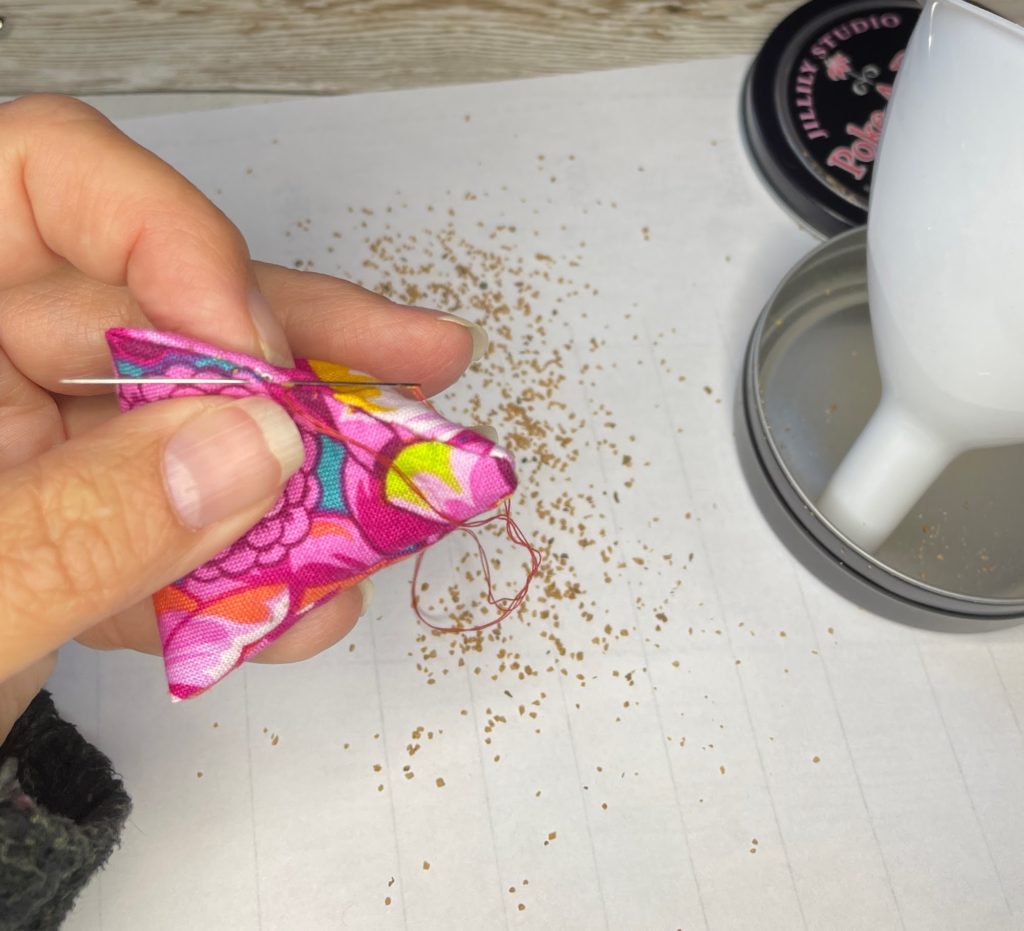
Using a doubled thread, carefully stitch the opening closed, using tiny little stitches. Knot the thread, and run the end through the middle of the pincushion. Clip thread.
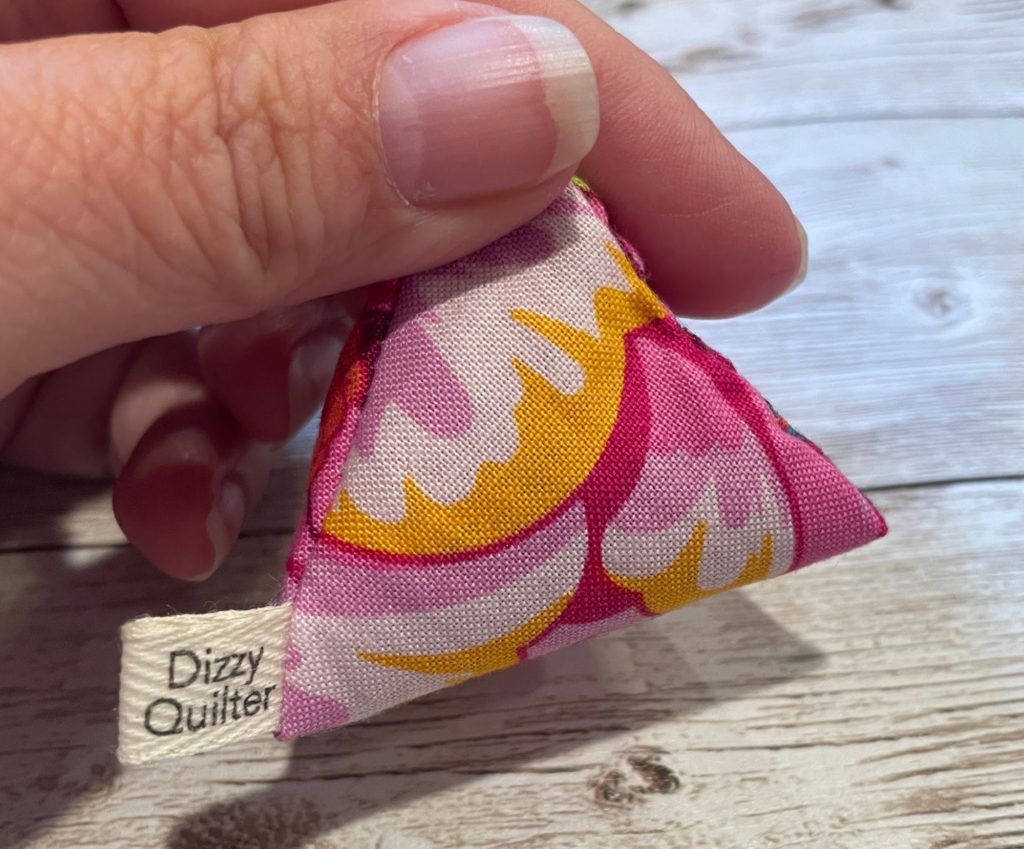
Admire your little creation. Aren’t they adorable?
If you love scrap busting, I’m running a scrap buster quilt sew along, starting on October 2nd. Check it out!