
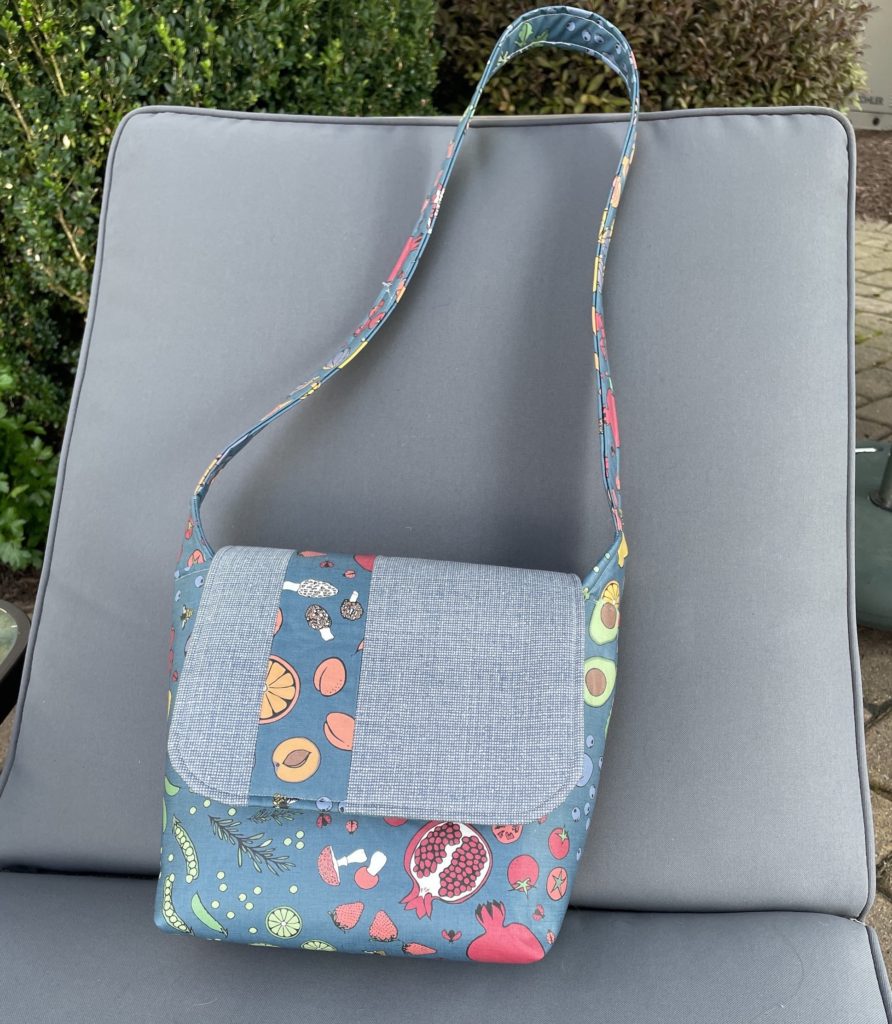
Through my membership in StitchCraft Marketing I am sometimes invited to try new products. Recently I was invited to try out laminated cottons from Splash Fabric. This weekend I finally made time to put together my project and put their fabric under my needle. I made a Chunky Wee Bag with Splash Fabric. Check it out!
First off – have you encountered laminated cotton before? It is regular quilting weight cotton, but it has a thin sheet of urethane adhered to the printed side. It is great for things like toiletry bags, aprons, baby bibs, etc. Anything that needs to be washed regularly, but would benefit from being able to be wiped off.

I decided to use a pattern I had purchased years ago but not made yet – the Chunky Wee Bag by Hunter’s Design Studio. The instructions were clear and easy to follow. Sam Hunter writes great patterns, with lots of illustrations to make things easy for occasional bag makers. It took me about 3 hours, with plenty of breaks for puppy play in there. (CJ doesn’t care to see me paying attention to anything other than her.)
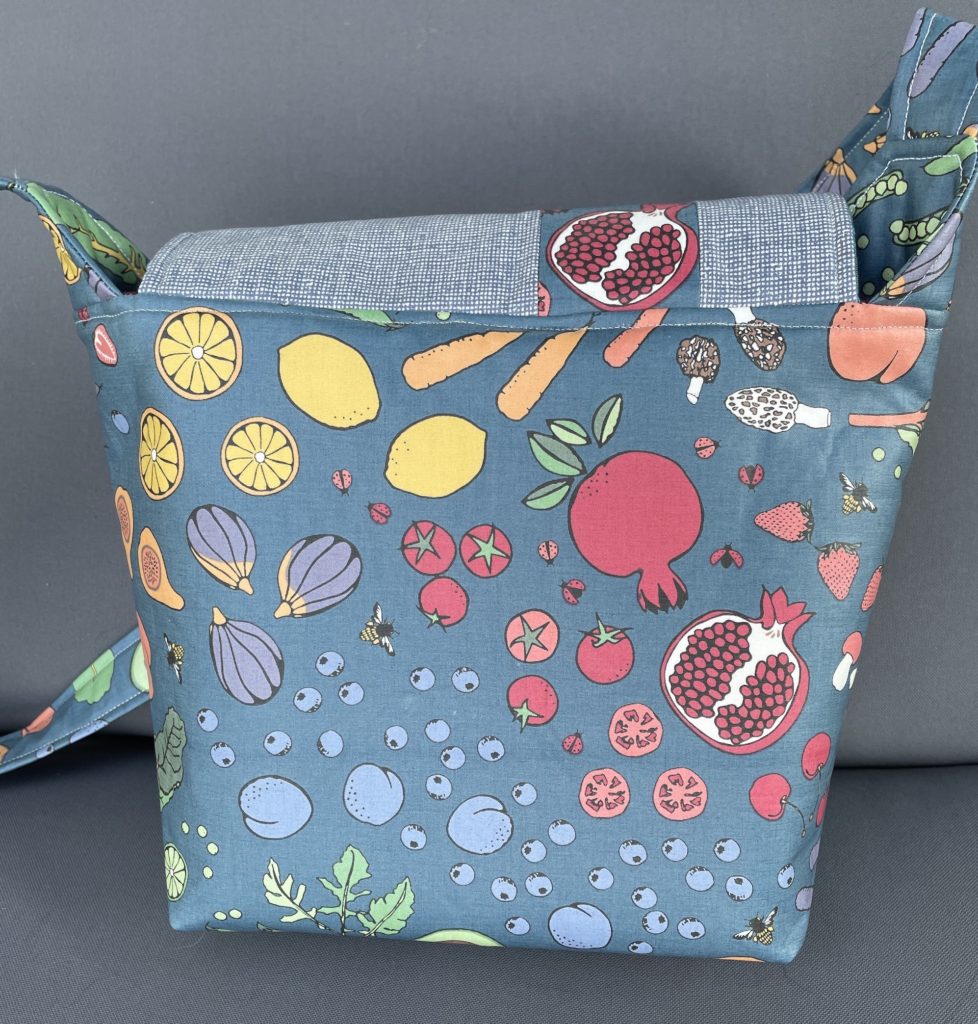
Okay – let’s talk about the fabric. It is wider than the typical 44″ width. It’s 58″ wide, with 56″ of usable laminated surface. It’s very soft, and feels lighter than I would expect it to. Not in a bad way, just not as stiff as other laminated cottons I’ve used. This could be due to the urethane coating, rather than the vinyl I’ve worked with before. You can read about their eco-friendly process here. I chose two prints to play with – this gorgeous garden veggie medley, and a more neutral plaid-ish piece.
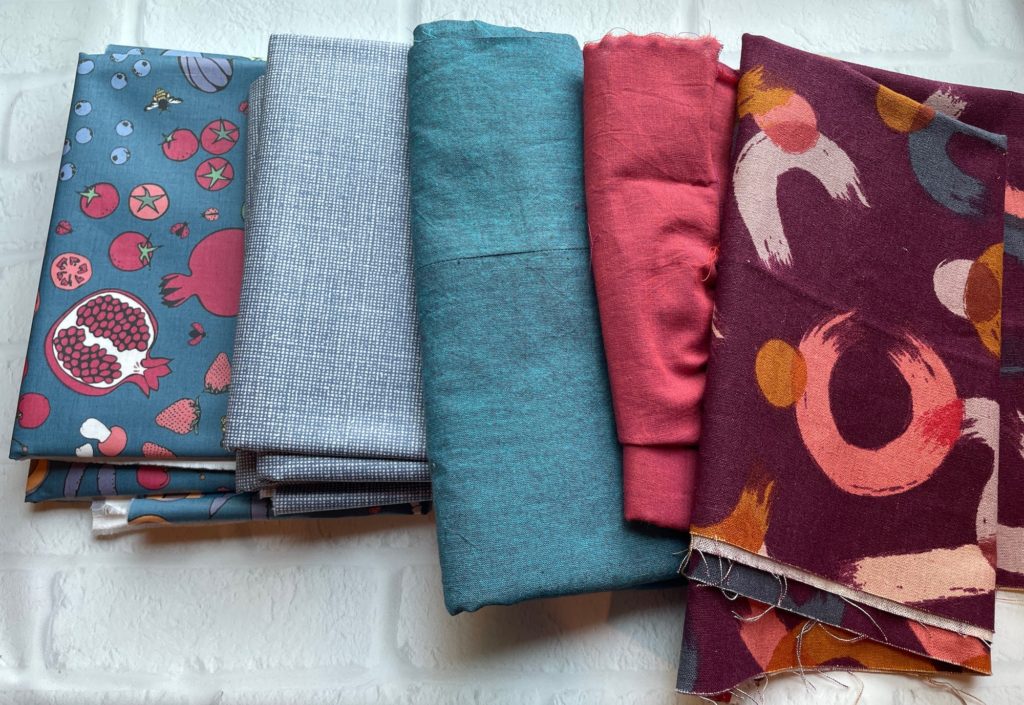
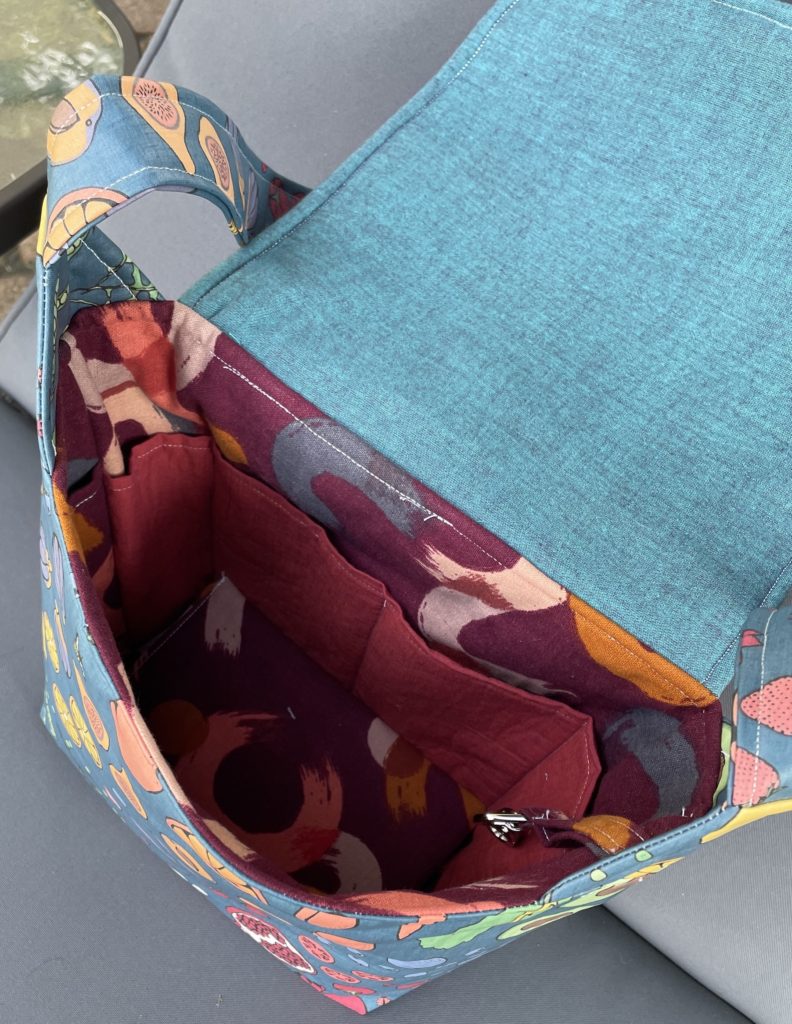
For my bag, I decided to use the Splash Fabric on the outside, but fabrics from my stash for the inside. I’ve got some canvas and some shot cotton that I’m using for the interior, because the colors worked so well together.
My first step was to read through the pattern and highlight the cutting instructions for the bag size I’m making, medium for this test. Then I made some notes to make sure I cut the right fabrics for the right pieces. Keeping track of pieces is super challenging – I should have made labels for each piece. I will definitely do that next time. I confused a couple of pieces, then assumed I had made a cutting mistake and trimmed a piece down, which was a mistake.
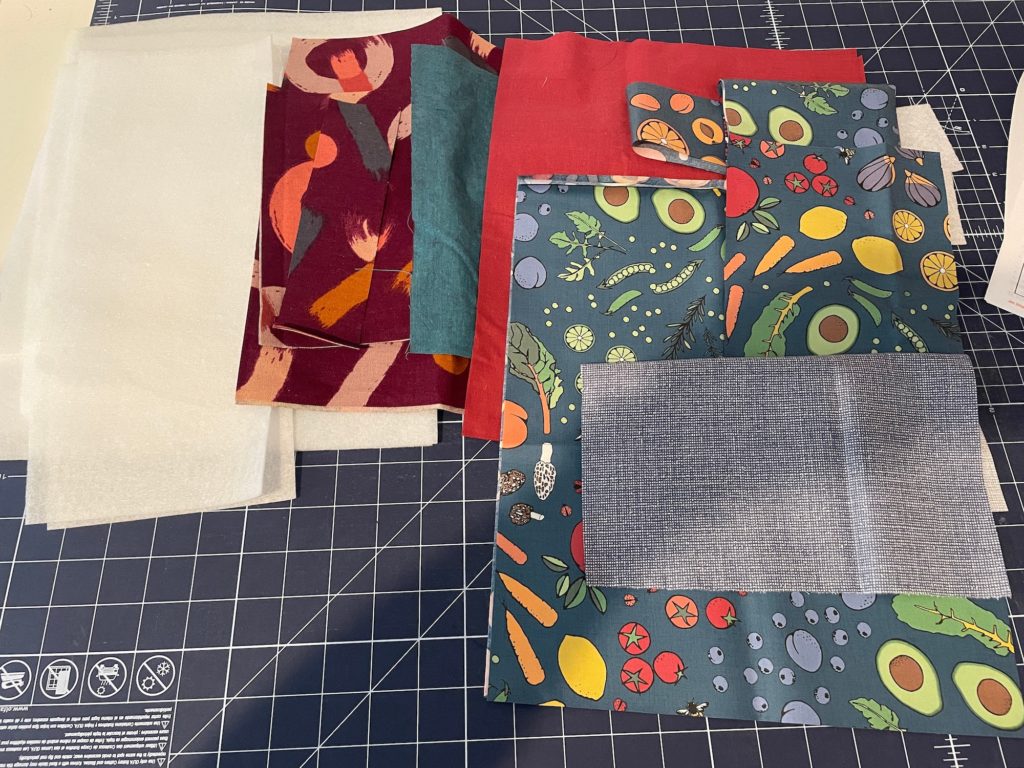
Construction was easy. I just took the instructions one step at a time, and had very little confusion. I did use fusible fleece, which had a really interesting effect on the fabric. The laminated cotton feels almost like leather now, and I really like it. I’ll definitely be making more bags with this, and maybe even some kitchen aprons.
I didn’t iron directly onto the Splash Fabric, even though the website says it is okay. I chose to use my silicone pressing mat, just to be safe, I like to use a really hot iron, and they recommend a lower setting. With the pressing mat, it was fine.
I didn’t use any special feet on my machine, and everything stitched really nicely. The only thing my machine struggled with was the many layers involved in the keyring holder, which was 8 layers of canvas, 2 layers of laminate and two layers of fusible fleece. I’m sorry I even tried to make the Bernina stitch through that.
Here are the finished pics.
And here are my studio buddies, kindly agreeing to model for me today.
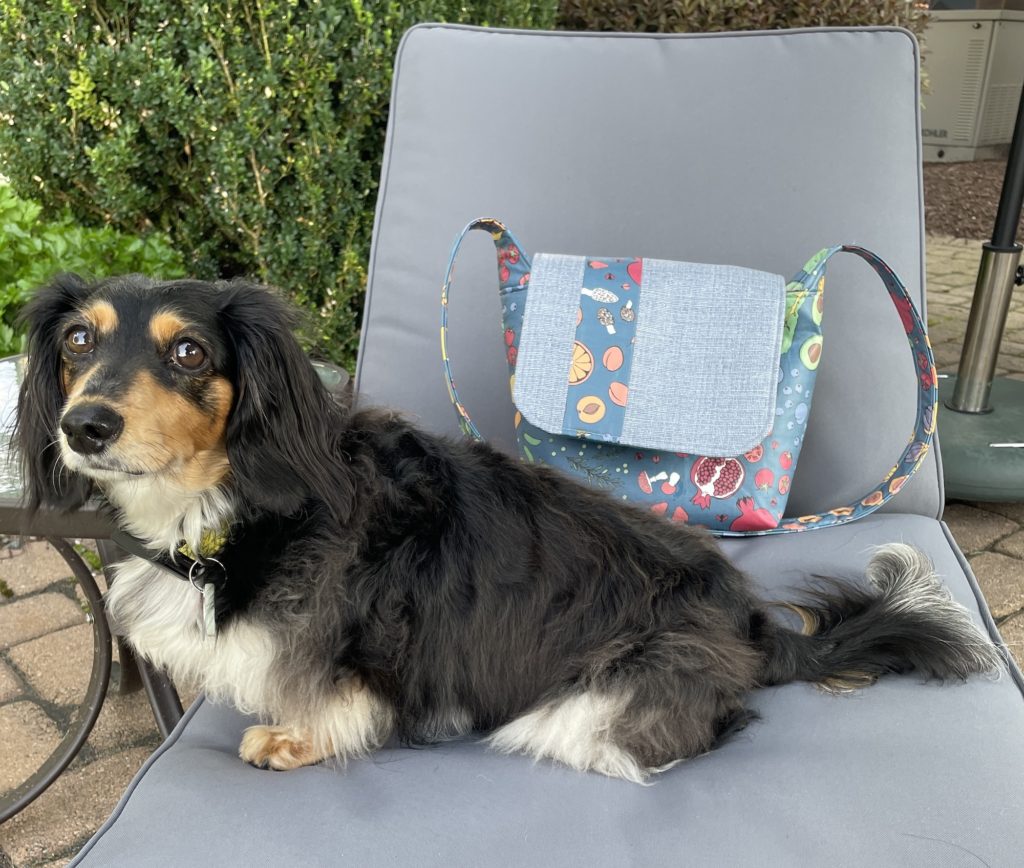
Oscar feels that the bag sets off his glorious fluff.
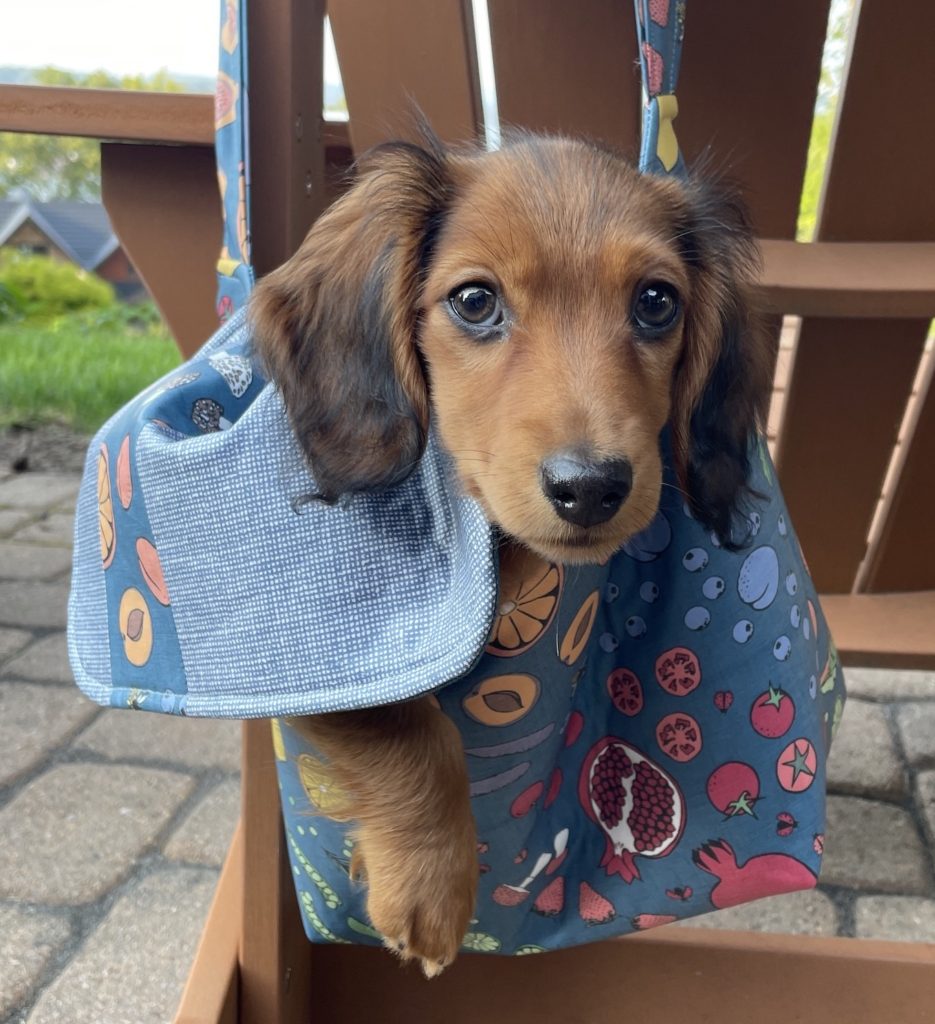
CJ finds it to be a little tall, but adequate for transportation. (My next version will be hacked to make it more dachshund friendly.)
What do you think? Are you willing to give the Chunky Wee Bag or Splash Fabric a try? Let me know in the comments!
Thank you to Stitchcraft Marketing and Splash Fabric for the fabrics used in this project!