I’ve been working on the digital end of my project. I’m competent at computers, but there are still things I find incredibly frustrating. Image editing software is at the top of my list. I’m using GIMP, which is a free open source image editing software.
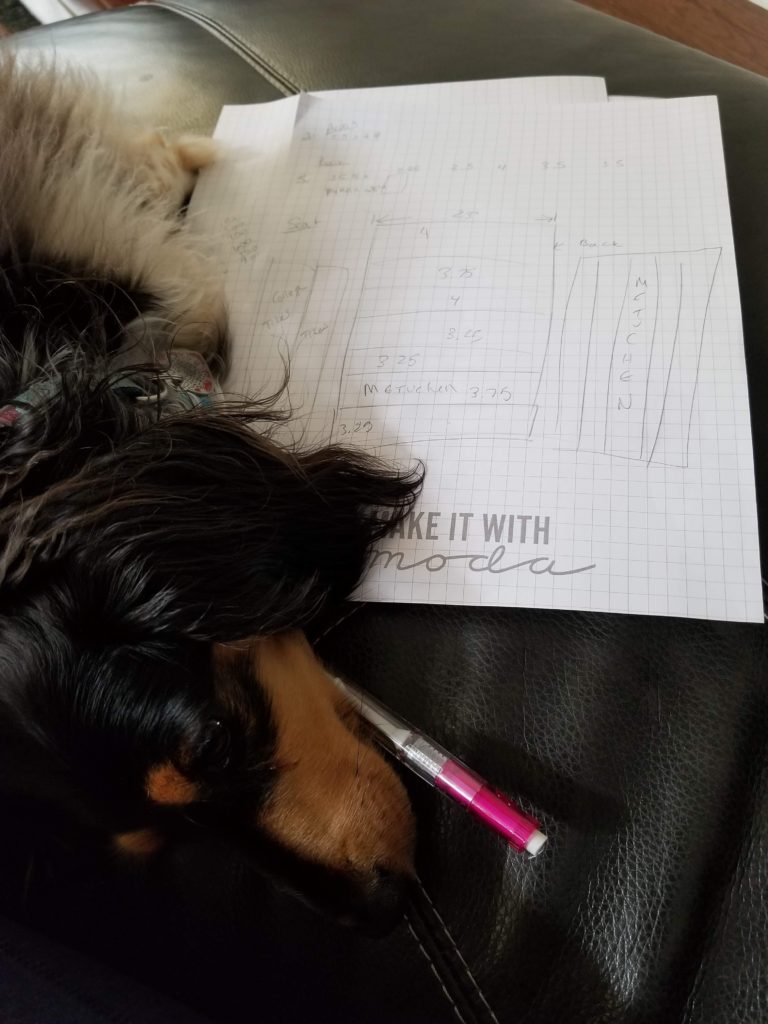
After sanding the wood I measured all of the pieces, drew myself a little diagram, and then thought about fabric layout. The eco canvas I am planning to use is sold in a 54″ width. I will need 2 yards to cover all of the elements of the chair I want to cover.
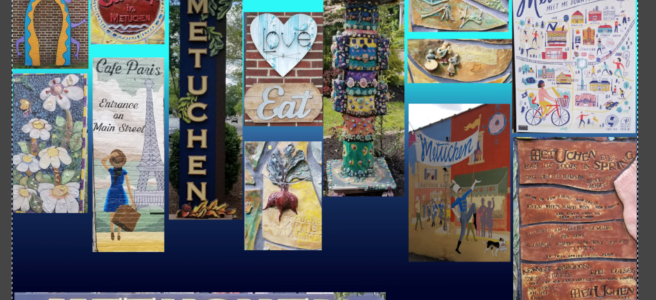
This was not my first time using Spoonflower. I’ve done it before, and it was fun and easy, but my design size requirements were not as precise last time. This time I actually want the images I produce to come out at the correct size.
I decided to do one yard for the slats on the back, and one yard for the slats on the seat. I may end up ordering a third yard of solid to cover the back sides of the slats, or I may just find a cheap solid poly at a local shop. No need to pay $32 per yard for a custom printed solid. Also, depending on what scraps are left, I may be able to play and show off my piecing skills there.
On day one, I had a little meltdown, and went to bed with no design work achieved. Several days later, I fired up the software again, trying to set my canvas at 36″ x 54″. No luck. I tinkered with it for a while, then went to bed. (I usually do computer work in the evening, when the family is camped in front of the TV.) As I was laying there fuming I figured out what question to ask Google. If you’ve done any challenging computer stuff, you know that asking the right question is the hardest part. “How to Create large-scale images in Spoonflower” is the question. Luckily, the answer is right there, with a combination of words and pictures that got me set right up.
More math followed, translating my slat measurements into pixels. I figured out how to draw guide lines for myself, then couldn’t figure out how to get the photos I had taken into Gimp. Luckily I was on the sofa with my software developing husband and two sons, who share DNA with Windows.
You add photos into a Gimp project by using “open as layers”. It felt a little clunky, but once I got going it was easy. The second stopping point was that I couldn’t find the tool to make those little grabby squares on the corners of my images so I could change the sizes. My husband helped me find the scale tool, despite my being really crabby. After that, I was off to the races.
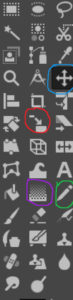
If you are thinking about trying Gimp, here are the tools I used most. Blue circle – move it around. Red circle – scale (change the size). Purple circle – gradient fill. Green circle – draw lines and look like you know what you are doing.
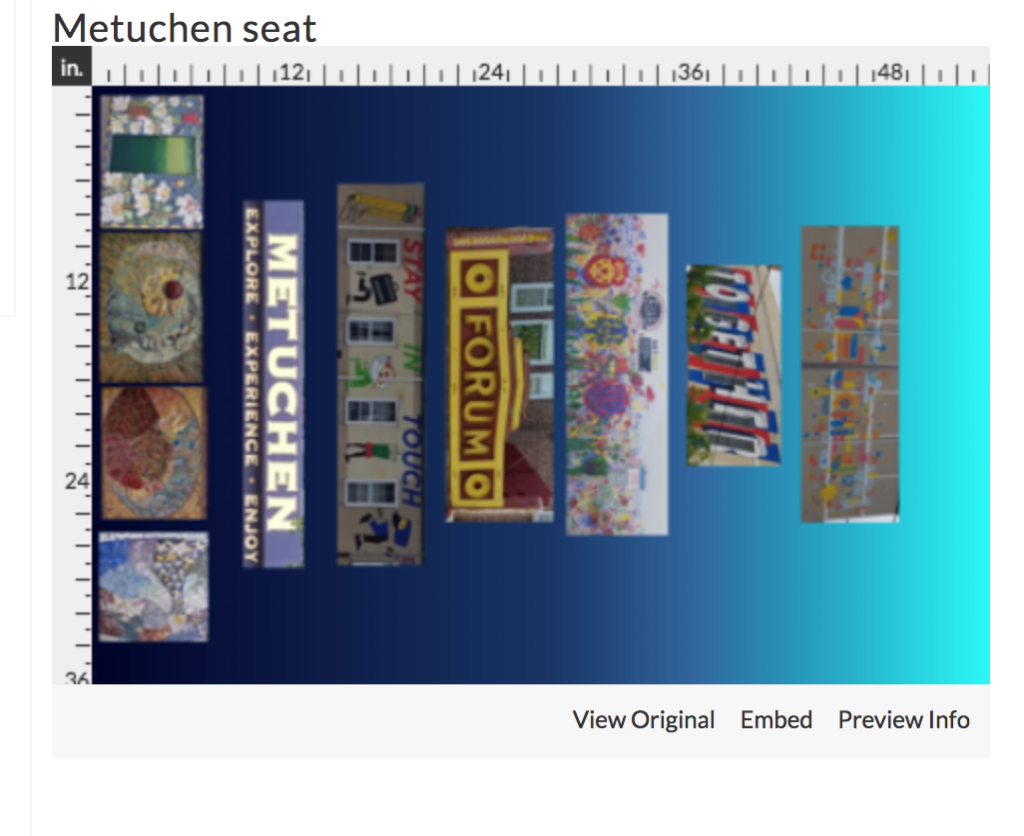
I made myself two collages that I believe will print out at the right size. To make sure the finished piece didn’t have any obvious blank spots, I filled the background with a gradient and erased my guide lines.
I was shocked, shocked I tell you, when I uploaded my first file to Spoonflower and everything looked correct. The second file was aligned incorrectly (only showing part of the image), but that was easy enough to fix. You do need to make sure that your width and height settings are correct to align with the fabric.
Now I have come to the hardest part. The waiting. My fabric should be here June 12th. I may have slipped in a little reward for myself – did you know Stacey Iest Hsu used to design doll panels on Spoonflower? I bought a yard of Harold Bunny, which means I will have one bunny for me, and three bunny panels I can sell. I’ll have them listed in my Etsy shop when they arrive.
Thanks for following along with me. The next step will be to paint the pieces of the chair. I want to get to that this week, so that when June 12 comes around, it is nice and dry and ready to be assembled. I’ve been dragging my heels because of the digital work. Now that I’ve finished that part, I want to get cranking.
Congratulations on the progress!!! Thanks for the info on sharing your tools and what you’ve done. So great of you to share this. Can’t wait to see the next few steps. Jen, I am in awe of your various talents.
Thanks! I’m really just blundering around.
I have got to get on to spoonflower! I can’t wait to see this – it is going to be spectacular!
Hi Jen! You’ve got a great plan in place, especially allowing yourself a week for the painting part. It’s hard to do that in the rain, even if you’re working in the (hot) garage. I love all the details you shared about Spoonflower and the software used prior to that. Great job so far! ~smile~ Roseanne
Can’t wait to see the finished product !
Thanks, Mary! That due date is coming right up.
I get confused just reading all that stuff, but I’m so excited to see how this turns out! This is going to be fun!