
Instagram is all aflutter with Jelly Roll Rugs. I don’t know when I first saw one, but they have been parading across my feed and each is prettier than the last. I may have a jelly roll or two (or five) stashed in my studio. So, I did what every self respecting quilter does when an exciting pattern rolls across their feed. I ordered it. I had every intention of making it using one of my already purchased jelly rolls, but you know how that goes.
Have you seen the V and Co Ombre Metallic Confetti Dots line*? OMG. I was at Gotham Quilts and Ivette slyly stacked a few near me while I was working. She is absolutely fantastic at selling me fabric. Some days I think the shop is stocked with me in mind. Seriously. Every time I go in and don’t come home with fabric is a victory. I should get a medal when I control myself. I would have zero medals, though.
You can find the Jelly Roll Rug pattern on Etsy*. I will not be sharing all of the construction details, as I feel it is important to support pattern designers.
Preparation
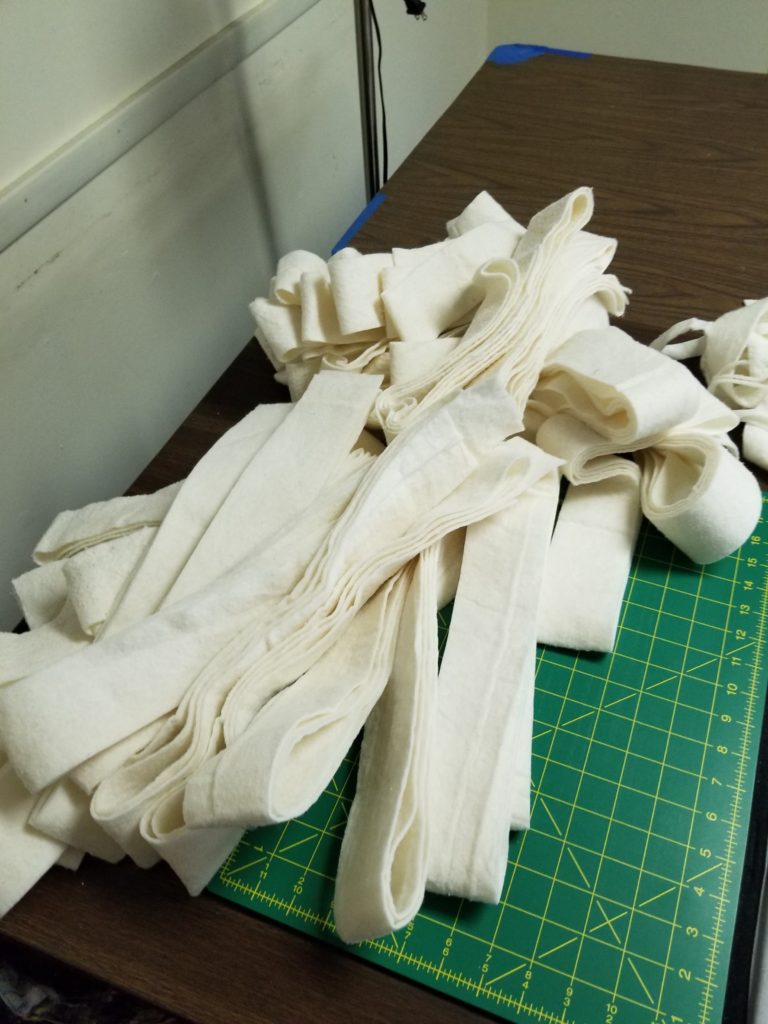
The first step was to cut my batting strips. I cut loads and loads of my batting scraps into strips, as I couldn’t figure out how to easily be certain I had enough. It used up a nice pile of batting scraps. This might be my new favorite way to clean up that particular pile.
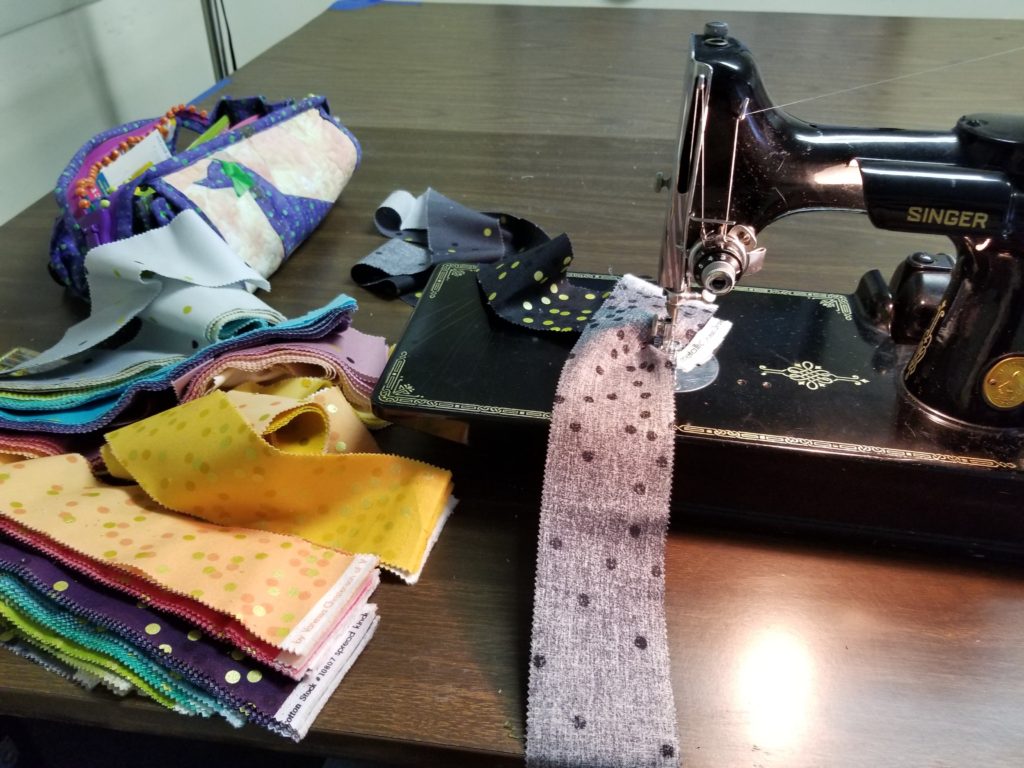
Next I joined all of my jelly roll strips. I used my grandma’s featherweight for this step. It is my go-to for taking to sew-ins and classes if just a straight stitch is required. It is so much more portable than my Bernina.
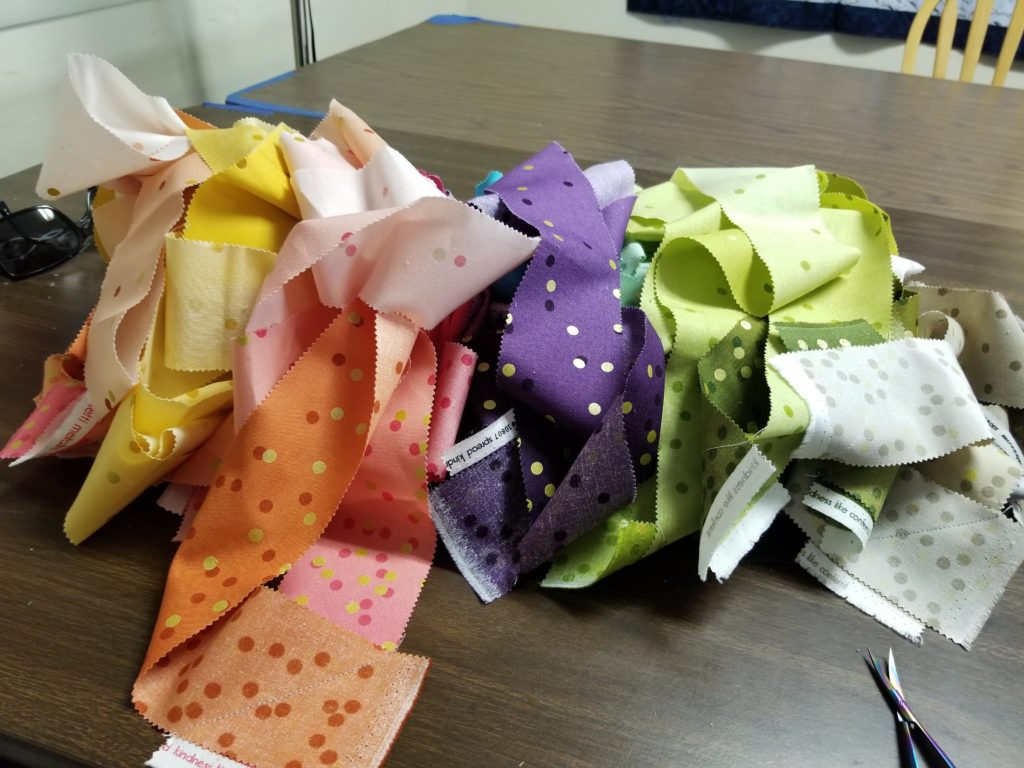
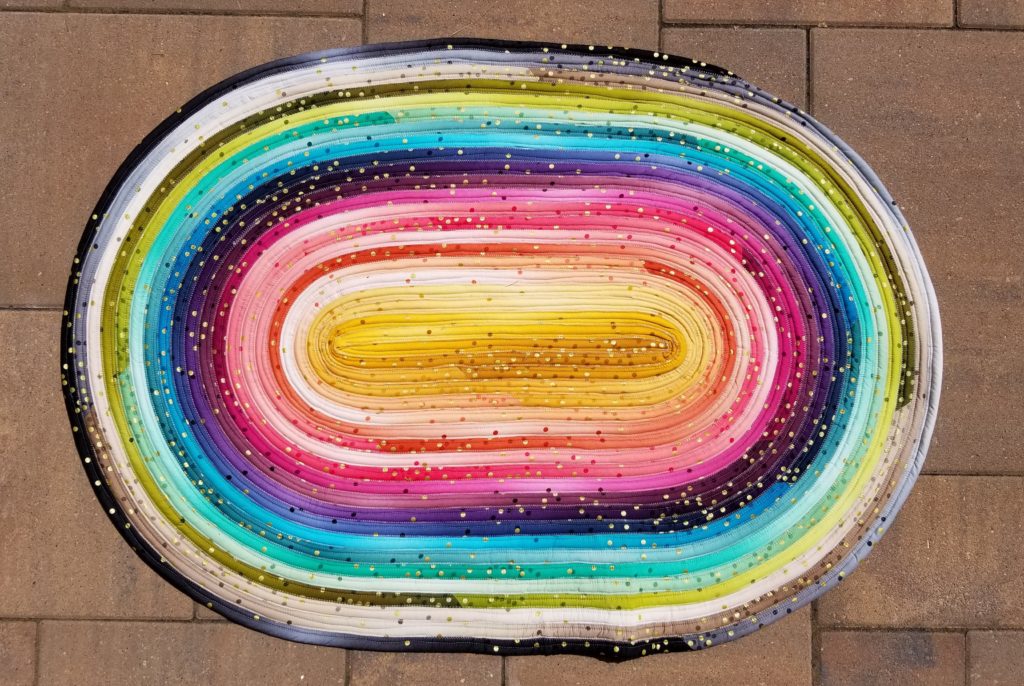
Aren’t they gorgeous? I kept matching strips together, to keep the final rug coloring more cohesive. They were stitched together in the same order that they were rolled up by the manufacturer.
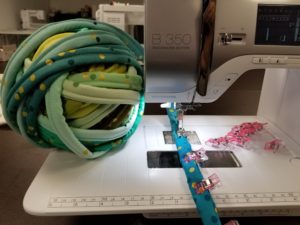
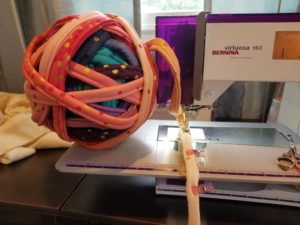
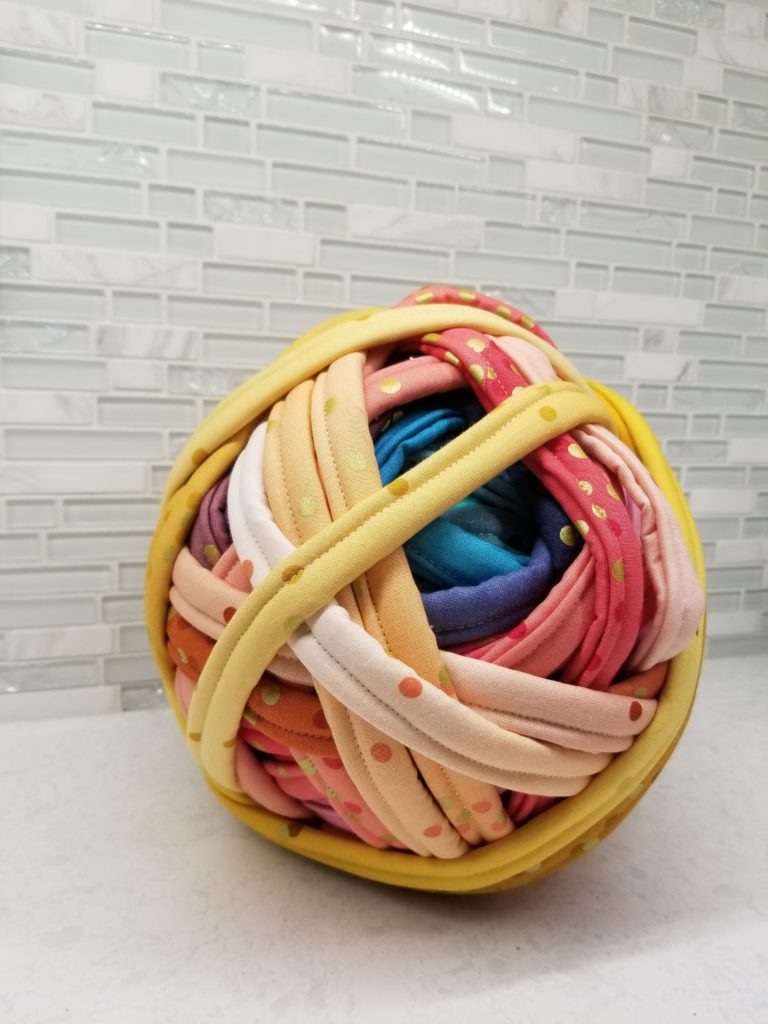
Turning the strips into “rope” was a bit tedious. It seemed to go on forever, and used up more than one bobbin. As I wound up the ball, it just got more and more beautiful. There was some discussion of just keeping it rolled as a decoration. I’m glad I didn’t do that.
One thing I didn’t realize as I was making the rope, is that the end you begin with will be the outside of your rug. You don’t treat both ends the same way, and of course the end that you finish with will be the center of your rug.
Assembly
I was shocked at how quickly the rug came together once I started assembling it. The prep goes slow, but final construction is a snap.
 I found this foot in my Bernina foot collection. I’m not sure what I originally purchased it for, but it is ideal for Jelly Roll Rug construction. It is called a blindstitch foot, and apparently is for construction of “especially elegant clothing”. Lol. That definitely isn’t what I bought it to make. The little bar in the center worked beautifully to keep my zig zag evenly distributed across the seam.
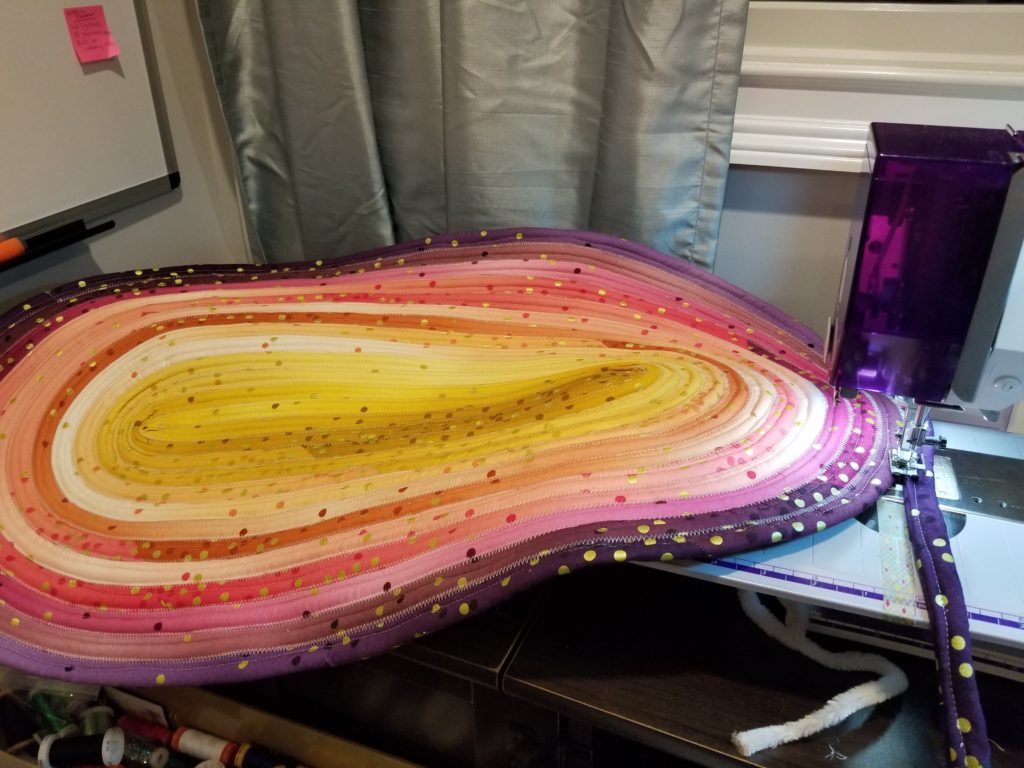 My sewing table is a small one, and is crammed into a corner of my studio. Do as the pattern designer suggests, and use a bigger, flat surface to stitch on. My rug is quite wobbly. I really should take it apart and fix it, but I don’t see that happening any time soon. It is much flatter after a good dousing of Best Press and a session with a hot iron.
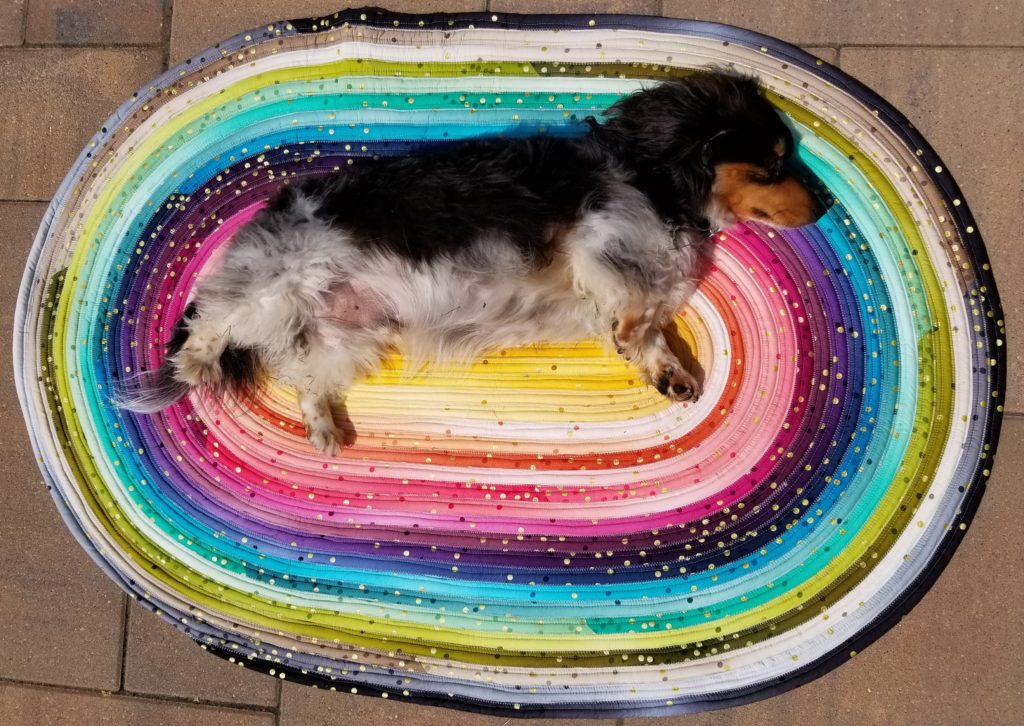
Oscar approves.
You will notice I referred to this as my first jelly roll rug. I have the rope for the second already prepared – it is just waiting for me to finish some client work and open up my schedule.
Final Thoughts
The Jelly Roll Rug finished at 30″ x 43″, one inch smaller than than the pattern designer predicted. I will be stitching my next one with a polyester thread. This one was made with Aurifil 50 weight, which is beautiful, but one play session with my small dog has created some broken and pulled threads. I think a stronger thread would be a better bet.
Have you tried a jelly roll rug yet? I’m hooked – I better go get my client work done so I have some more time to play.
I’ve seen them popping up on social media. I’m a little tempted, but I think I’ll just enjoy seeing everyone else’s. Haha. That fabric is to die for! Nice that your quilting buddy stacks those lovelies right by you — no temptation there! Quilty friends are good like that!
I love the ombre and colors in your version, Jennifer! I have seen them pop up everywhere and wondered about how long the preparation process took.
Great job, kind of reminds me of the rag rugs my grandmother used to make!
I think I might make one. I was waiting for your write up to see whether your bigger machines were necessary. My kitchen floor needs some color.
Oh, that’s beautiful! I LOVE THAT!! Yours is the first one I have ever seen. I probably don’t monitor Instagram as well as you do. Where do you buy the pattern?
I have been seeing them everywhere as well. I have been trying to decide if I want to make one…or a few. They are super cute. I like the color choices you made too. 🙂
ooooooo…..I have been wanting to make one and was curious about the size. Thank you! Beautiful fabric choice. I have some of my stash that needs to be used up and this, as well as batting scraps would work perfectly for this.
Thanks!
Hi Jen,
Be honest – your rug is much flatter after Oscar gave his approval and spent some time on it. Love it – love the fabric – it turned out fab. I would love to make one sometime soon! ~smile~ Roseanne
Everything looks better under Oscar!
Well done. I intend to start one and have thepattern plus her straight rug pattern, but I don’t have enough time to do all the things I want to do.
Isn’t that always the problem? I want to take a look at her other patterns.
Love your rug…but, OMG, Oscar is darling. Looks like a piebald, longhair dachshund ❤️
I’ve made a few of these also. Addicting. I did use my quilting gloves with the rubber texture on the palms. They helped when the rug was beginning to get bigger. Gave me more control and less stress on my body.
Great idea. I should dig mine out.
Have you ever tried to make a quilt out of the jelly roll material without putting the batting inside?
I haven’t. I like the cushiness the quilt gets with batting.