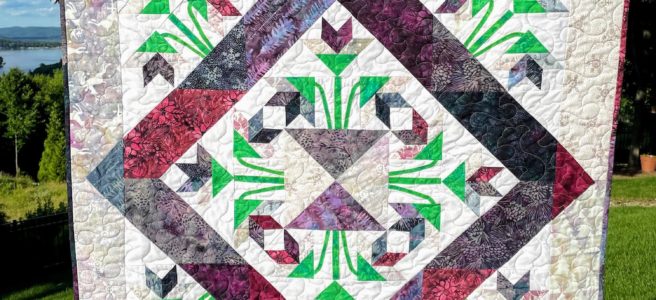
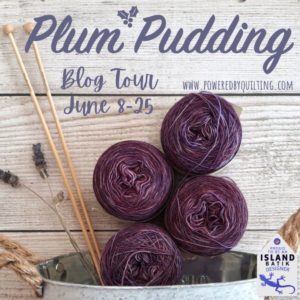
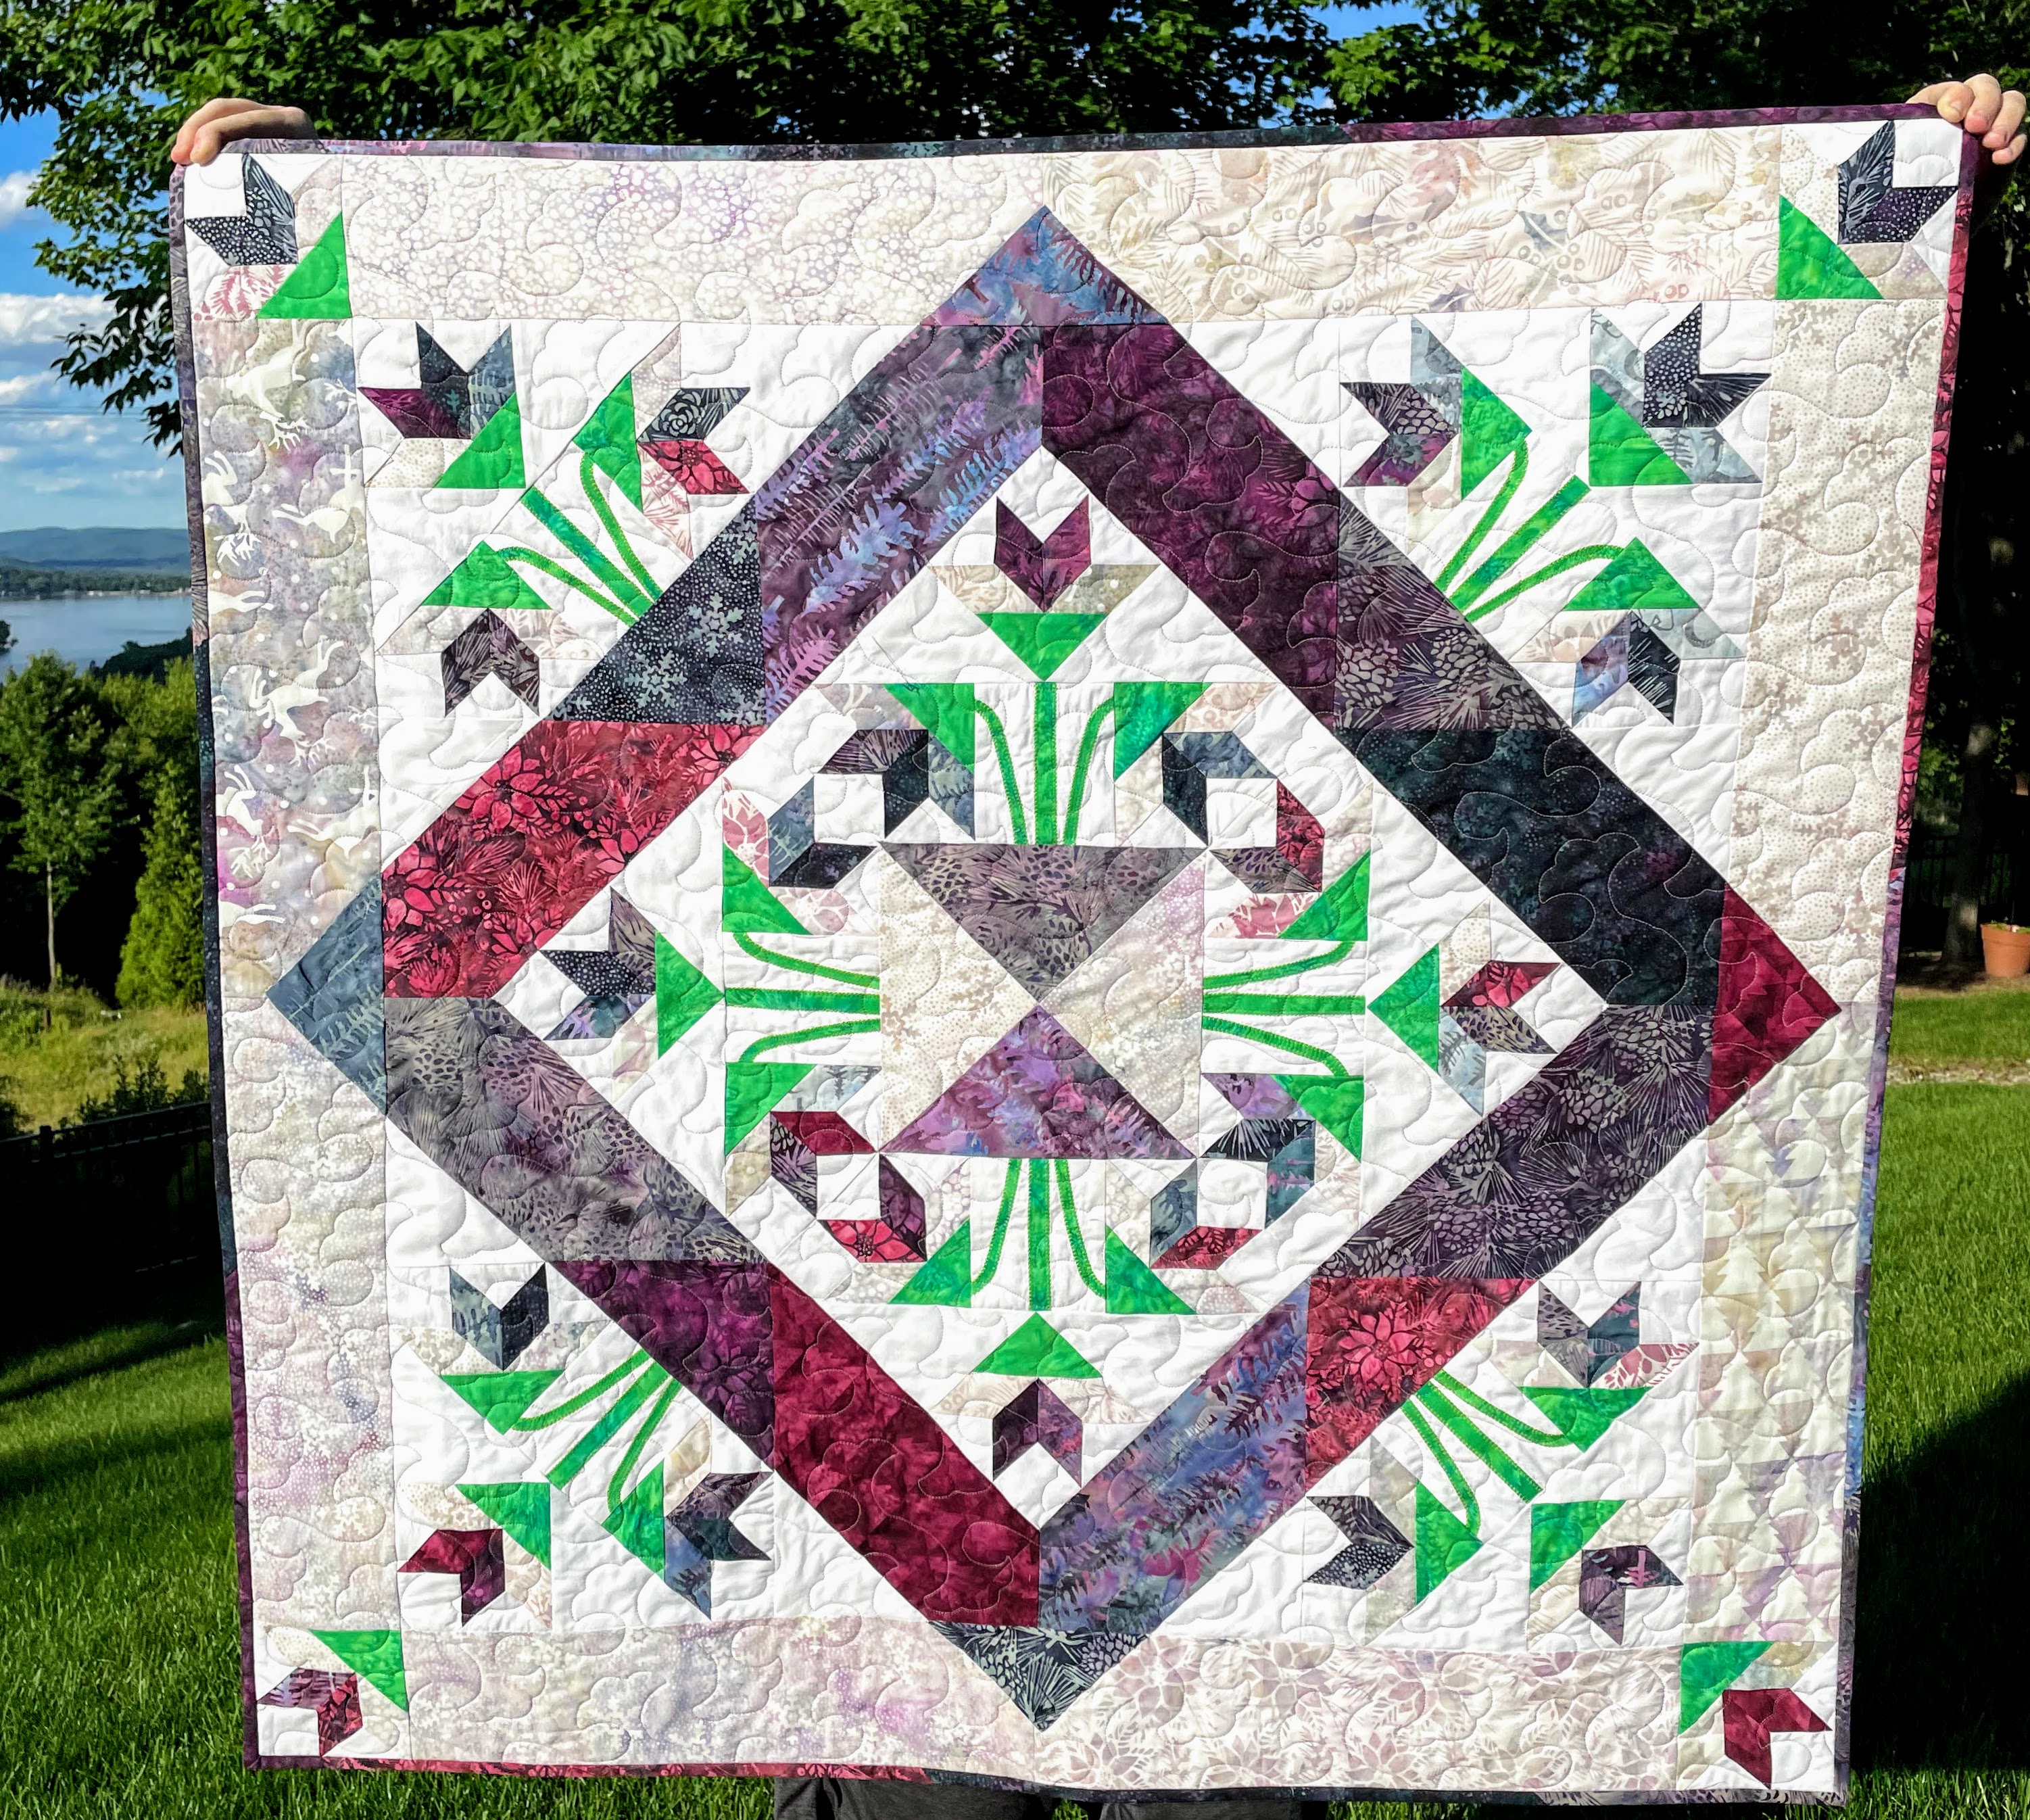
Sherry Shish, from Powered by Quilting is at it again! This month is the blog hop for her brand new signature fabric line with Island Batik – Plum Pudding. Go, Sherry, Go! Plum Posies is the quilt I made using this beautiful fabric.
This amazing fabric arrived back in February, and I’ve worked through several ideas for it. I went back and forth with myself over design options, but as soon as my Basket of Lilies die from Accuquilt showed up, all of my other plans went out the window.

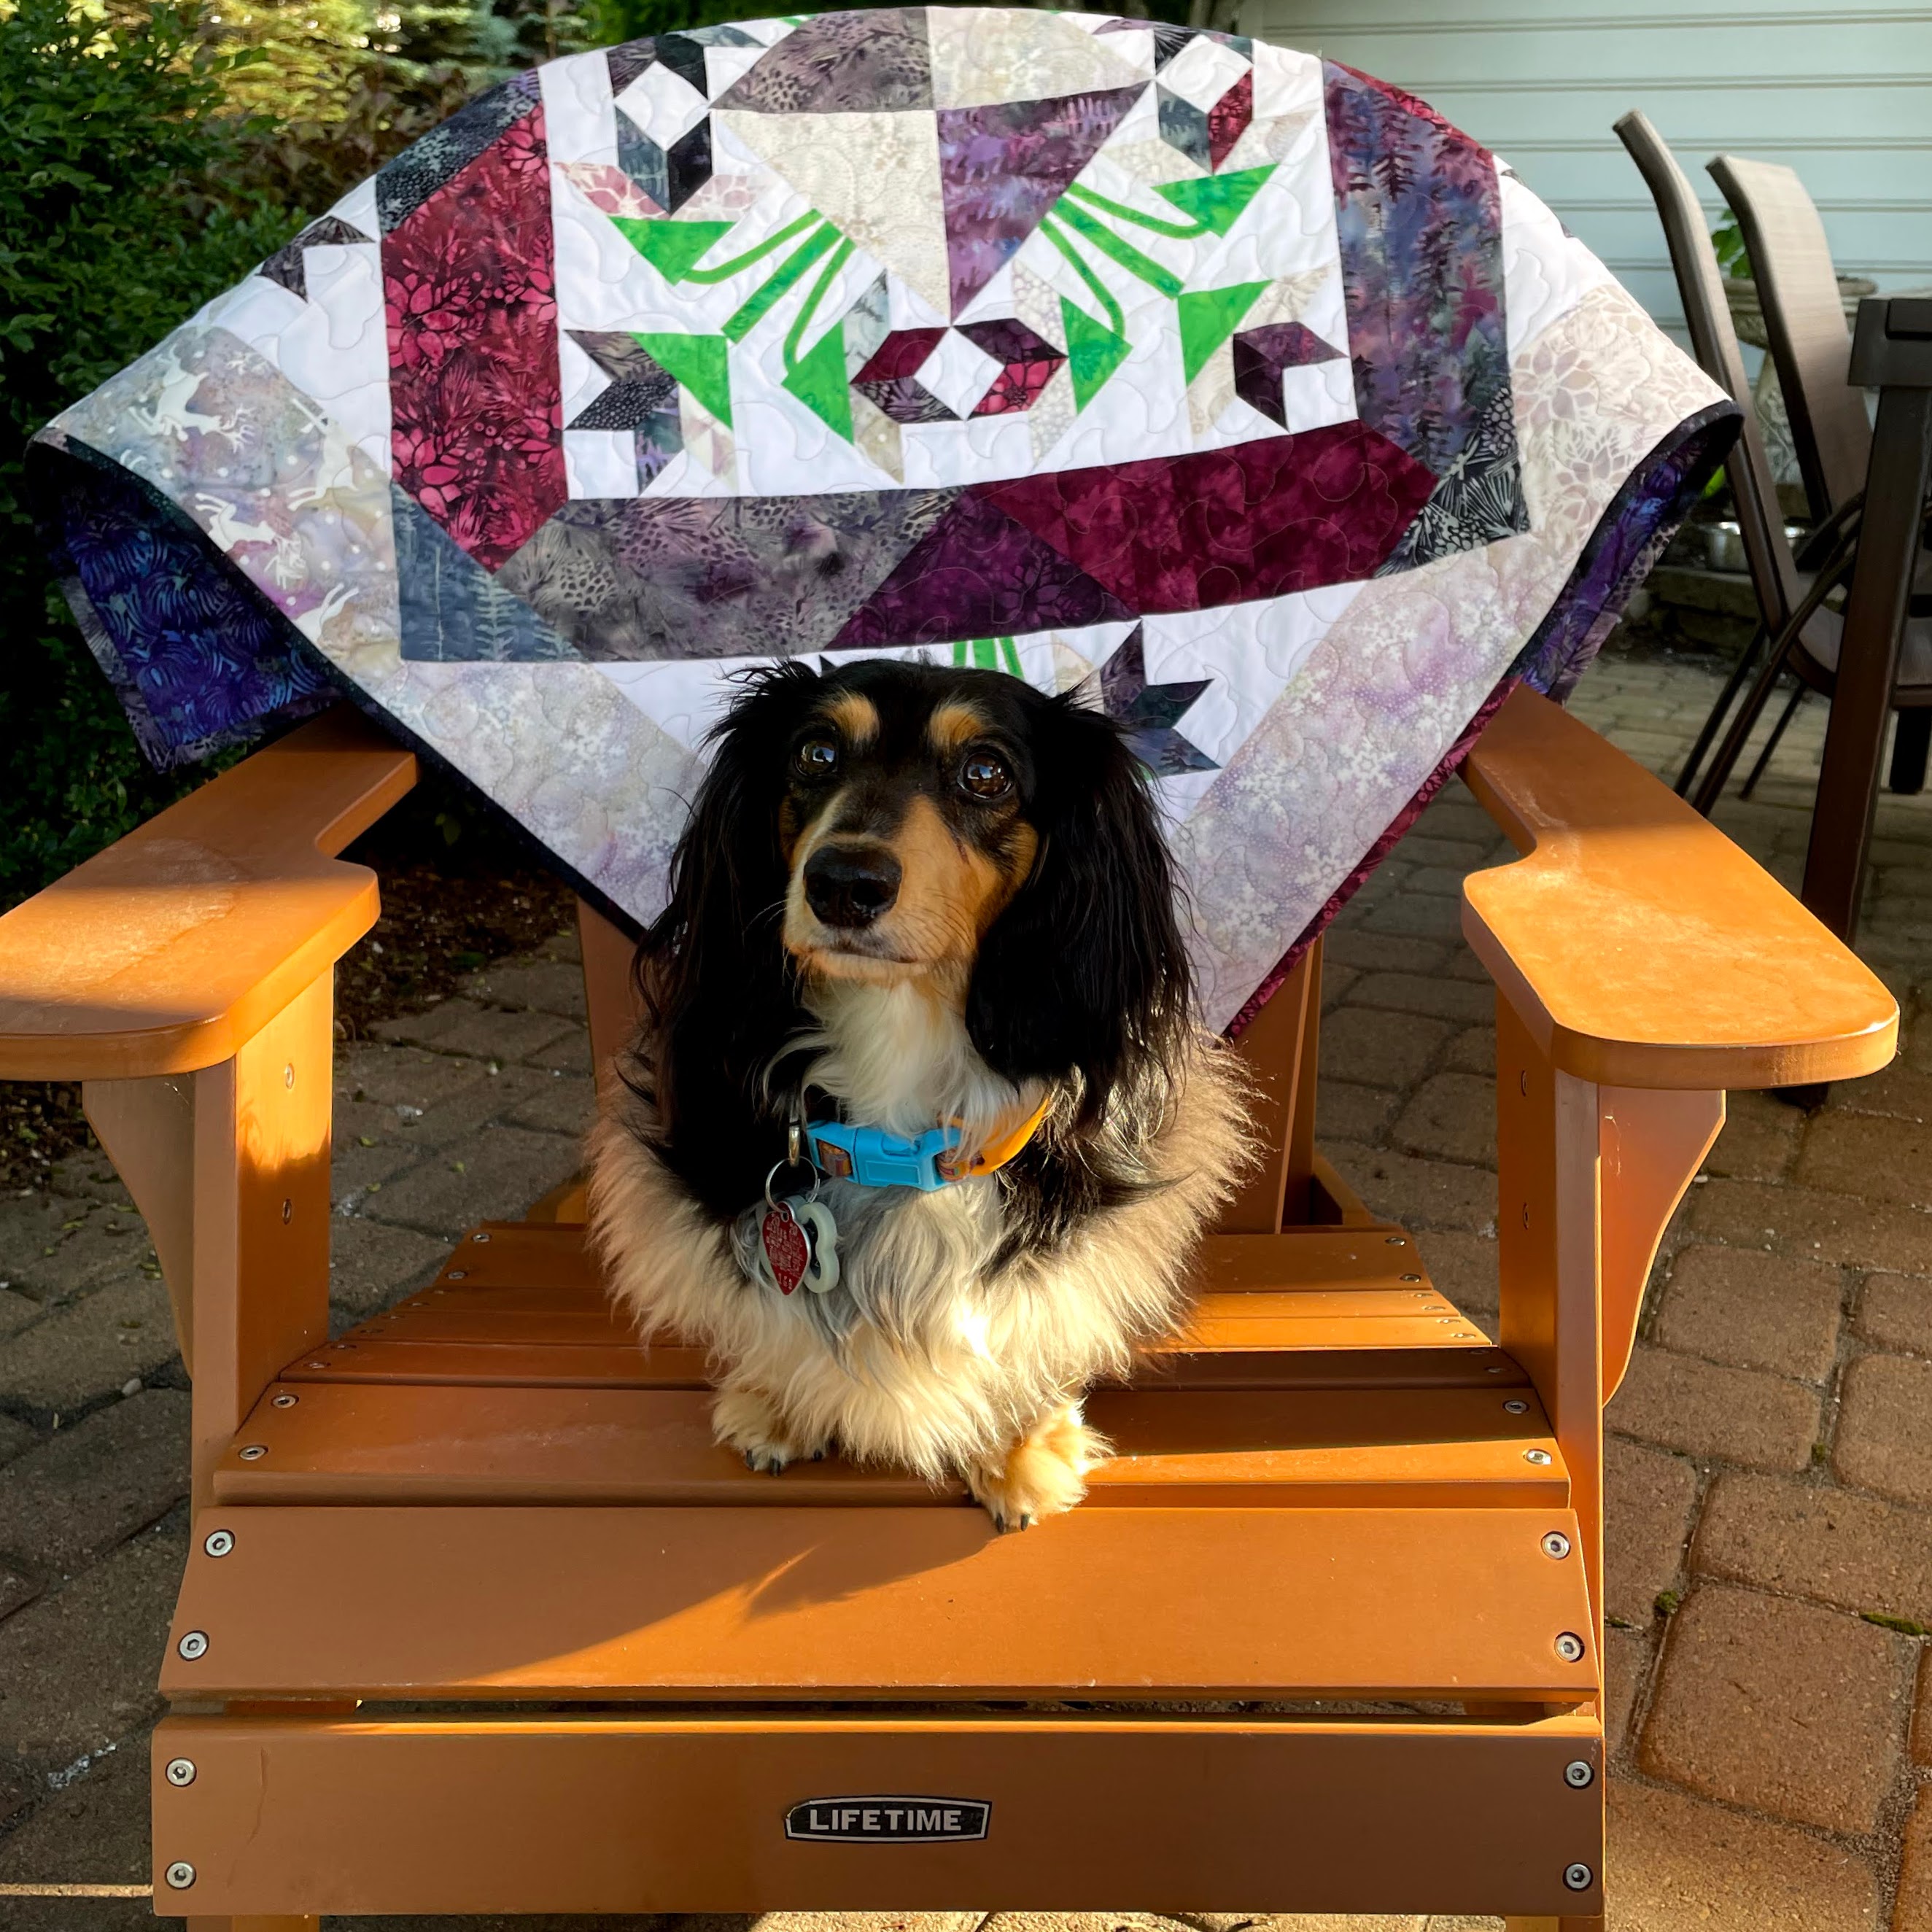
I spent a bit of time whining about making this quilt last week. Sorry about that. It was all worth it – look at this thing! Plum Posies measures 41″ square, and may become a baby gift if I can bring myself to part with it.
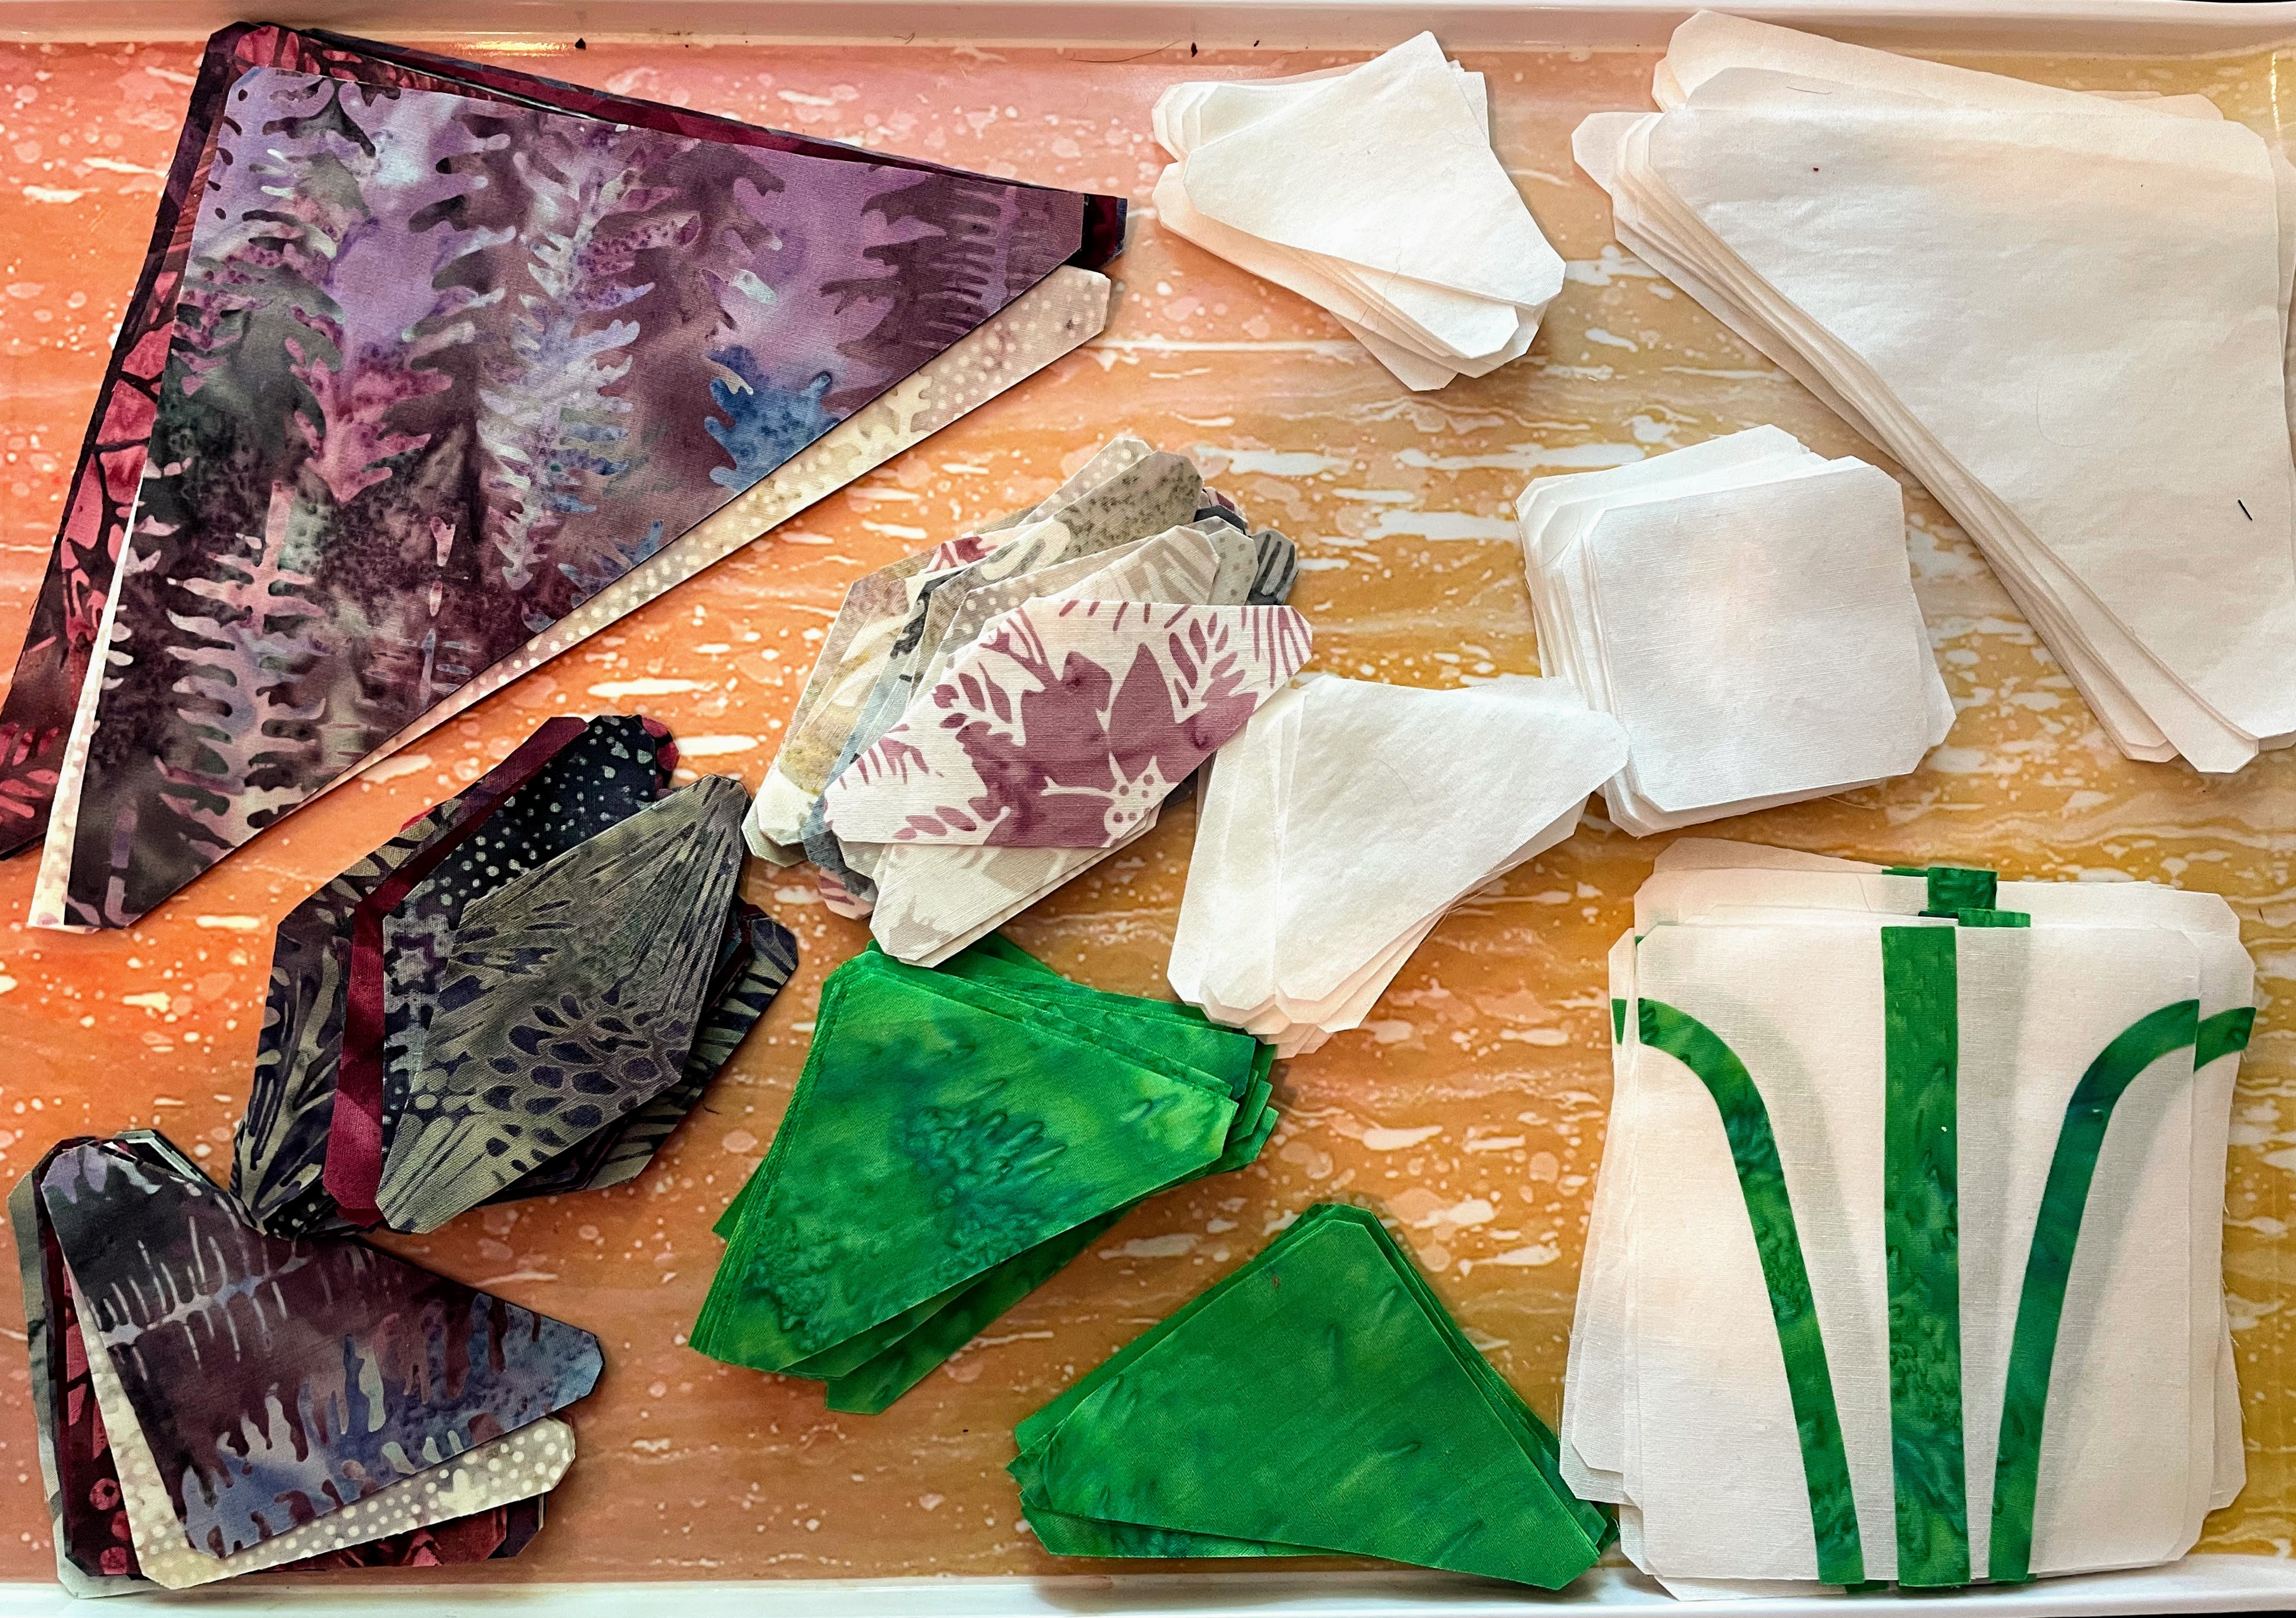
To make this quilt I used all Island Batik fabrics. All of the print fabrics, other than the green, are from the Plum Pudding collection. The white background is Island Batik white solid. The green is from my epic IB stash. I did a lot of planning, making notes, and pre-cutting of fabric before using my Accuquilt die to precisely cut the pieces.
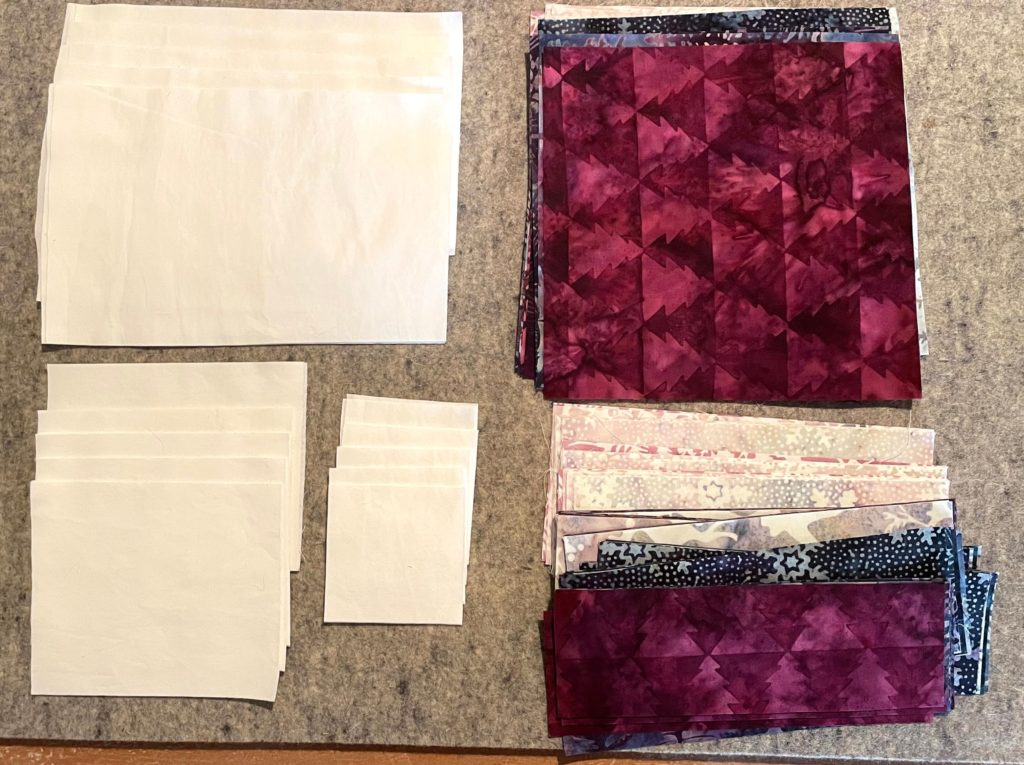
I like to use a tray to keep my cut out pieces organized with complex blocks like this one. Since I rarely work on one project at a time, I need a way to keep things sorted out.
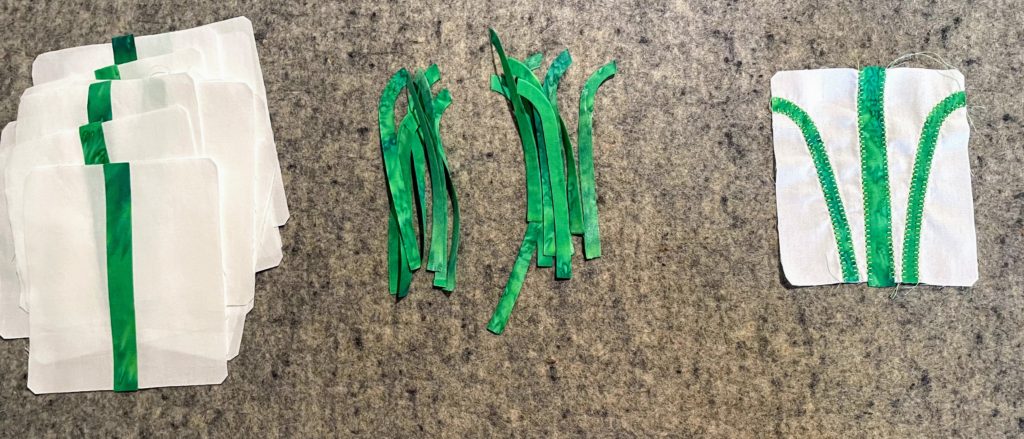
I used a blanket stitch on my Bernina to embellish the edges of the stems and fasten them down, as they are fused in place. That took a while.
Watching the blocks come together really motivates me. So, I allow myself to complete some blocks as I work on chain piecing the rest. It can get a little chaotic, but I need to see the quilt coming together to keep going.
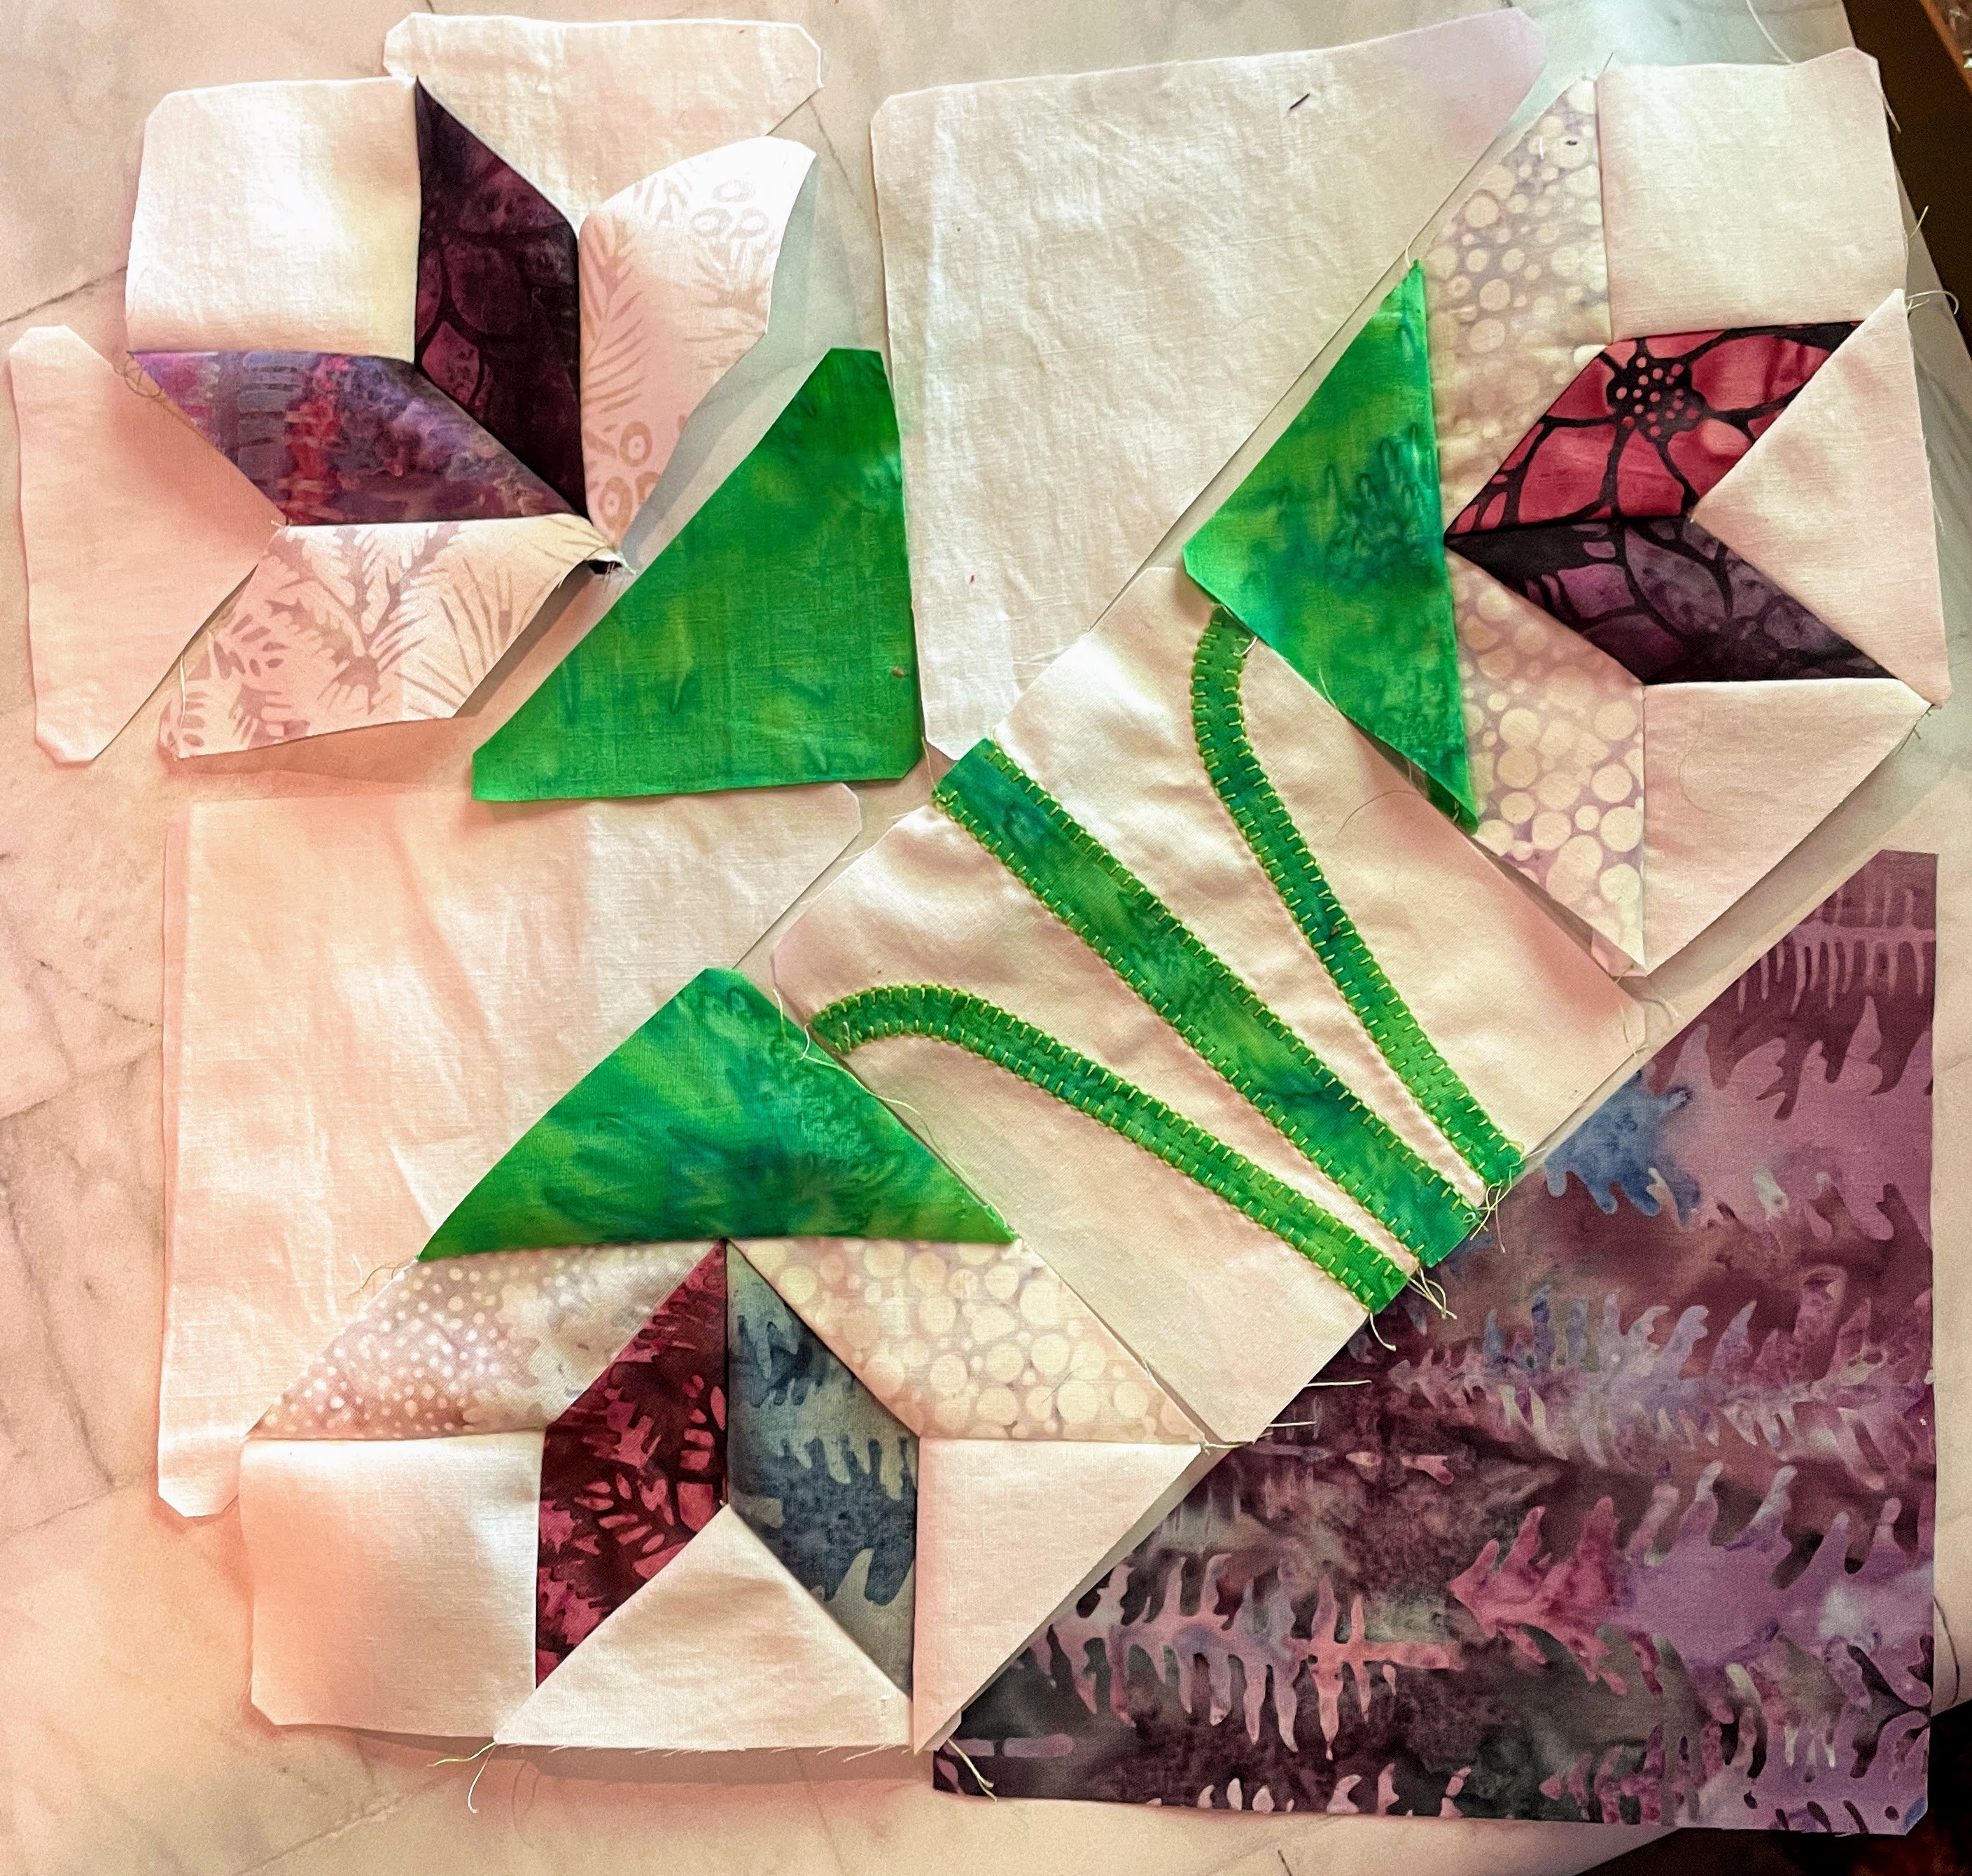
This was the first block as it was coming together. I was so happy to see how lively mixing up the fabrics in the actual flowers made the quilt. Not only is it easier to just keep them sorted into light vs dark piles, but the variation makes them look more interesting to me.
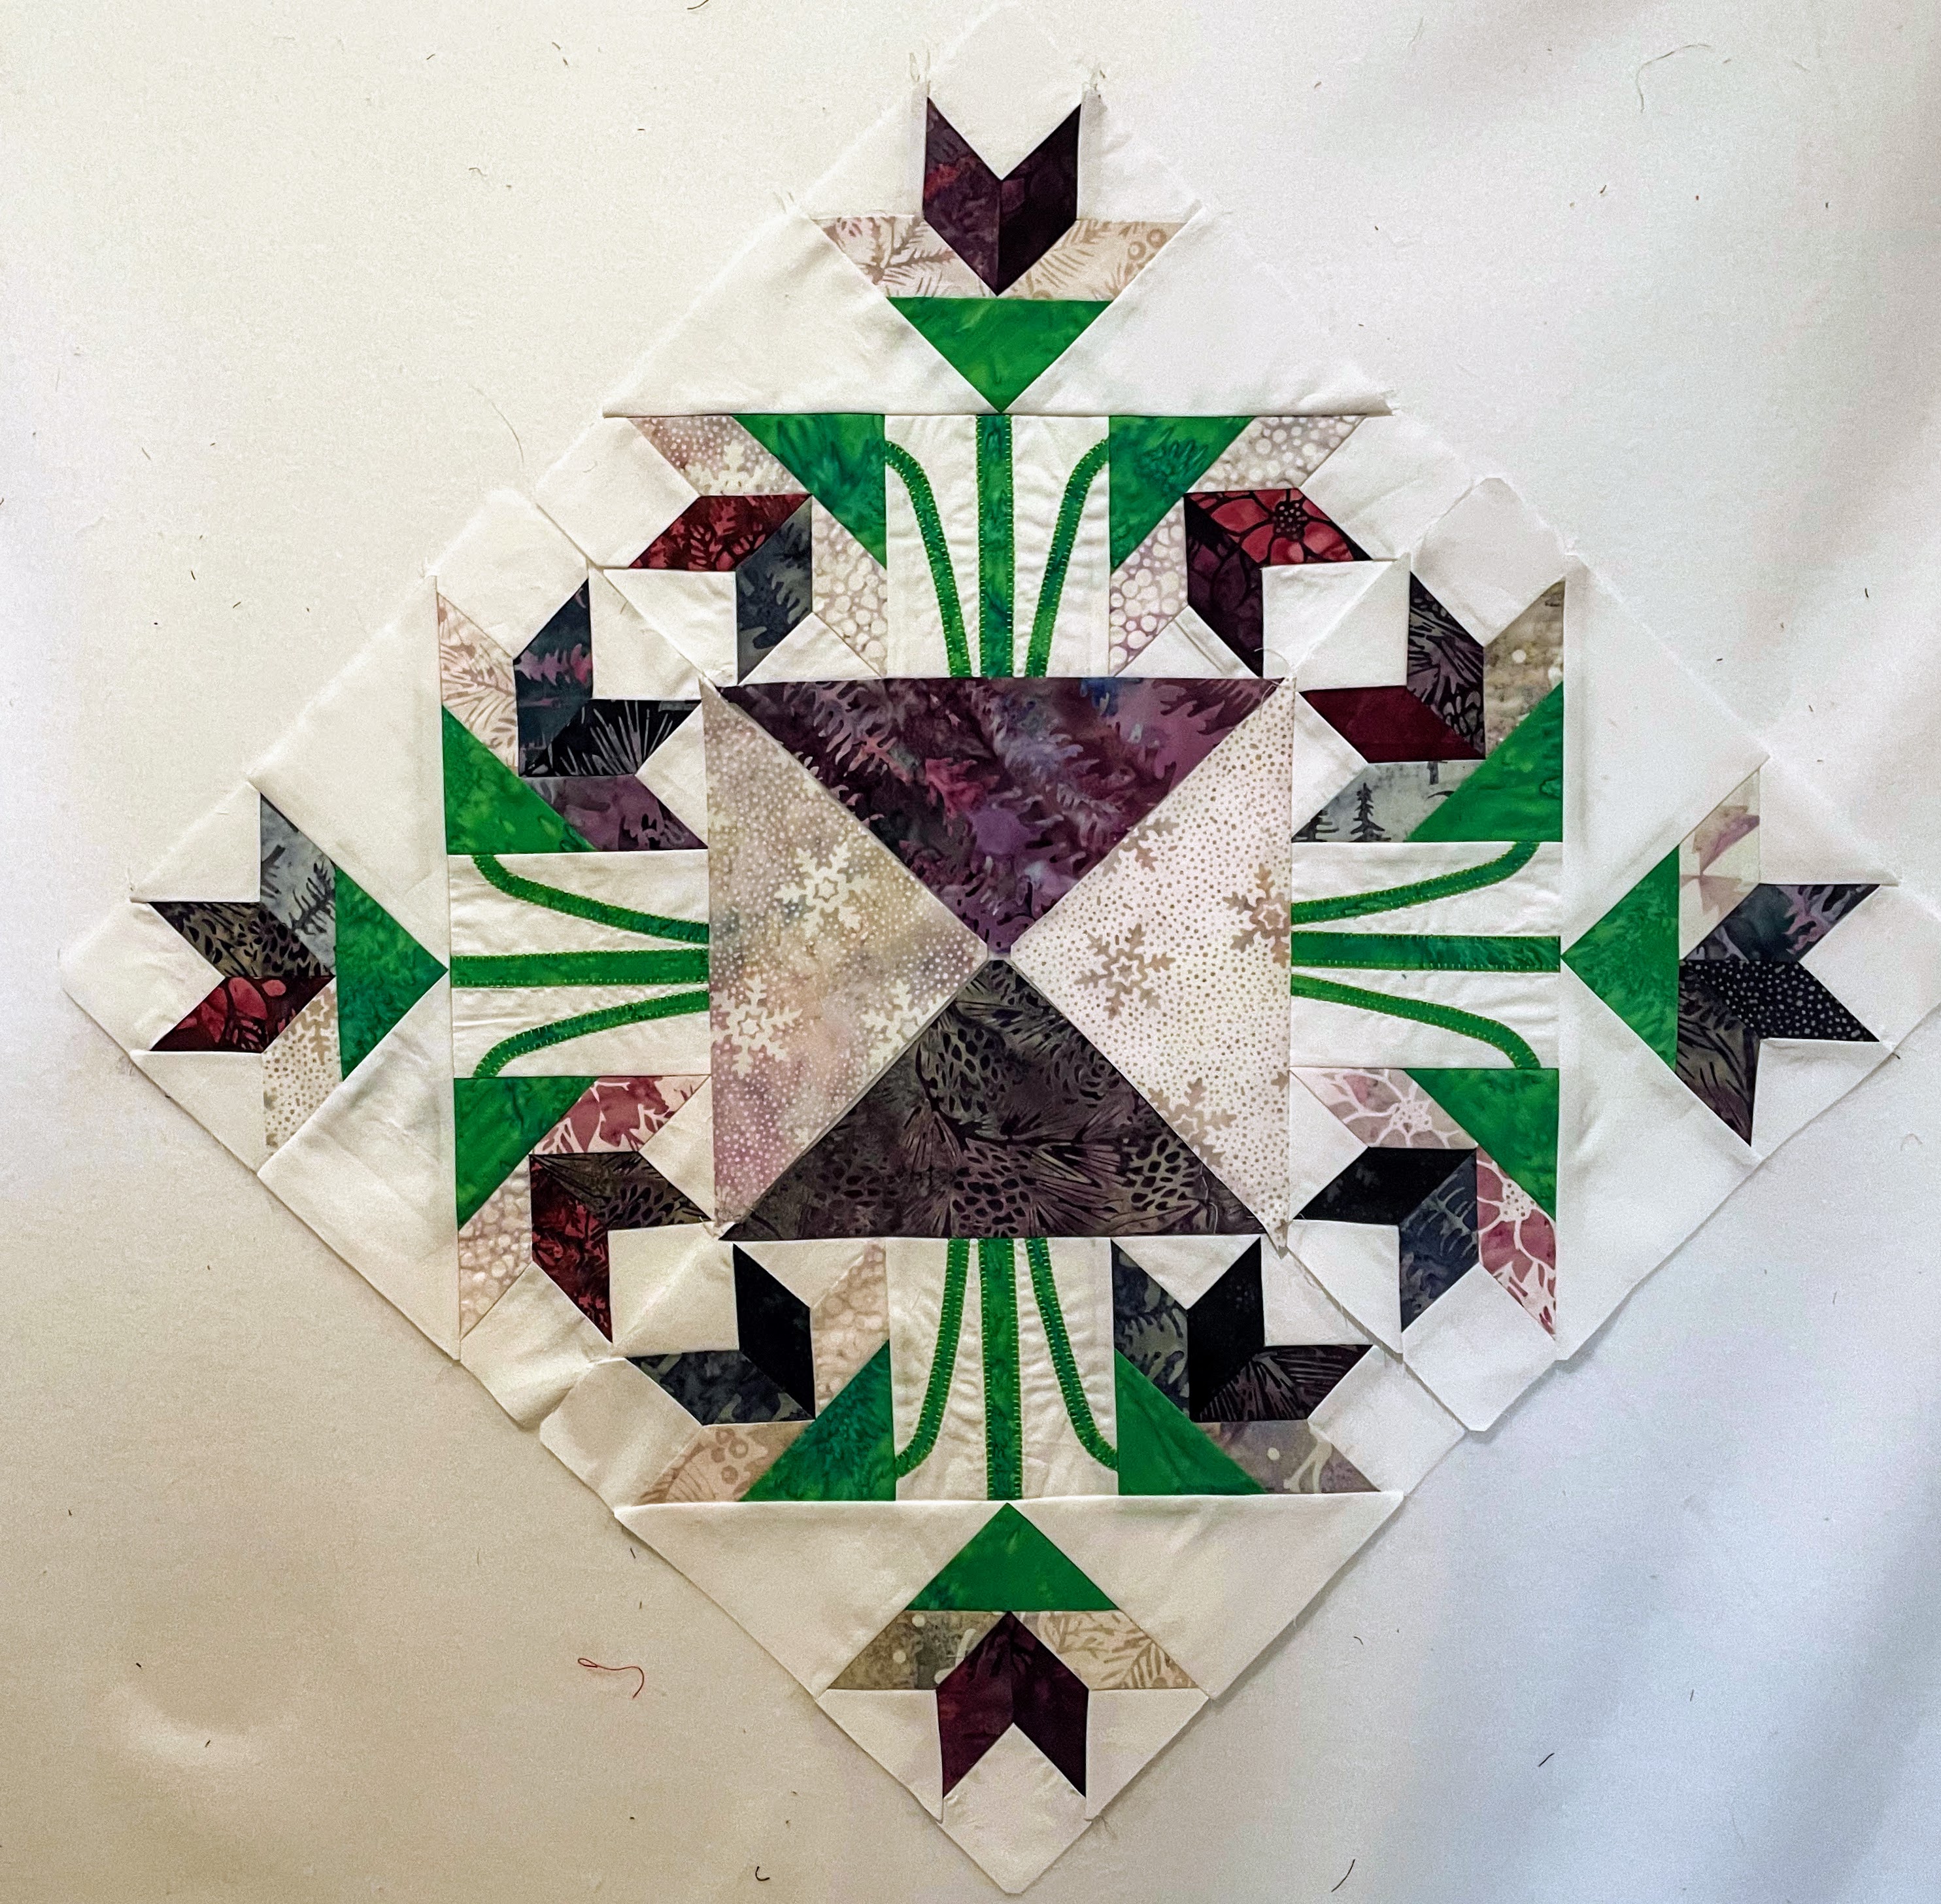
The quilt I made isn’t the quilt I intended to make. This project fought me at nearly every step in the process. I had planned to make 5 sets of 4 blocks, like the unit above, then set it in an alternating grid, like a checkerboard. However, I must be pretty bad at math, because when I had put all of my pieces together, I did not have enough blocks for my planned layout. Of course, I had enough of the embroidered centers! before cutting out more, I put what I had up on the wall to see how it looked.
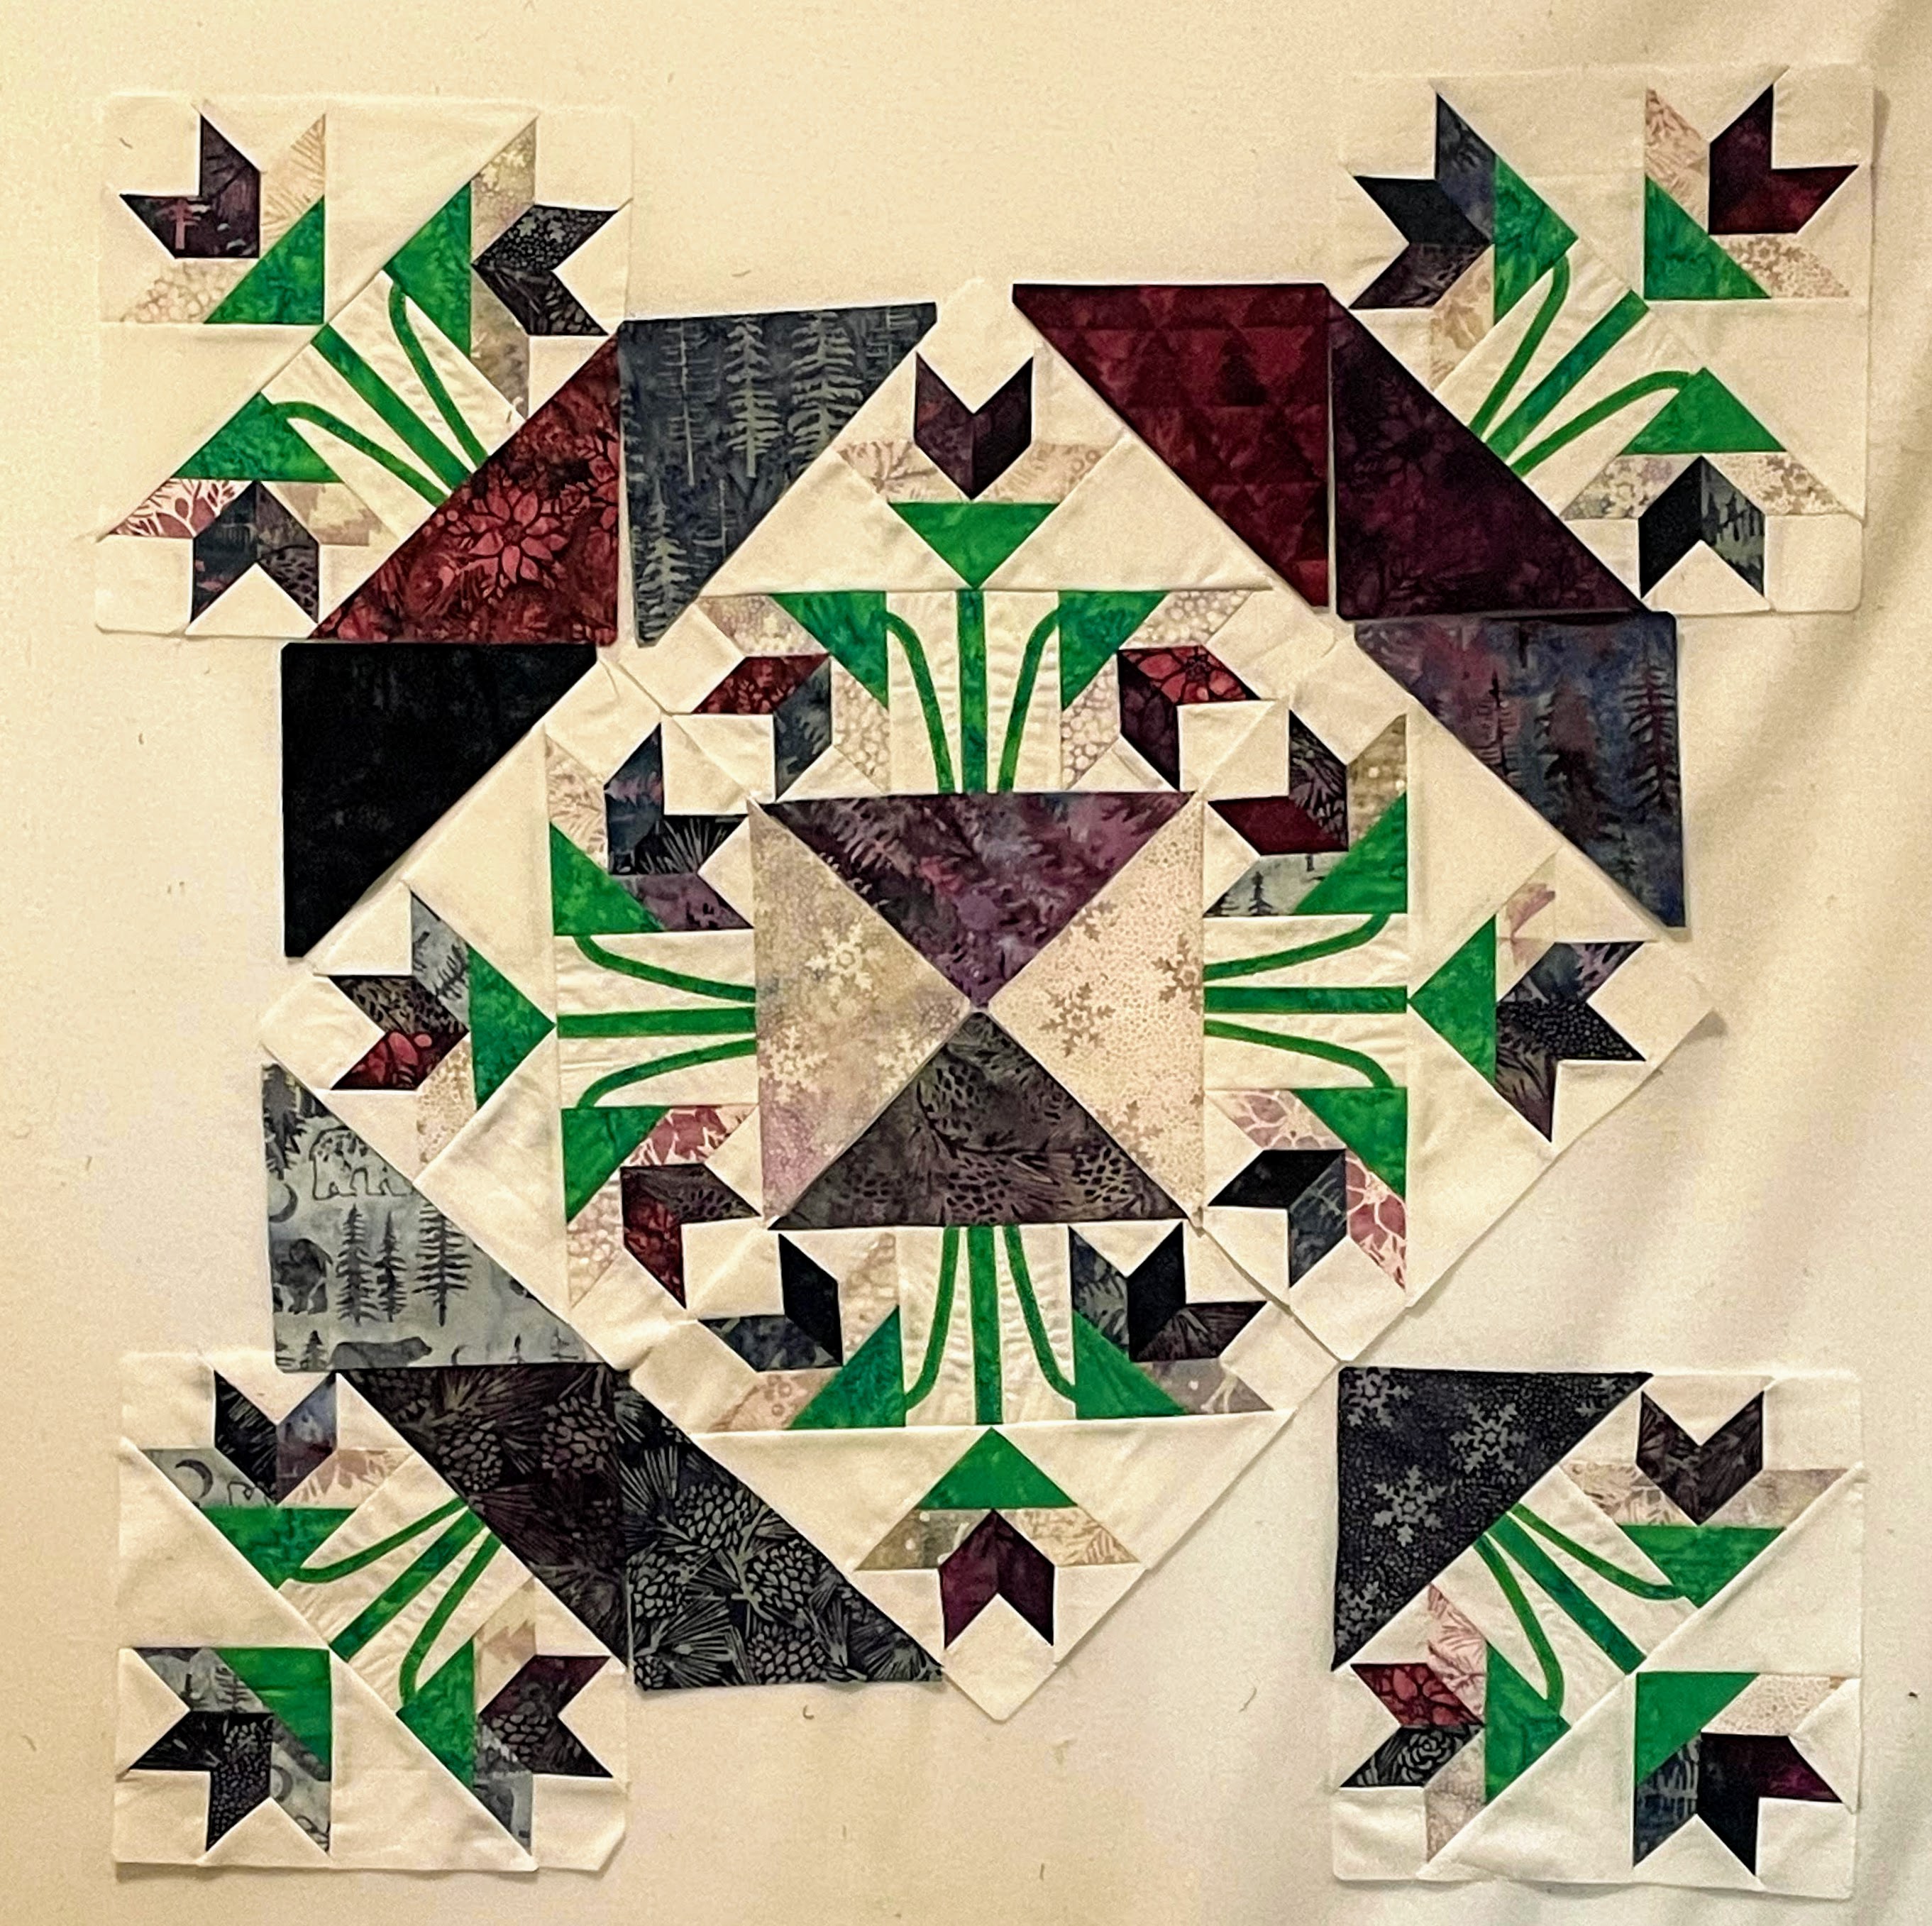
I liked how these extra triangles looked, but they are too short to fill the sides. It showed me that I was on the right track, though.
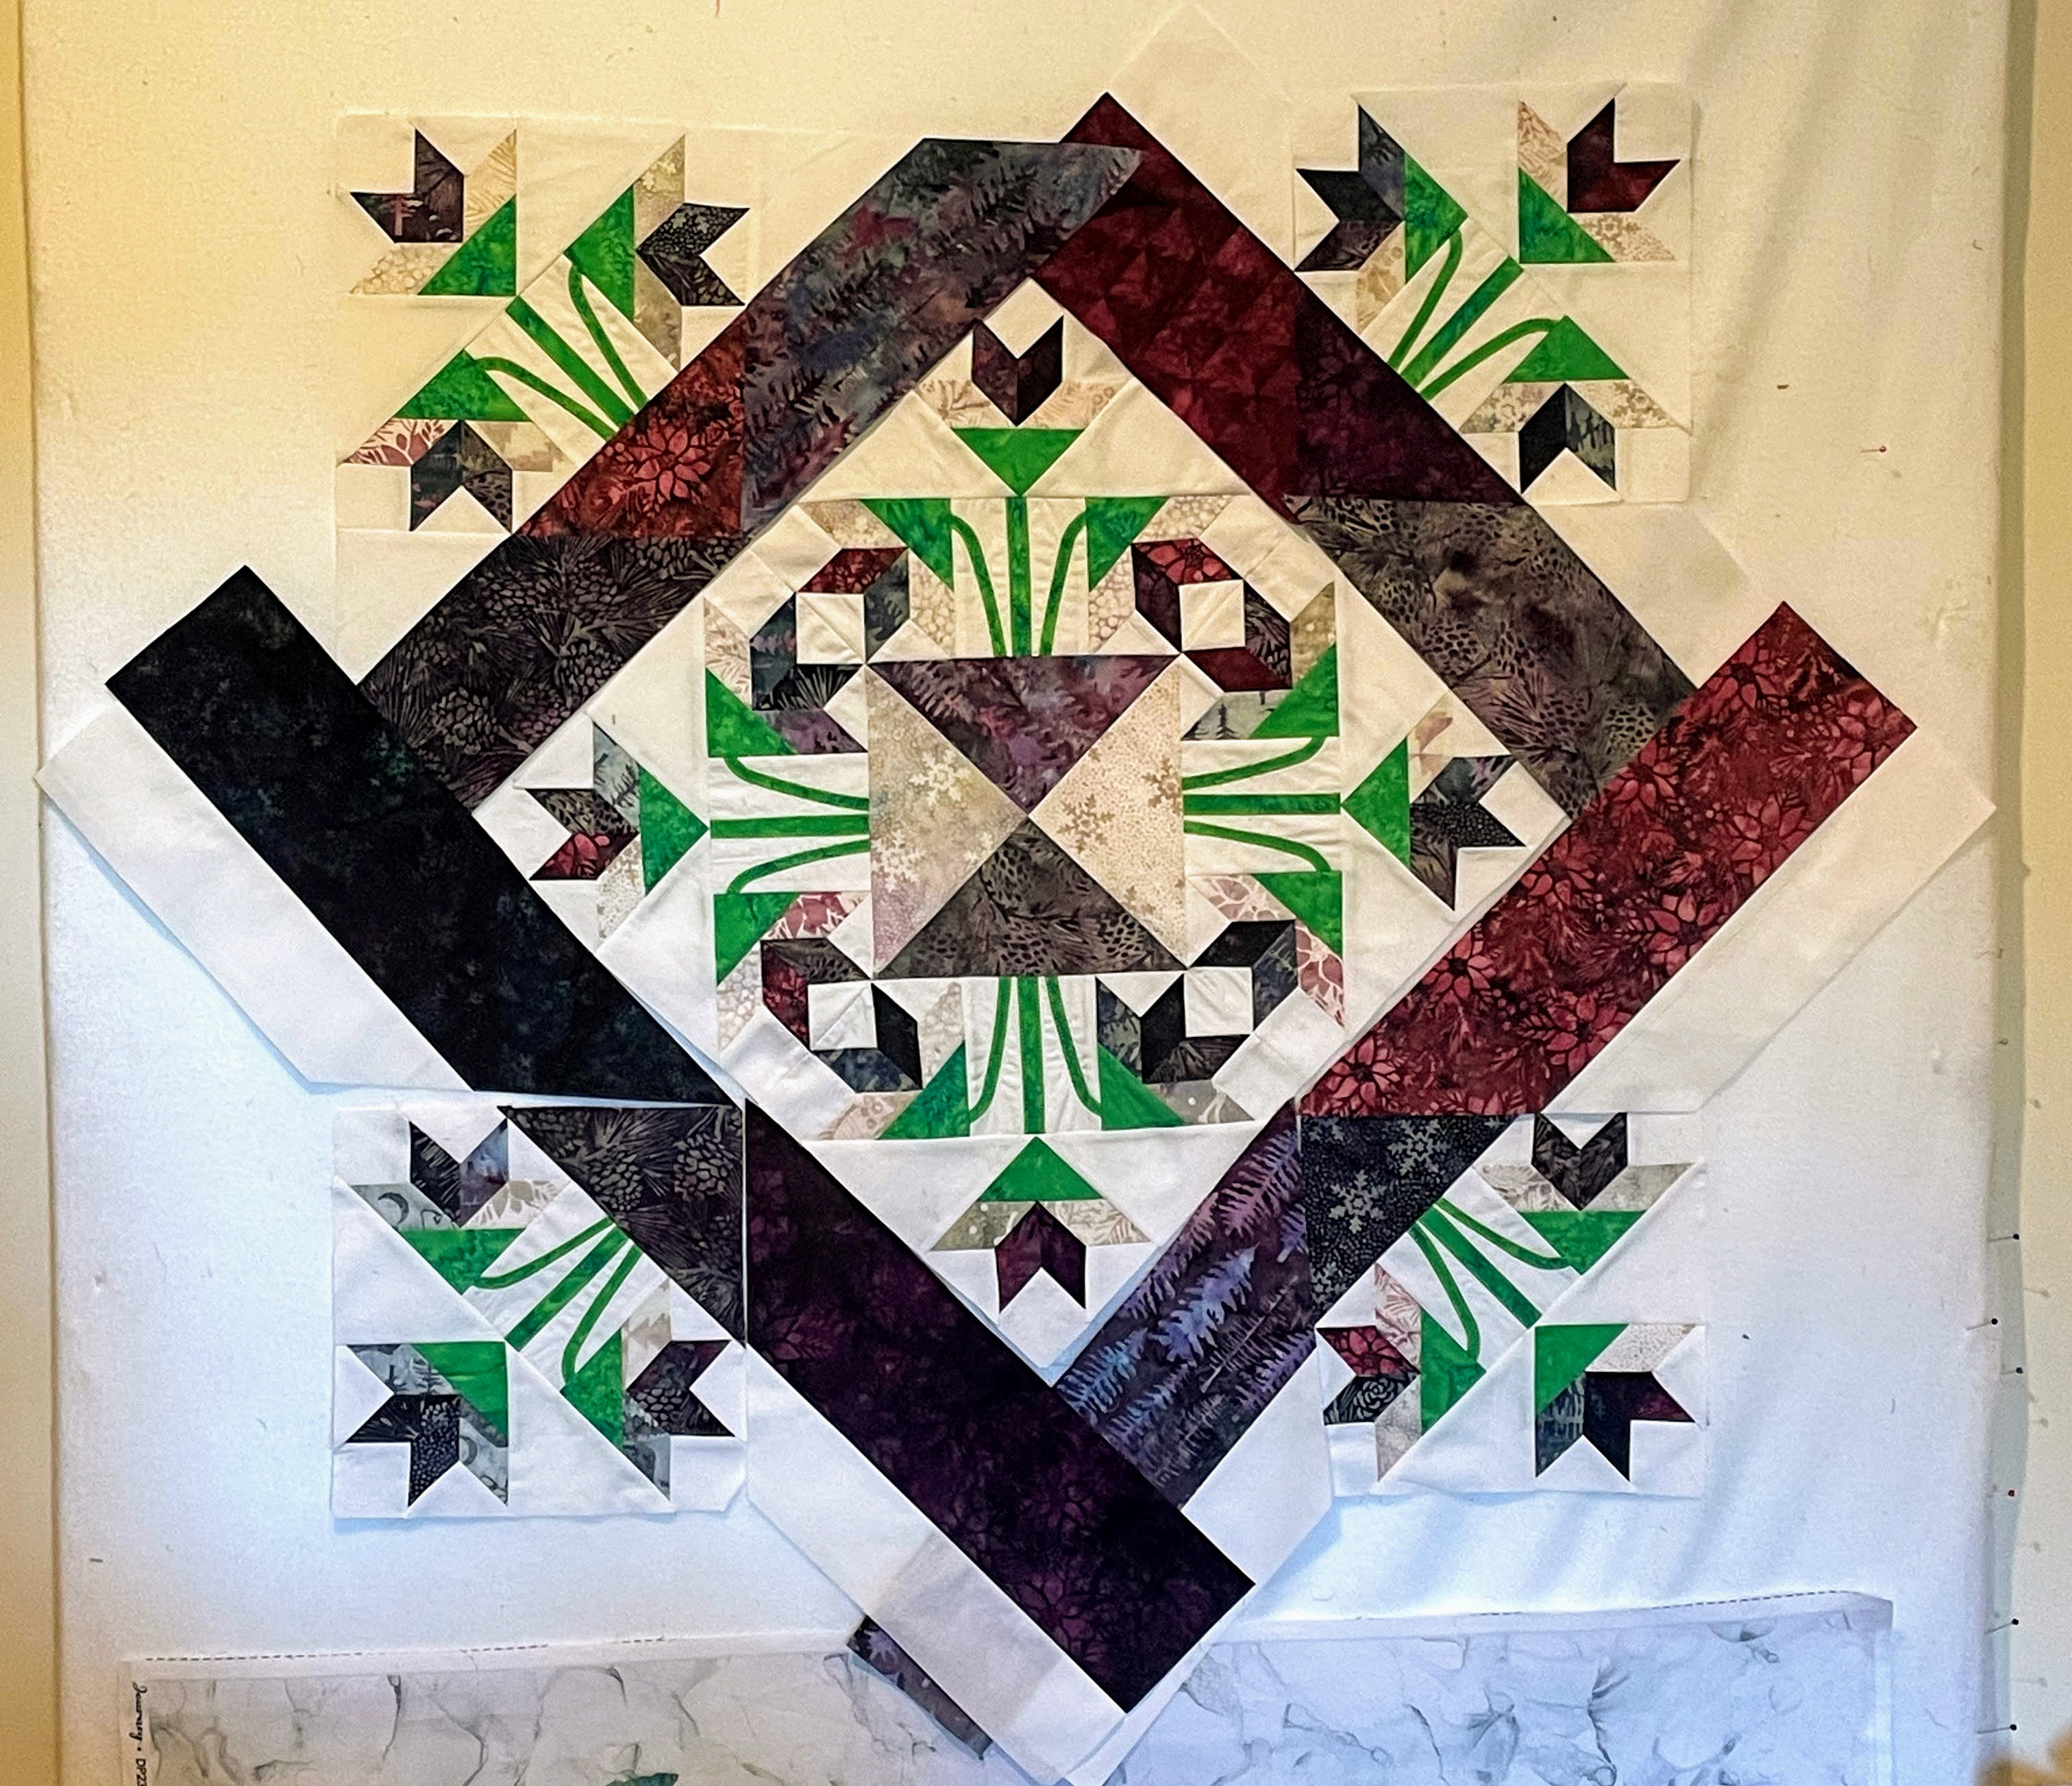
I figured out strip widths to fill in the sides, the pieced them in. I had to miter the corners, but it looked so good, it was worth it.
It still felt like it was missing something, so I used some of the lighter colors to add a pieced border, along with some extra lily units for corner stones.
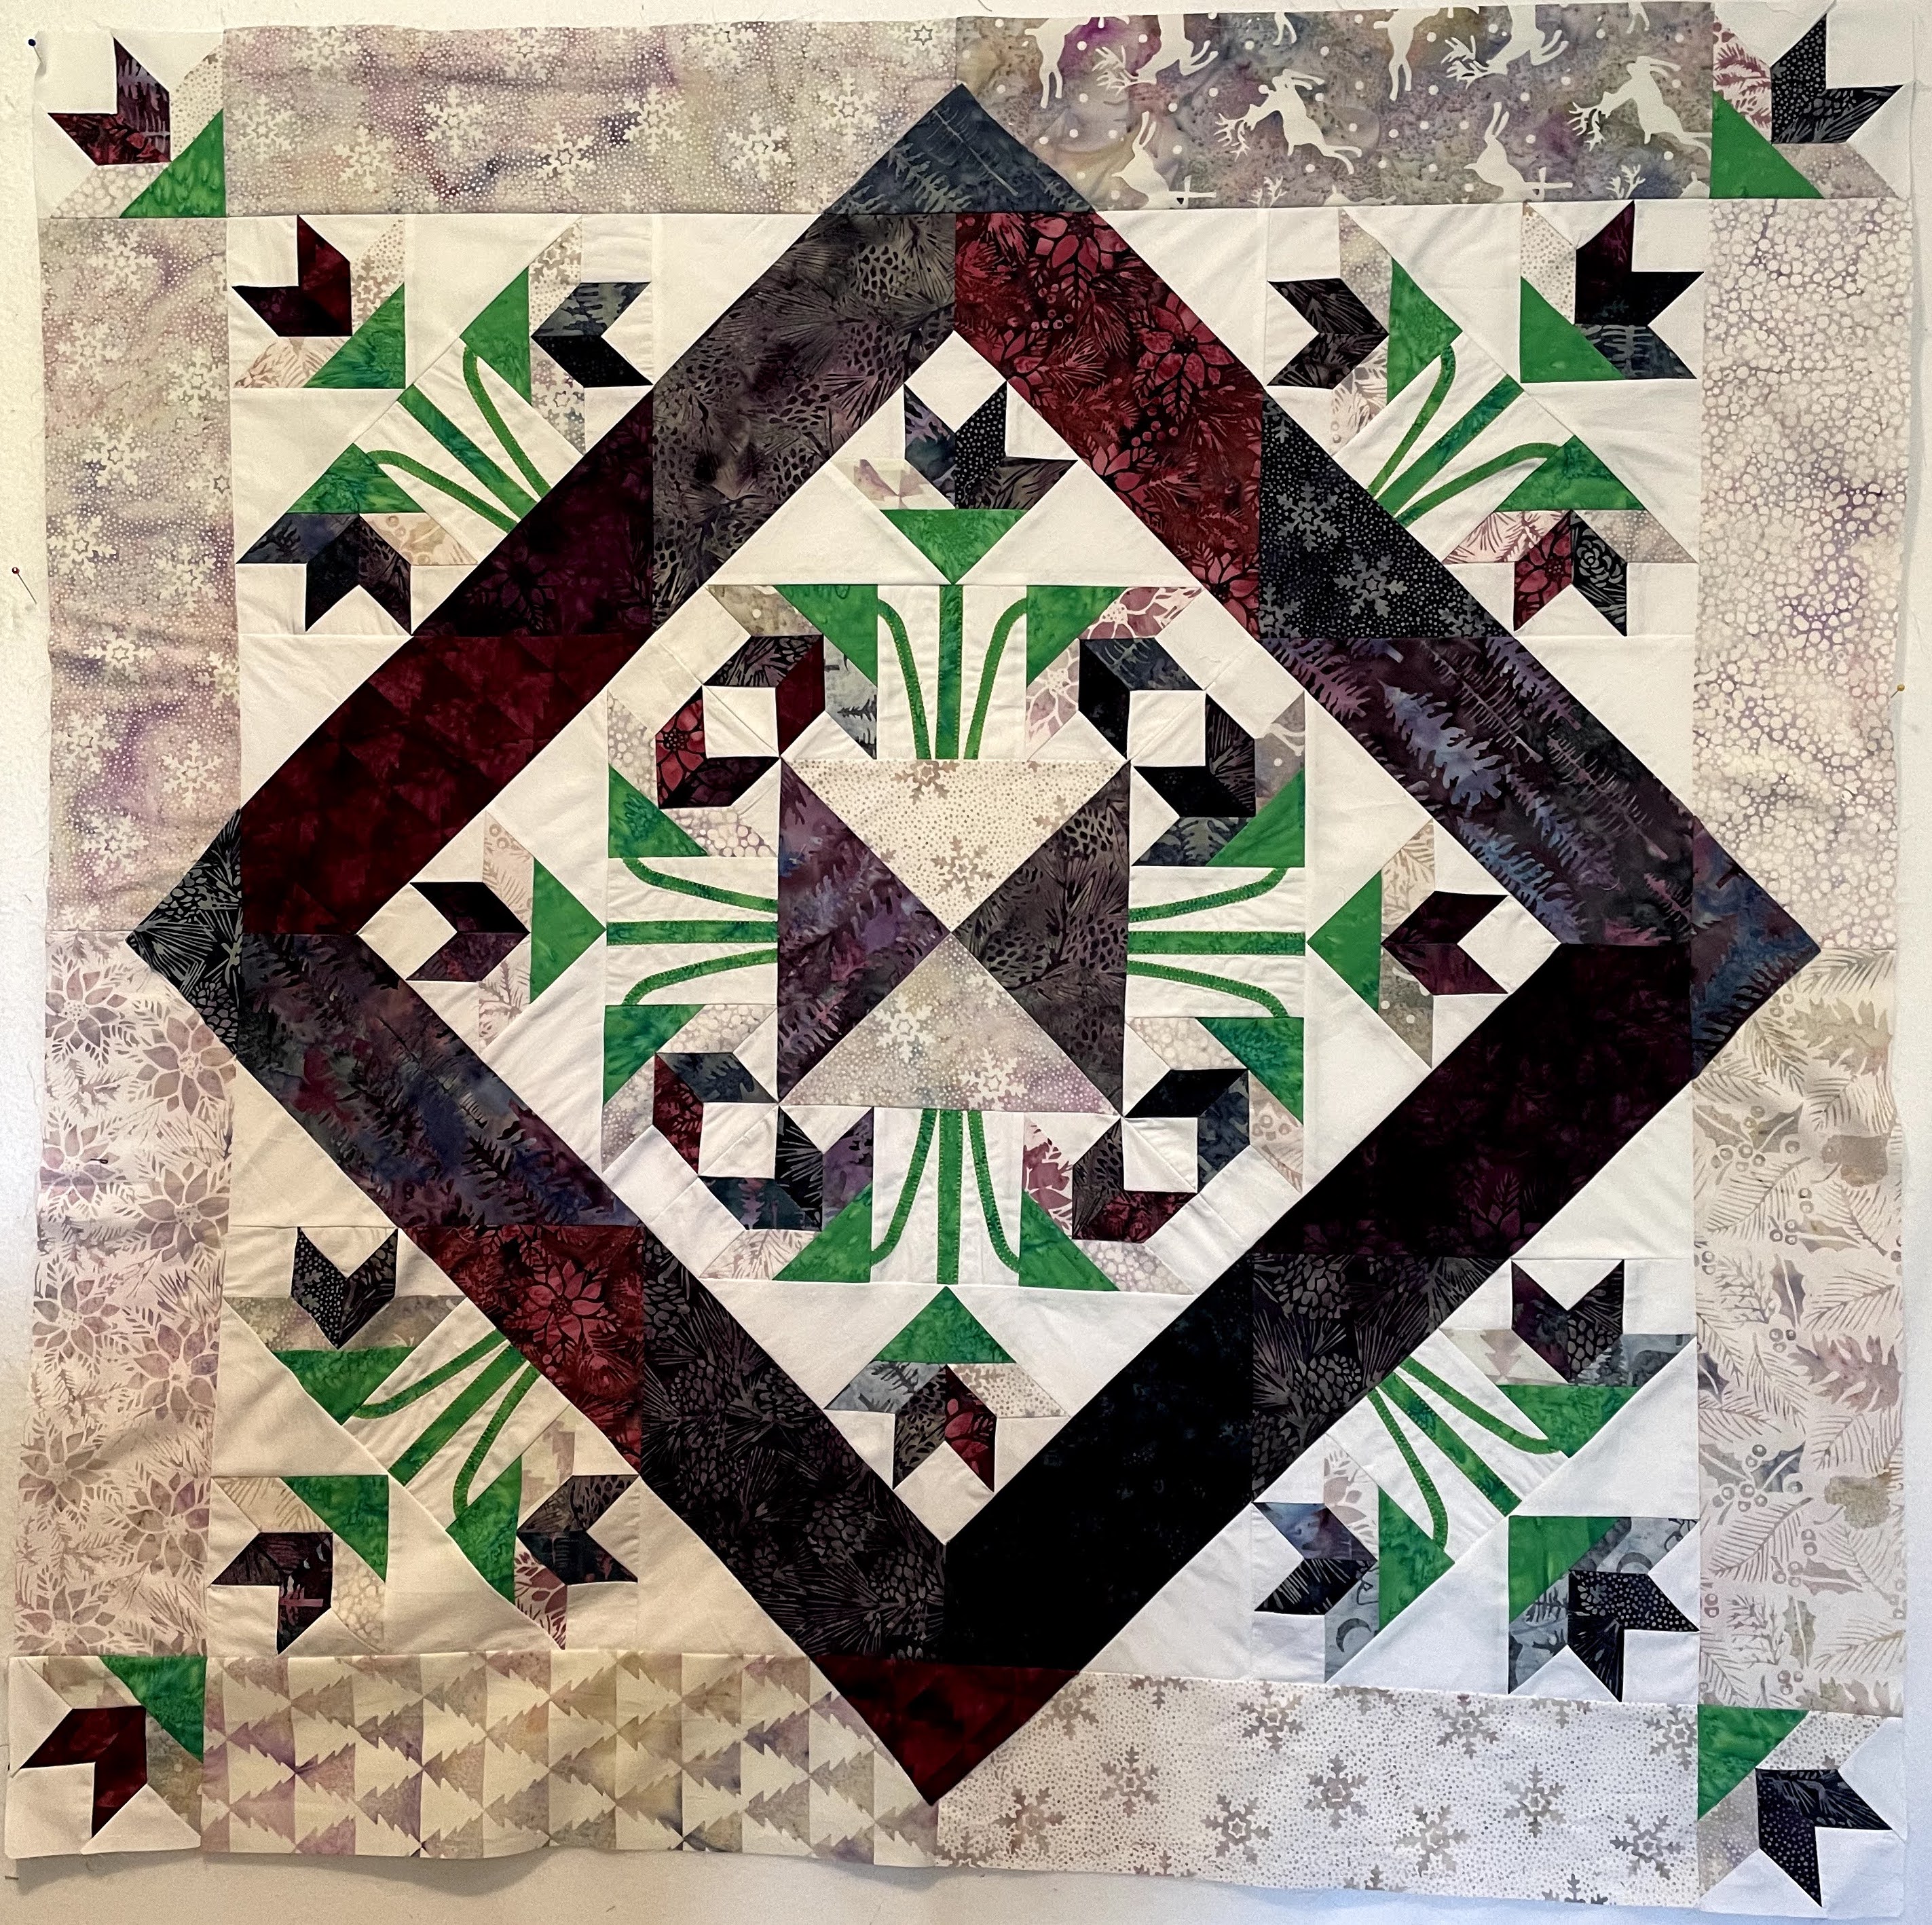
I quilted it using a simple pantograph, just enough to give a little texture. Sometimes simple is better, to not compete with a busy quilt. The binding is pieced from the leftovers of my original fabric bundle.

I’m totally enamored with my Plum Posies quilt. Even though it took me on a wild ride, I love how it turned out. It finished up at 41″ square.
One of my goals with this piece was to not follow the original block design on the Accuquilt die. I like to use these dies in more than one way, to get greater value from what can be an expensive investment. For this one I left off the base of the basket that the lilies sit in, and also made some of the smaller flower units for the corner stones in the border. I have some more ideas on how to use this die that I want to explore in future projects. You can check out the mini quilt I made when the die first arrived here.
Folks have been sharing their Plum Pudding makes all month. Plus, Sherry has a give away for an assortment of scraps from the line. Make sure you visit her to enter. There is another giveaway happening on Instagram June 26th.
- June 8 – Sherry Shish of Powered By Quilting
- June 9 – Joanne Kerton of Canuck Quilter
- June 10 – Vasudha Govindan of Storied Quilts
- June 11 – Kate Starcher of Katie Mae Quilts
- June 12 – Sally Williams of Paleofish Designs
- June 13 – Leanne Parsons of Devoted Quilter
- June 14 – Jessica Caldwell of Desert Bloom Quilting
- June 15 – Jenifer Dick and Trisch Price of Everyday Stitches
- June 16 – Patti Bochey of Lemon Tree Snippets
- June 17 – Debra Davis of Tuning My Heart
- June 18 – Laura Piland of Slice of Pi Quilts
- June 19 – Lisa Ruble of Love to Color My World
- June 20 – Anja Clyke of Anja Quilts
- June 21 – Suzy Webster of Webster Quilts
- June 22 – Sarah Vanderburgh of Sew Joy Creations
- June 24 – Jen Strauser of Dizzy Quilter <- YOU ARE HERE
- June 25 – Sherry Shish of Powered By Quilting
Jen this is absolutely stunning! I love the way you mixed the values in the flowers. You have a wonderful way of designing! Well done!
Thanks so much, Karen!
Thank you for breaking down the steps in the project. The color balance is fantastic. I think you are getting your use out of the accuquilt. Silly question about the “math”….did you use EQ8 to make your adaptations to the pattern? I have taken several classes and don’t feel comfortable in that software, and end up sketching on a pad of paper and using my calculator when resizing things. One thing about applique with those stems is putting some kind of stabilizer behind the block so the needle has something to bite into. I use tear away embroidery stabilizer or you can use paper. Beautiful project.
So, for the math, I looked at the Accuquilt info that came with the die, then did math while listening to an audiobook, all while holding the plan in my head. That is the issue – Stephen King and math don’t mix.
I love using EQ8 to design, but I didn’t for this block, since I don’t have it in my library yet. The only way to get comfortable in that software, in my opinion, is to keep banging away at it. It doesn’t give me all of the information I want, but it does help me get plans in order. For this project, I allowed the quilt to lead me.
And yes, I need to learn more about embroidery tricks. Setting up the machine with the hoop seems like such a hassle.
That’s funny – Stephen King and math! I listen to audio books a lot while stitching, but if I need to cut something, I have to focus so I pause for a minute. Re the stabilizer. I am a machine embroidery machine person, so I have a “few” rolls of stabilizer hanging around. What I meant was when you are using your sewing machine, just slide a bit of tear away under your project, while doing the machine applique. No hooping need, Stitch like normal but it gives your project a little support. If I make a button hole on a cotton sundress, I slip a piece of tearaway stabilizer under the project. This great content creator on you tube “The Sewing Room” uses paper. It works when doing crazy quilting using your fun stitches on your machine too. Be well.
It’s a stunning quilt and beautiful way to show off Sherry’s newest collection.
Thanks so much, Yvonne!
Do you really need to part with it? I think you might need to keep this one 🙂