Jen Shaffer of Patterns by Jen is at it again! I loved her Batting Buster week last year, and when she announced it this year I was super excited to join in. I’ll be showing you how I use up batting scraps to make snap bags. They are one of my favorite quickie projects, and Mom had the brilliant idea of working the longarm into the equation.
Batting scraps are an overwhelming problem in my studio. Having a longarm and doing client work has made it worse. I usually send scraps home with clients, but when they buy from the roll, I usually trim it pretty close to the quilt top, to make it lighter for shipping. That means there are lots of batting scraps piling up all the time.
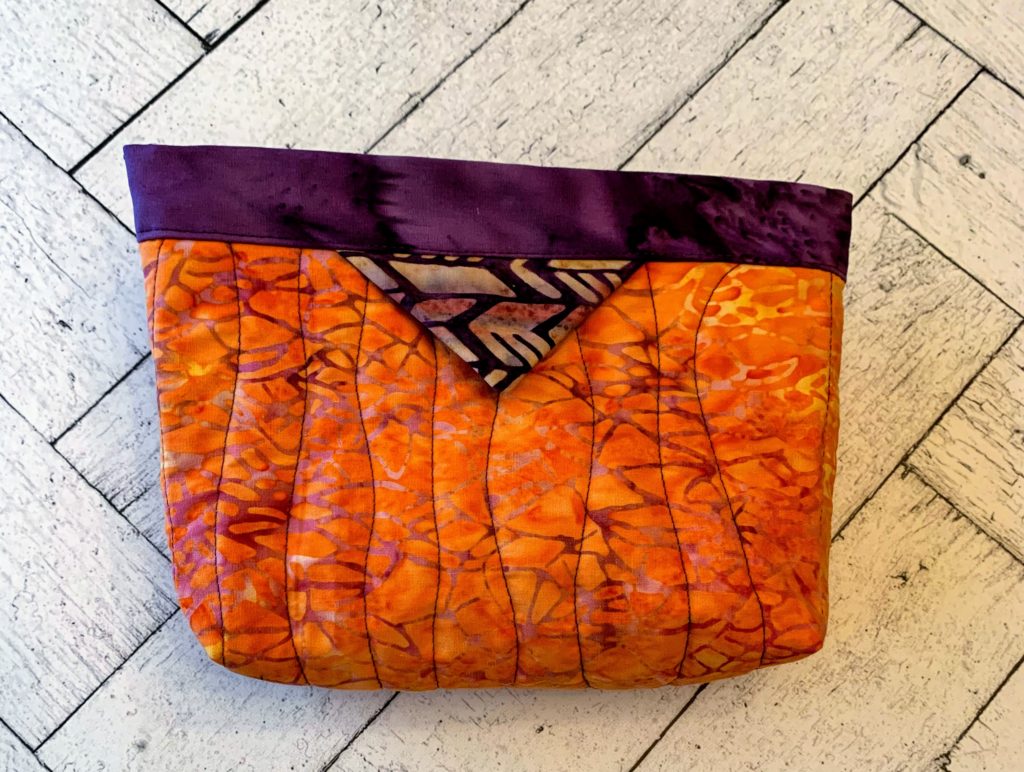
From my own projects I also end up with large strips of backing. Today I’m going to show you my favorite way of putting both of these waste materials to good use. I enjoy making snap pouches – the ones with measuring tapes in the band. They sound magnetic, but there are no magnets involved.
The original way I learned to make them was with fusible batting. I don’t usually have that on hand, but I have plenty of batting scraps, and a longarm to quilt them together.
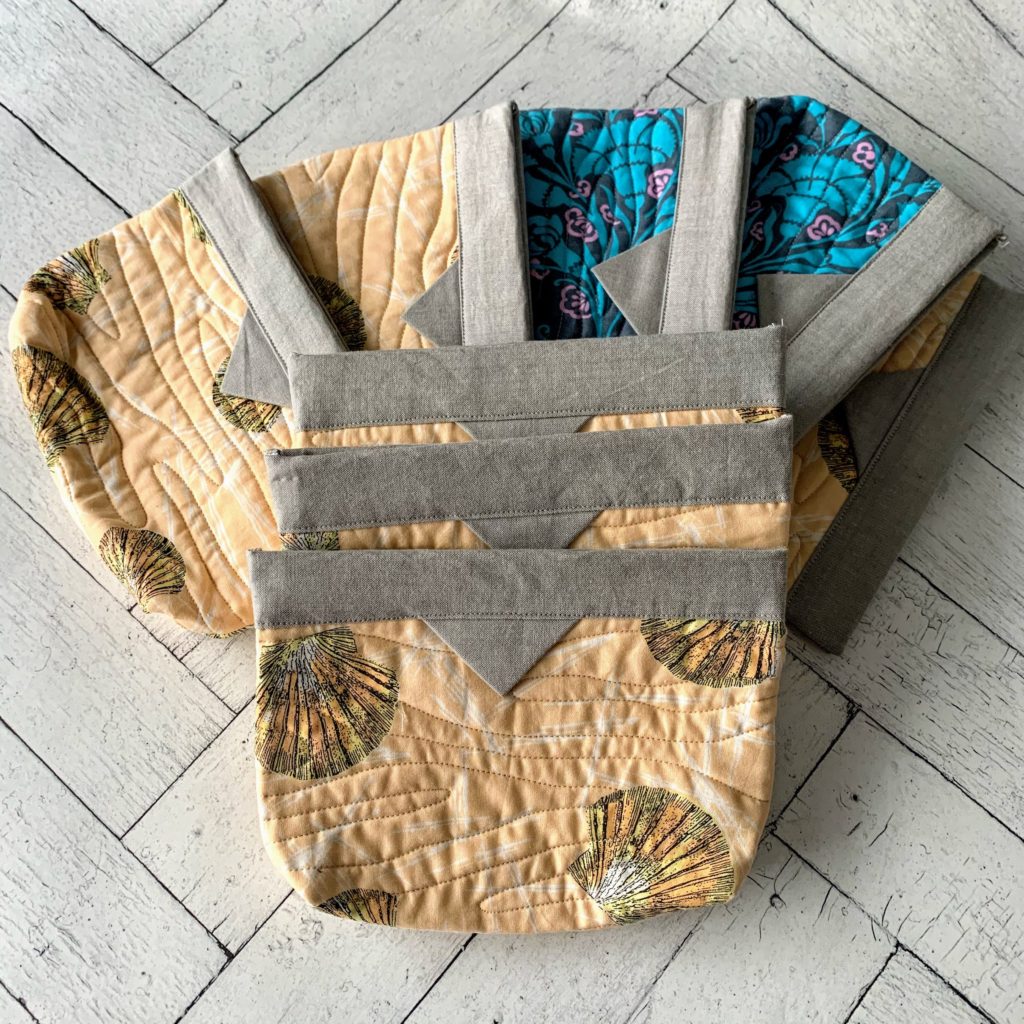
Just to make it as confusing as possible, we also use scrap fabrics for the front. Many of the pieces in these images are from a collection of discontinued fabric sample books from an interior designer. So, we saved a lot of fabric from going to the landfill with this project. I’m going to give a general description of what we do first, then I’ll give you a pattern with actual dimensions, in case you want to try it yourself. After our first few, we deviated from the original dimensions, and now we just freestyle it, based on what we have on hand.
The General Process
I start by evaluating my scrap fabrics. These will be the outside of the bag. I select a group that is the same size, trimming if necessary. I like my pieces to be in the range of 12″ x 9″. That yields a useful sized pouch.
A dig through the batting scrap pile is next. I cut scraps into 12″ widths, and make sure there is enough to be used under all of the fronts.
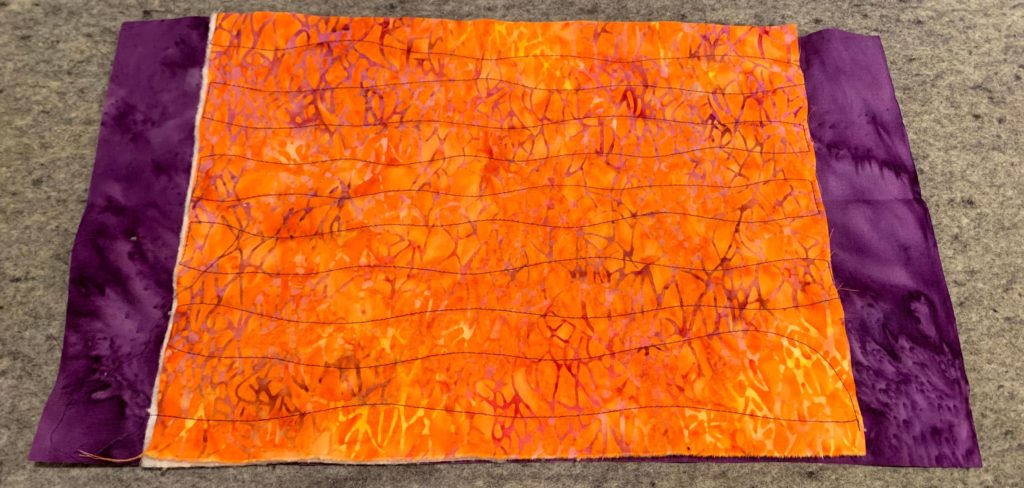
Then I find a piece of backing fabric, at least 18″ wide, and as long as possible, up to 108″ long. That is the longest I can reasonably accommodate on my longarm. It does need to have straight edges, and keep in mind that it will show on the finished pouch. This piece ends up being the contrasting band.
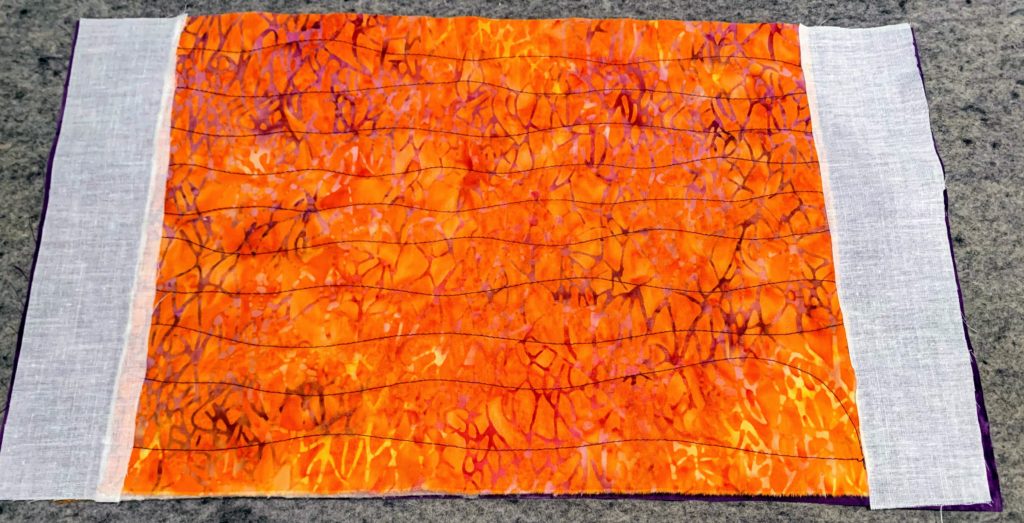
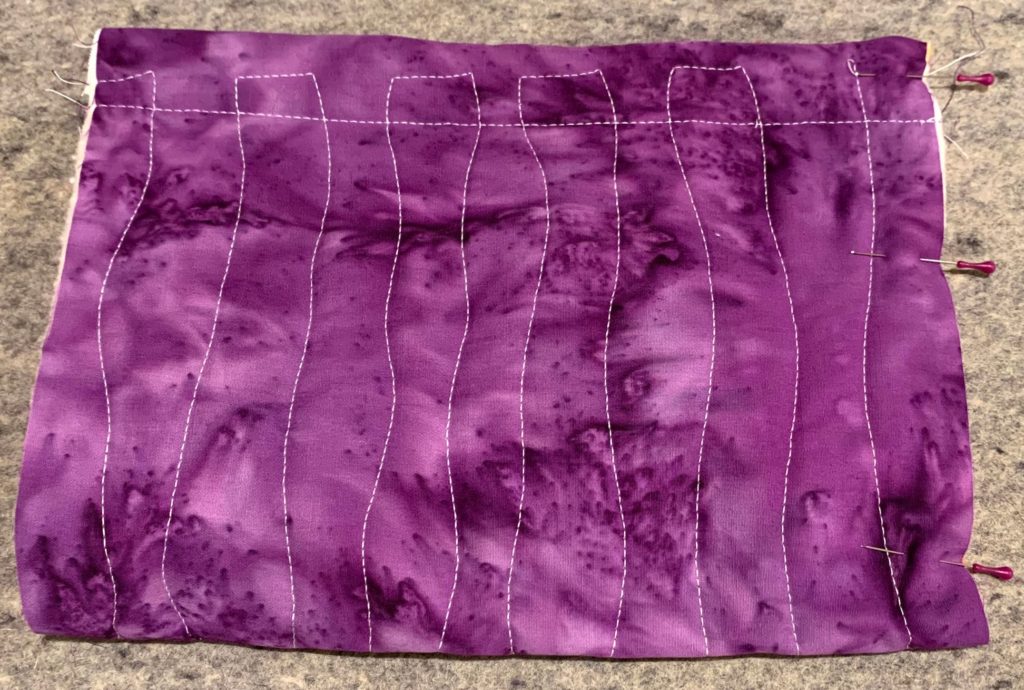
Once the backing is loaded, I lay a strip of batting out on the backing. I keep it 2″ away from the top edge. I fill up the entire width of the piece I have loaded. Then I lay the fronts on, again, as many as I can fit. They can be right up net to each other.
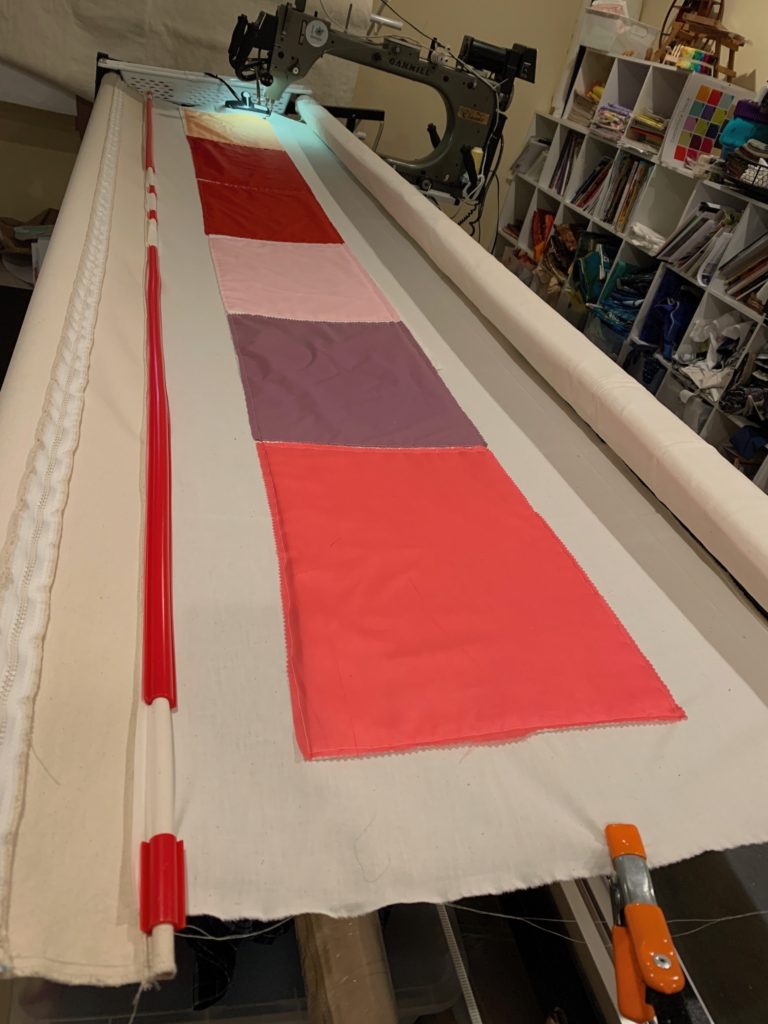
Next is basting. I carefully stitch around each piece, anchoring it securely to the backing.
Then, it’s time for some fun. I chose a pantograph, and let the longarm do the hard part. It quilts everything together for me. I do try to chose a design that will complement the scraps we use. My favorite is to use solids, and use a busy pantograph. It really shows up nicely in the finished pouch.
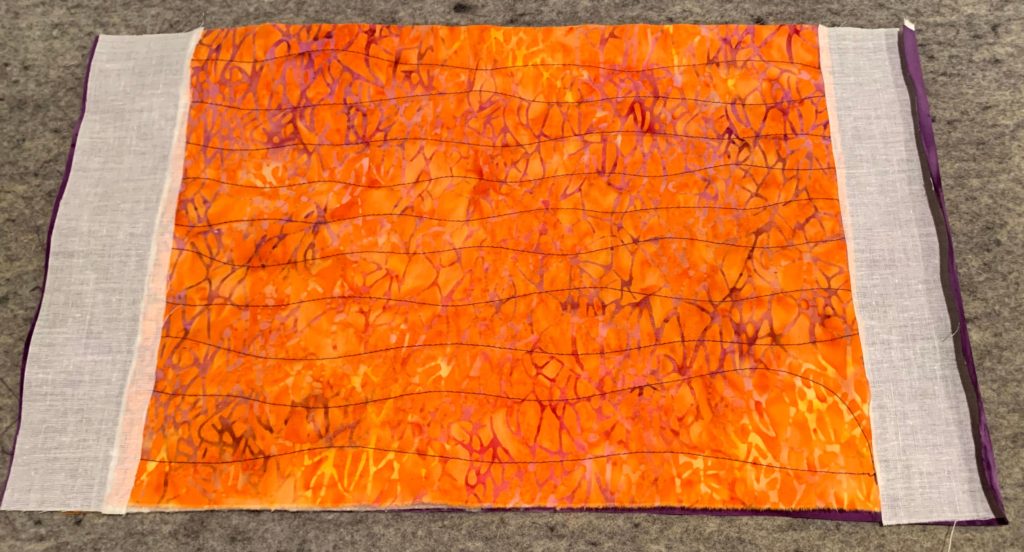
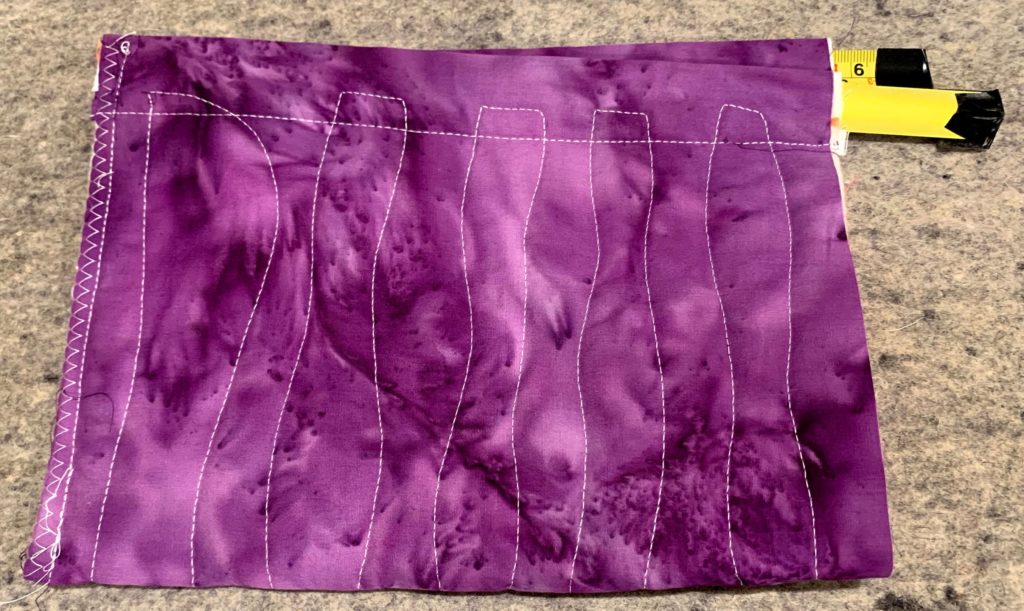
Once quilting is complete, I take the panel off, and trim the edges to be 2″ away from the edge of the quilted section. Pieces larger than 4″ square should be saved for making the prairie point pulls.
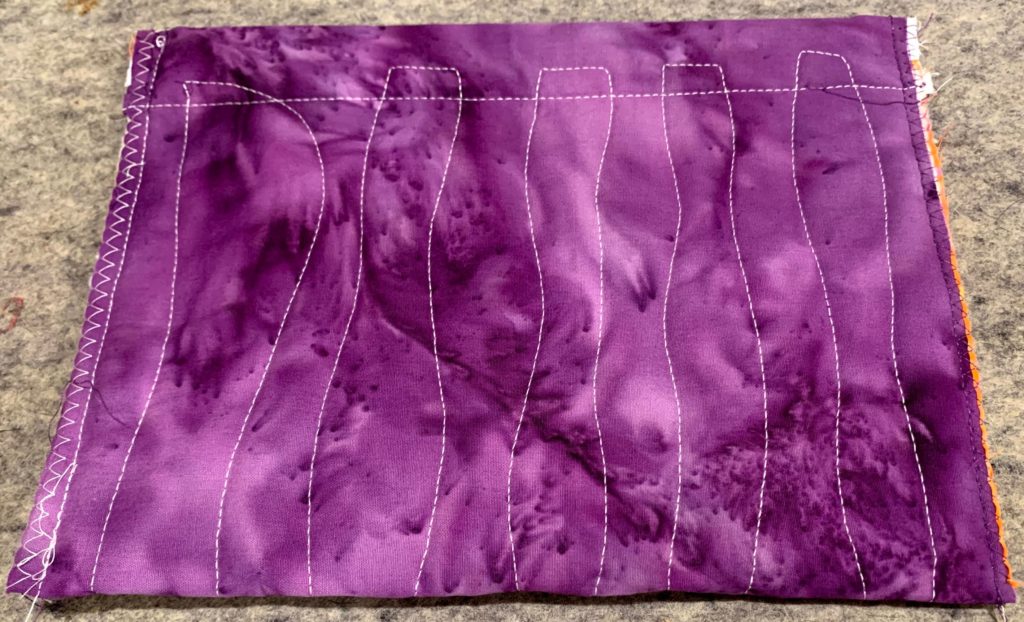
Then, we add 2″ strips of interfacing the length of the piece to prevent the snap tape from shredding the bag. We totally use up scraps for this part, too. Next it’s just finishing work. I’ll cover that in the next section.
Since I work with my Mom in my studio, this is a team sport. We work with bunches of bags, and do a few steps at a time. At any given time, you can find a pile of bags in various states of completion. It often looks like a disaster for a few days, then several dozen bags are finished at once.
Okay. Enough teasing. Here is a tutorial to make your own snap bags. I’ll give you actual dimensions for the ones I have, but after you make a few, you will see how you can adjust your sizes to best use up what you have on hand.
Making a Snap Bag Pouch
Supplies needed
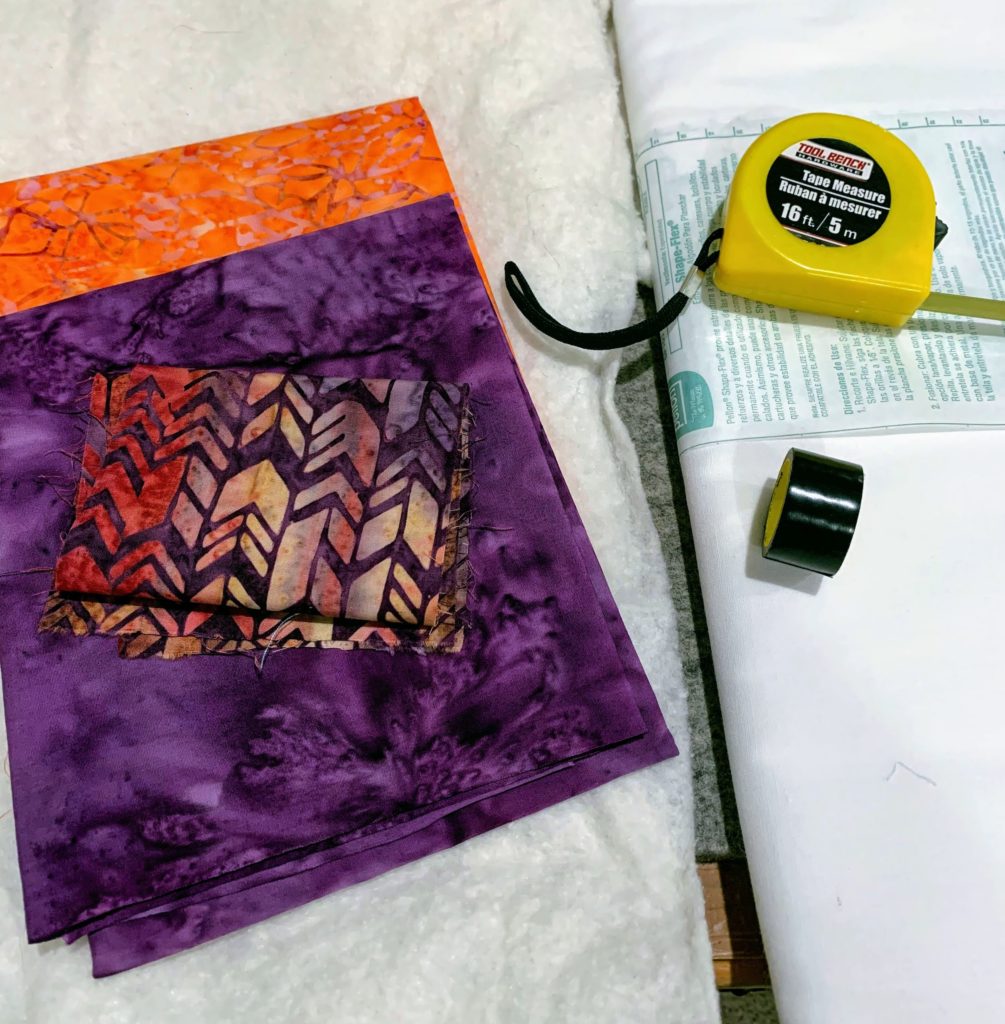
- Front – 12″ x 9″ quilting cotton
- Lining – 16″ x 9″ quilting cotton
- Batting – 12″ x 9″
- Fusible interfacing – SF101 – 2 pieces, 2″ x 9″
- (2) 4″ squares quilting cotton (pull tabs)
- 16″ of retractable measuring tape*
- Electrical tape
*For your measuring tape – cheaper is better. If you can find them at your local Dollar Store, that is perfect. You don’t want to cut up your nice, strong tape measure, as it will be too hard to open your pouch.
Preparation
Cut four pieces of electrical tape, about 1″ long.
Cut 2 pieces of measuring tape, 8″ long. Engage the lock on your tape measure after cutting to make sure it doesn’t retract inside the case. Clip the corners of the tape, rounding it off. Cover with the pieces of electrical tape.
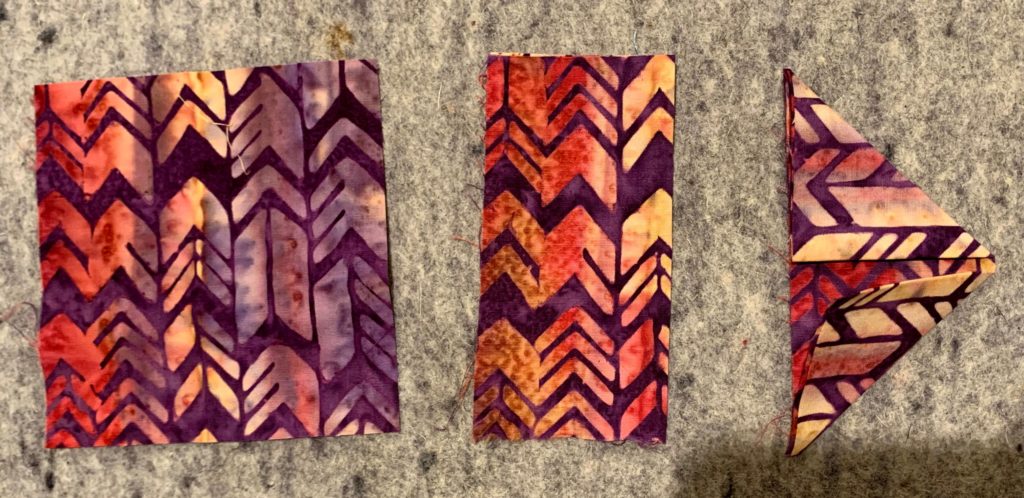
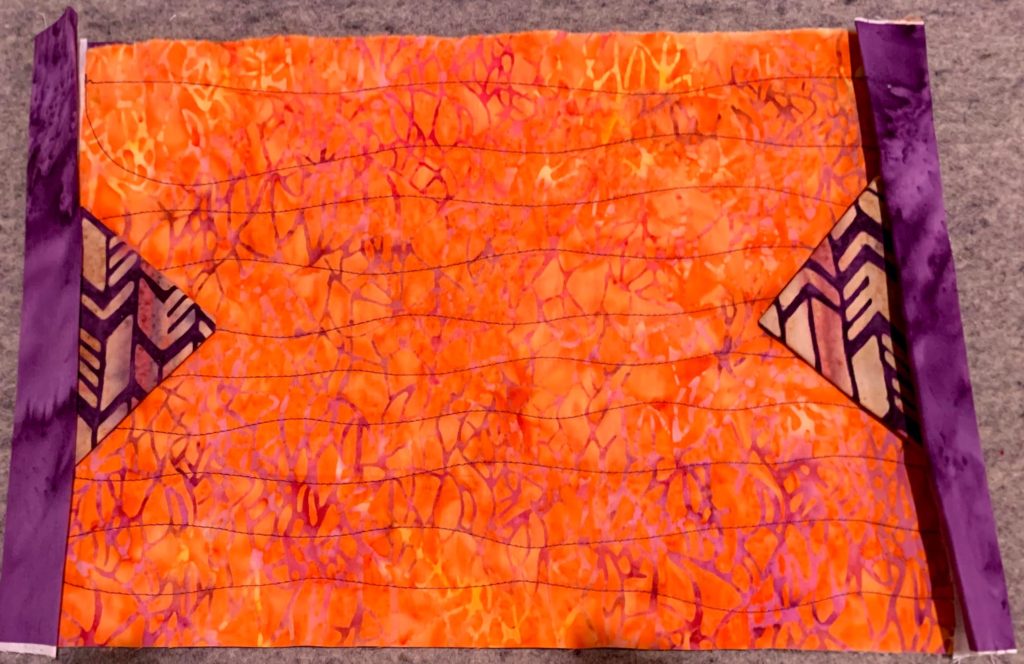
Fold the 4″ squares of quilting cotton into prairie points, press.
Press your fabrics.
Make it
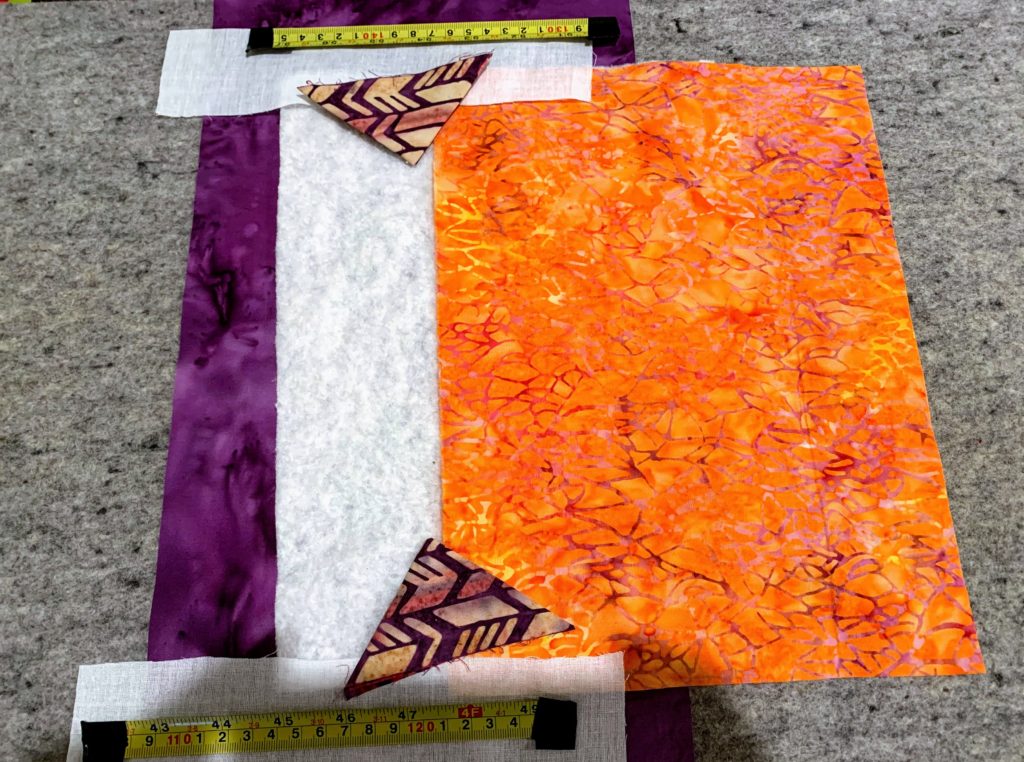
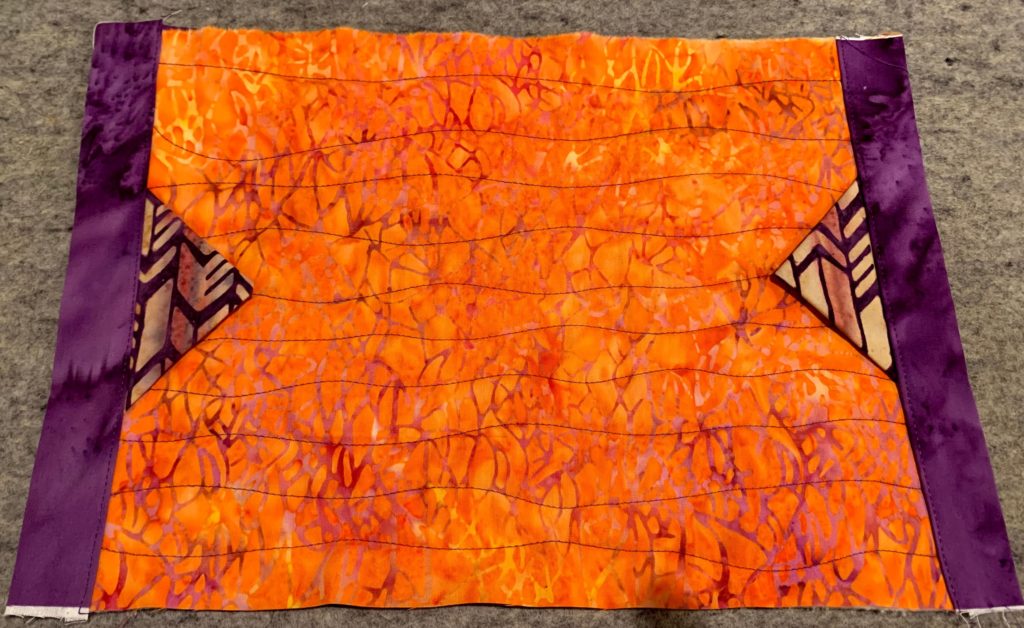
Layer your backing, batting and front together. The center of your batting and front should be centered on your lining. Pin and quilt, or if you have fusible batting, fuse ’em.
Lay your fusible interfacing over the exposed lining and fuse it in position.
Fold over 1/4″ of the lining and press.
Fold lining over to cover the front, giving it about 1/4″ of overlap. Press in place.
Repeat for the other side.

Center your prairie points on each side of your pouch, tucking them under the folded lining. Pin in place.
Top stitch along the edge of the lining flap, securing it in place. I get really close to the edge, maybe 1/16″ if I can stay straight.
Fold your pouch together, right sides together. Pin together, and stitch, using a 1/4″ seam allowance.
Insert your tape measure pieces into the pouch. When the pouch is inside out, the tape measures should face each other, like this, ( ). When you turn your pouch right side out, they will be like this, ) (, and that will make the snap sound when you open it.
Stitch the second side of your pouch closed. If you want a more professional, finished look, you can serge the edges, or just zig zag off the edges, if you don’t have a serger. Not to be patronizing, but it is really important not to hit the tape with your sewing machine needle. If you are worried at all, take a minute and trim your tape shorter.
To box the bottom, I open the pouch up while it is inside out. I flatten the corner out, with the seam in the middle. Then I stitch across the corner, where it is about 1″ wide. I do this on both sides.

Turn it right side out, and enjoy!
Click It!
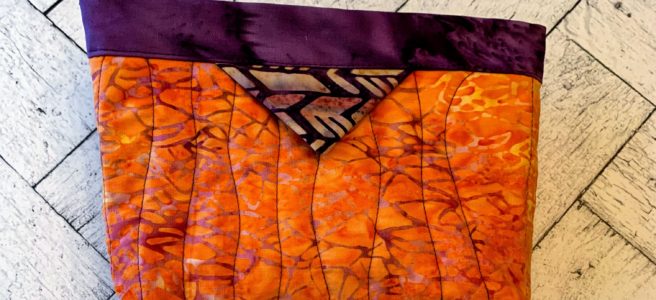
Fabrics in this pouch are from Island Batik. Batting is Tuscany Cotton/Wool from Hobbs. Thread is from Aurifil.
Make sure you check out everyone who is participating in Batting Buster Week. I can’t wait to see what my fellow makers have in store.
- Patterns By Jen
- Dragonfly’s Quilt Design Studio
- Dizzy Quilter
- Sew Joy Creations
- Sunflower Stitcheries and Quilting
- Bea Quilter
Thanks, Jen, for letting me play along this year!
This looks like a fun project, and an excuse to raid the dollar store – ha! Thanks for sharing!
Jen Thanks for the pictures of how to on the bag. Are those snap leaders?
Yes. I use Red Snappers with my machine, and I love them.
I have made a couple and love them. Thanks
such fun!
Looks like a lot of fun.
Great idea!! Thanks for sharing!
Great Idea! Love how you mass produce and upcycle with them too. Thanks for sharing!
Great idea! Snap bags are fun. Thanks for sharing.
Jen, thanks so much for writing this up! I missed the local class and never got to make one.