With Island Batik and AccuQuilt
For our July challenge, the Island Batik Ambassadors are making small quilts using an AccuQuilt Go Me die cutting system, then giving the quilt and the system away to a friend. I get to be Santa and his elves, all in one month.

Have you seen the AccuQuilt Go Me system yet? You should definitely check it out. I’m fortunate to have worked with AccuQuilt for about a year now, so I already had one from a project I worked on last year. I can tell you that I was pleasantly surprised by this little workhorse.
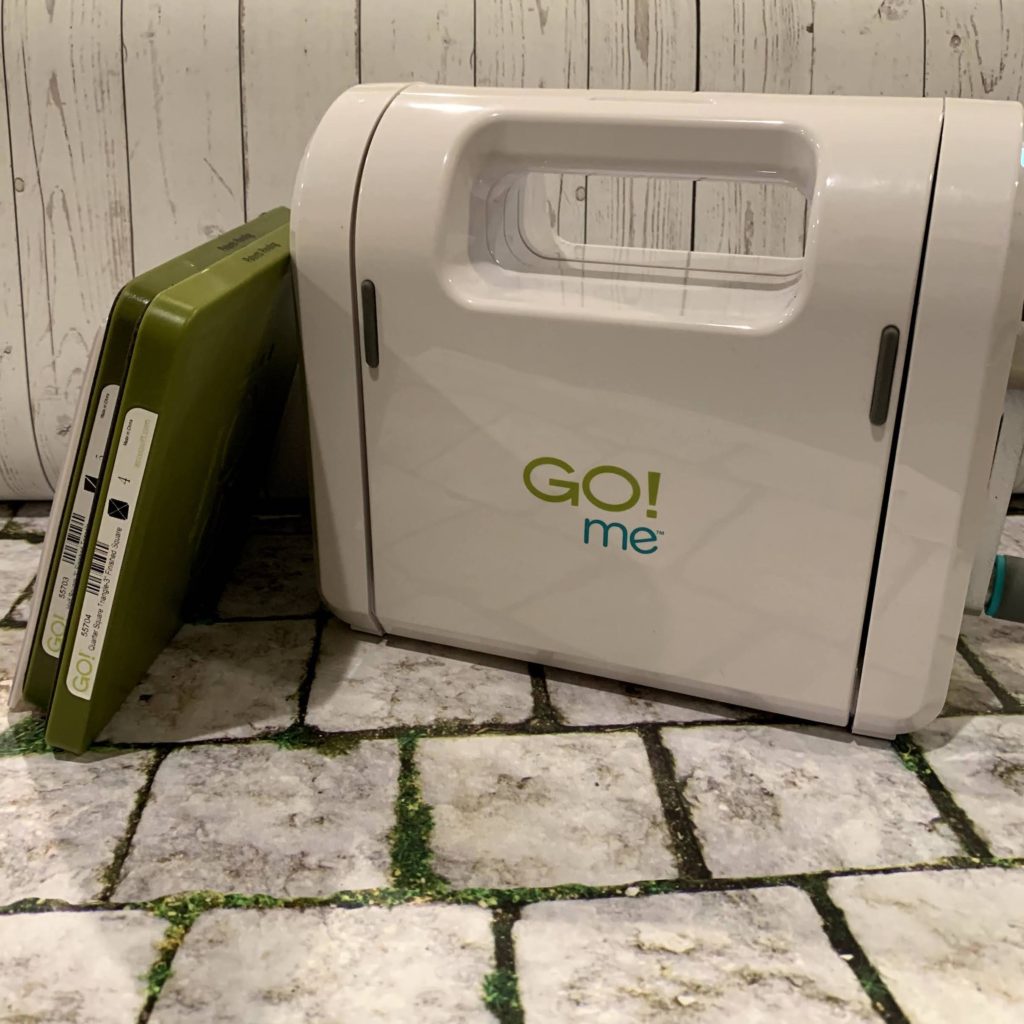
Don’t get me wrong, I love my AccuQuilt Go system. But, it doesn’t have a dedicated space in my studio, so I have to clear off a space and pull it out every time I need to use it. The little guy is easier to work with when you are a messy maker. Also, about half of the dies I work with are on the 6″ base, which is what fits into the Go Me.
The little system is also perfect if you are a quilter on the go, which I hope we all will be again, soon. It easily fits into a tote bag for classes, retreats, or sew-ins. Probably I could get away with taking it on vacation – it would fit into my suitcase.
The AccuQuilt Go Me comes packaged with two dies – a 3″ finished half square triangle and a 3″ finished quarter square triangle. It also has a few patterns included. For $99, it is a great way to try out a die cutter and see how it impacts your work flow.
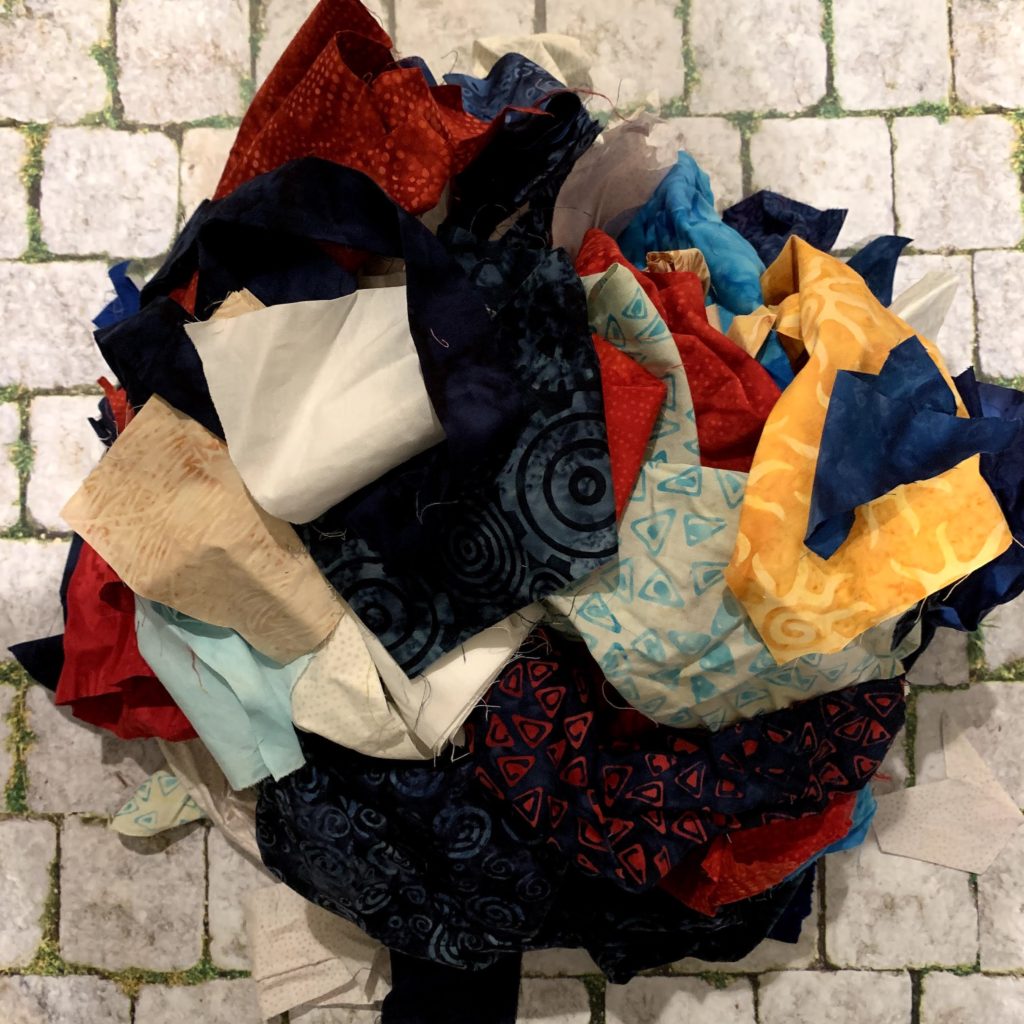
I started with a rummage through my scrap bin. I pulled out all of my red, white, and blue Island Batik scraps. A few yellows and turquoises were added for fun, and because I worried about having enough fabric.
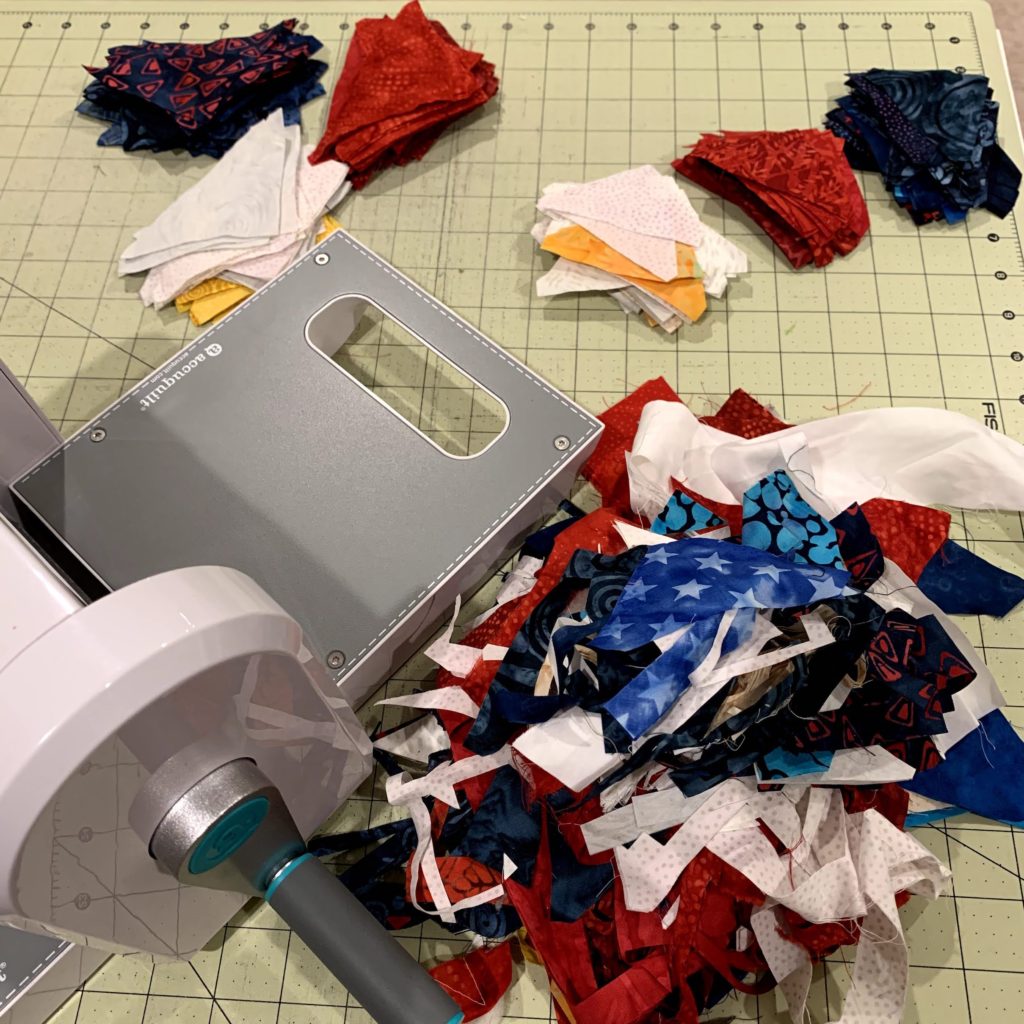
My work station setup consists a pile of wrinkled scraps on my ironing station, along with my Go Me, a pair of scissors, and my phone to listen to an audiobook. (This week it is Eat, Pray, Love by Elizabeth Gilbert. Highly recommended). I press my scraps, trim off any wayward bits that would get in the way, and load up the dies with fabric.
After a couple of hours, I had a good size pile of triangles in both sizes, and my scrap pile looks pretty much the same as when I started.
I took a break from cutting and sewed all of the units together, randomly. Then I pressed them all, and took stock. I had 120 pieced squares, all measuring 3.5″. Doing a little bit of calculating, I realized I would need well over 400 squares to make a properly sized quilt to accompany the Go Me. I decided instead to pursue a plan that had been nagging at me.
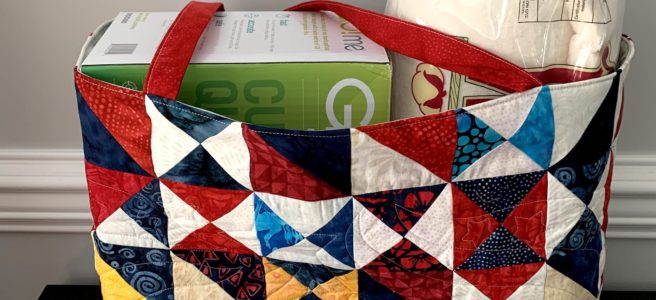
I decided that the perfect thing to go with a portable die cutter is a quilted tote bag to carry said cutter. I hope I will be forgiven for not making a flat quilt. Life is short, and I have to embrace brilliant ideas when they come to me.
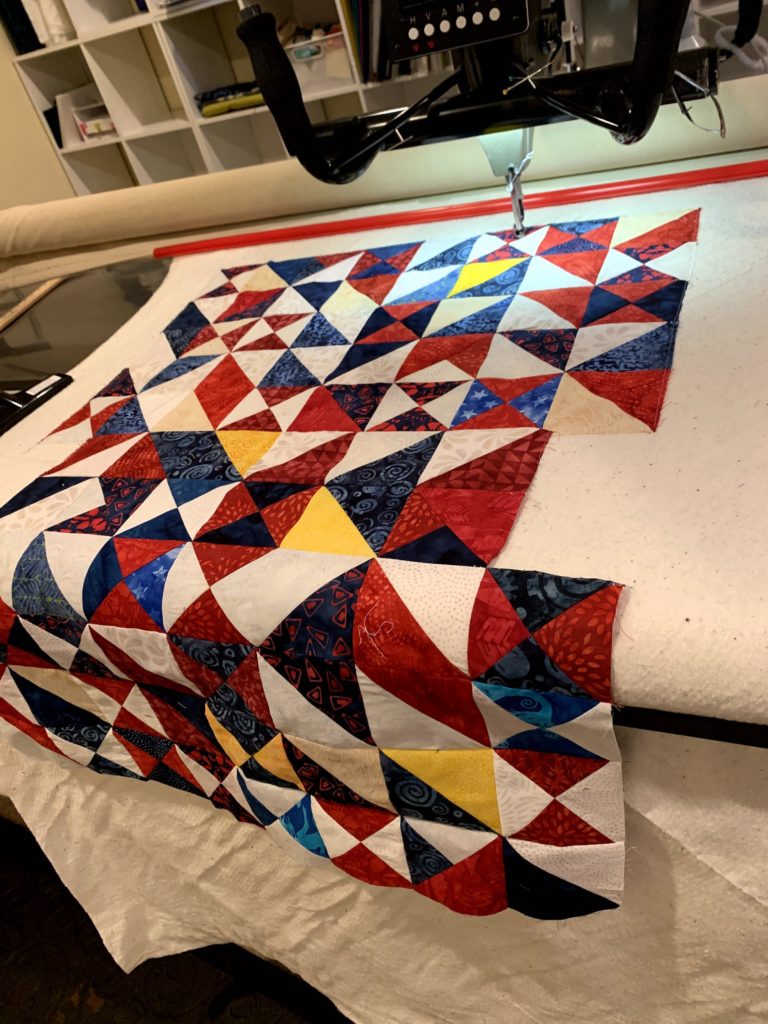
I sewed together 12 rows of 8 blocks. On rows 6 and 7 I removed a square from either side, giving me a weird shape for a quilt, but the perfect piece for a tote bag. I loaded a leftover piece of batting onto my longarm, no backing, and quilted the top and the batting together, using one of my favorite patriotic designs.
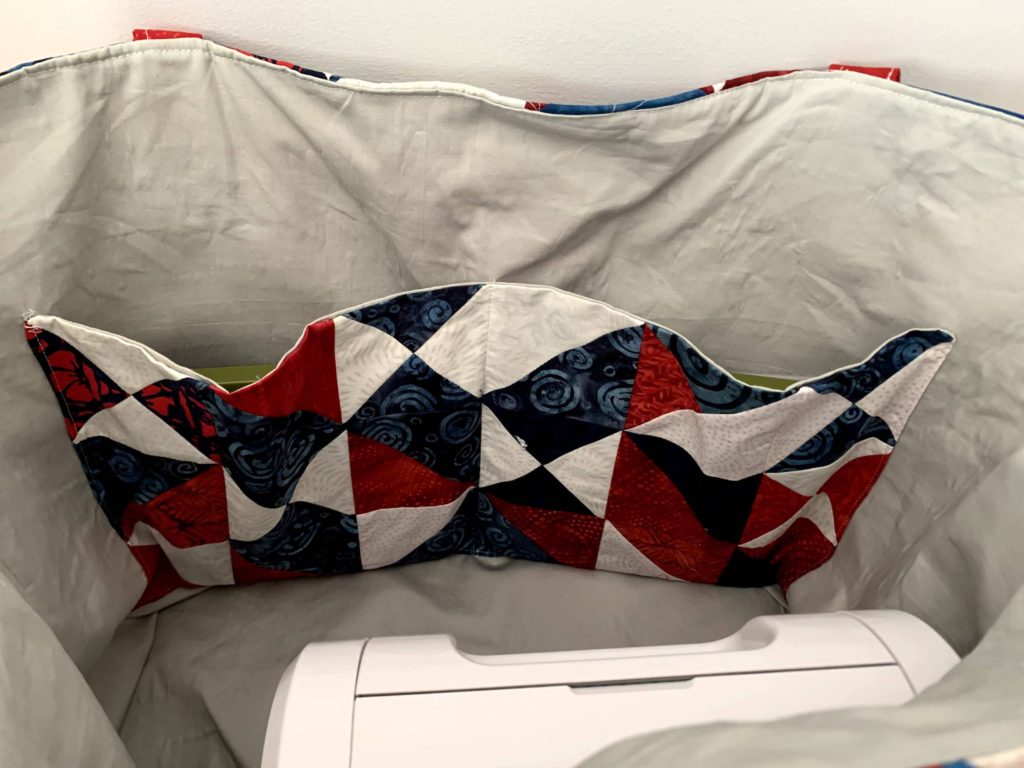
Once it was complete, I took it off of the longarm and trimmed it up. I prepared the lining next. I used some grey Island Batik solid, cutting it the same size as the tote bag body. I lined it with Shapeflex fusible interfacing. I want this bag to last, and a little extra body helped it stand up.
I made a large interior pocket – 3 squares by 18 squares, and backed that with more of the grey solid. I centered it low on one side of the bag lining and stitched it down. I also stitched a seam down the middle, making it perfect for carrying two dies.
Straps were made from one of my Stash Builder rolls. I used one piece of 5″ x WOF in a lovely red. I cut it in half, lined each piece with Shapeflex scraps, and turned it and stitched it together. They are probably too long. I think maybe 30″ would be better.
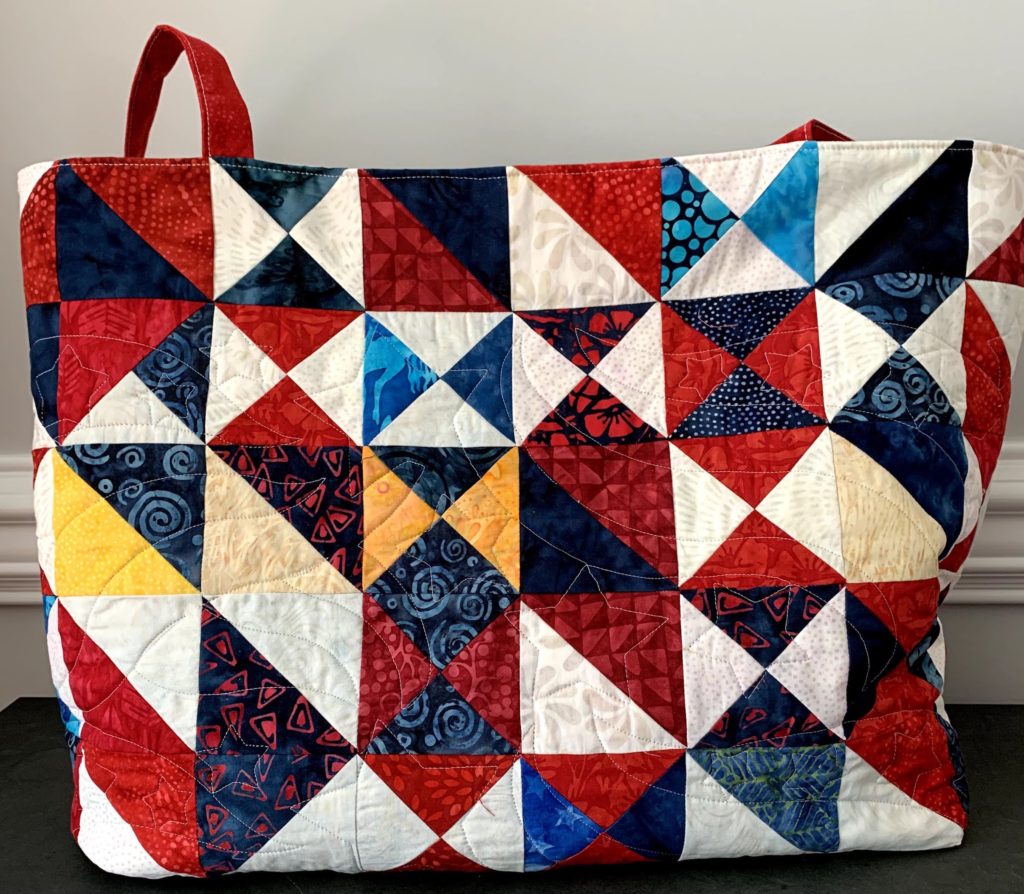
Here it is – all finished, even a nice line of top stitching. I’d tell you how I got the two pieces together, but there are other people who understand the process better and can explain it to you. I’m not entirely certain, as I find three dimensional making to be akin to voodoo. I don’t trust it, and I’m shocked when it works. I think I put them together right sides together, left a hole in the stitching and turned them right side out. Maybe.
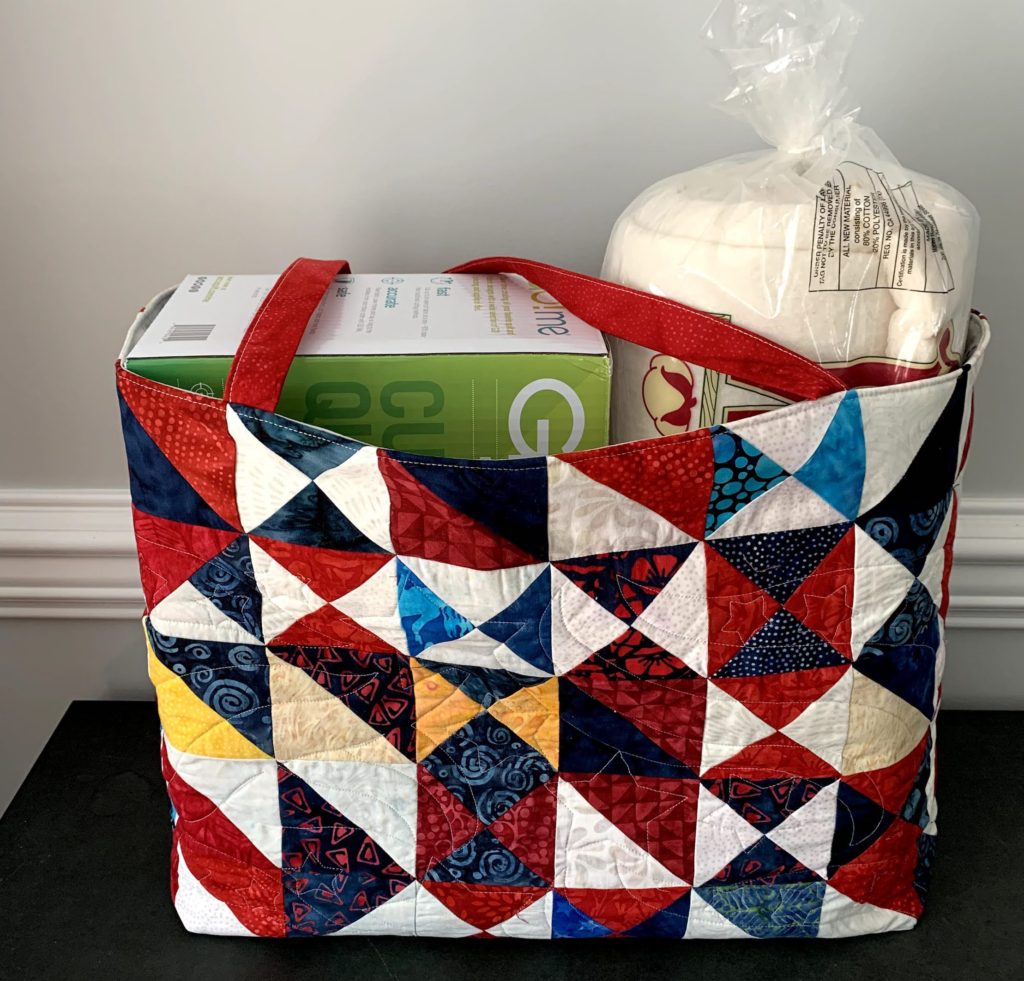
Just to make sure I’m forgiven for the too long straps, I’ve got it packed up with a fusible batting from Hobbs, and two Stash Builder rolls in red from Island Batik, along with the Go Me system. I hope my friend enjoys her Christmas in July present (when I finally give it to her in August!)
Be sure to check out what my fellow Island Batik Ambassadors did this month. There are a lot of beautiful quilts with these units being shared!
Carolina Asmussen ~ Carolina Asmussen
Megan Best ~ Best Quilter
Pamela Boatright ~ Pamela Quilts
Jennifer Fulton ~ Inquiring Quilter
Vasudha Govindan ~ Storied Quilts
Joanne Hart ~ Unicorn Harts
Mania Hatziioannidi ~ Mania for Quilts
Carla Henton ~ Create in the Sticks
Connie Kauffman ~ Kauffman Designs
Emily Leachman ~ The Darling Dogwood
Denise Looney ~ For the Love of Geese
Leah Malasky ~ Quilted Delights
Sally Manke ~ Sally Manke
Maryellen McAuliffe ~ Mary Mack’s Blog
Carol Moellers ~ Carol Moellers Designs
Gail Renna ~ Quilt Haven Threads
Sharon Riley ~ Sew Riley Designs
Michelle Roberts ~ Creative Blonde
Gail Sheppard ~ Quilting Gail
Jennifer Strauser ~ Dizzy Quilter <—- That’s me!
Jennifer Thomas ~ Curlicue Creations
Alison Vermilya ~ Little Bunny Quilts
Sandra Walker ~ mmm! quilts
Suzy Webster ~ Adventurous Applique and Quilting
Janet Yamamoto ~ Whispers of Yore
Love that tote bag! What a fabulous gift for your friend. Would you recommend this cutter or saving up for an electric one?
I’ve never used the electric one, so I can’t really say. I do think this little one is a great value.
Very nice I have never used the go cutting system.
Such a great looking bag. You are so creative with those scraps and I’m sure your friend will appreciate the bag with the cutter and the batting. If the straps are too long, she put a knot in them or she could do a little creative shortening with buttons on the side.
Thanks, and that’s a great idea for the straps!
Very nice bag!!!
Thanks, Mania!
What a great idea! Your friend will be so excited at the perfect gift in the perfect bag!