I hope you are enjoying all of the tutorials being offered through Hunter Design Studio’s Back to School Blog Hop! Thanks to Sam Hunter for pulling all of this together! Welcome to my tutorial!
Machine binding is my primary method of finishing my quilts. Once in a long while I will do a hand binding, but it is very, very rare. Machine binding just makes sense for me. I make a lot of quilts, and I like to finish fast. I also bind quilts for my longarm clients, usually a couple per month.
Machine binding is not the same as sloppy binding. From the front of my quilt, you should not be able to tell that I have done the binding by machine. Of course, you can, if you really examine it, but mostly it looks like I ran a row of quilting along the binding, stitch in the ditch style.
I can bind a really big quilt in just a few hours, and it looks good. I’ve had friends ask about my technique, and it seems that over the years I have cobbled together a bunch of different styles. I haven’t found a tutorial that is exactly the same as mine.
Good binding strips are essential for a good binding. Make sure you cut, join, and press accurately. I like to just cut 2 1/2″ strips width of fabric and join them together using a bias join. (I don’t typically make bias binding, unless I have something curvy going on, or I want to play with stripes.) I like to give myself at least 12″ of extra binding when I’m figuring out how much I need.
*If you dislike making binding, I have two hints.
1. The AccuQuilt Go! and 2 1/2″ strip cutter. The buy-in is steep, but I can’t get enough of mine.
2. Moda pre-made bias binding by the yard. It is 2 1/4″ wide, but I have a lot of clients buy it from the shop for me to bind their quilts with. It works great, and the price feels reasonable. They offer solids and grunge.
You will need
- Walking foot/dual feed foot
- Straight pins
- Trimmed quilt
- Threads to match top and binding
- 2 1/2″ binding for the length of quilt plus 12″

I prep my quilted piece by squaring it up. I like to attach my binding to a trimmed edge.
I start in the middle of one edge, about 12″ down the binding. I line up the raw edge of the binding with the raw edge of the quilt. I only pin the first inch or two of this section. I find it helpful to be able to adjust the tension on the binding as I go along. If you find that you are having trouble aligning your binding to your top as you sew, pin it.
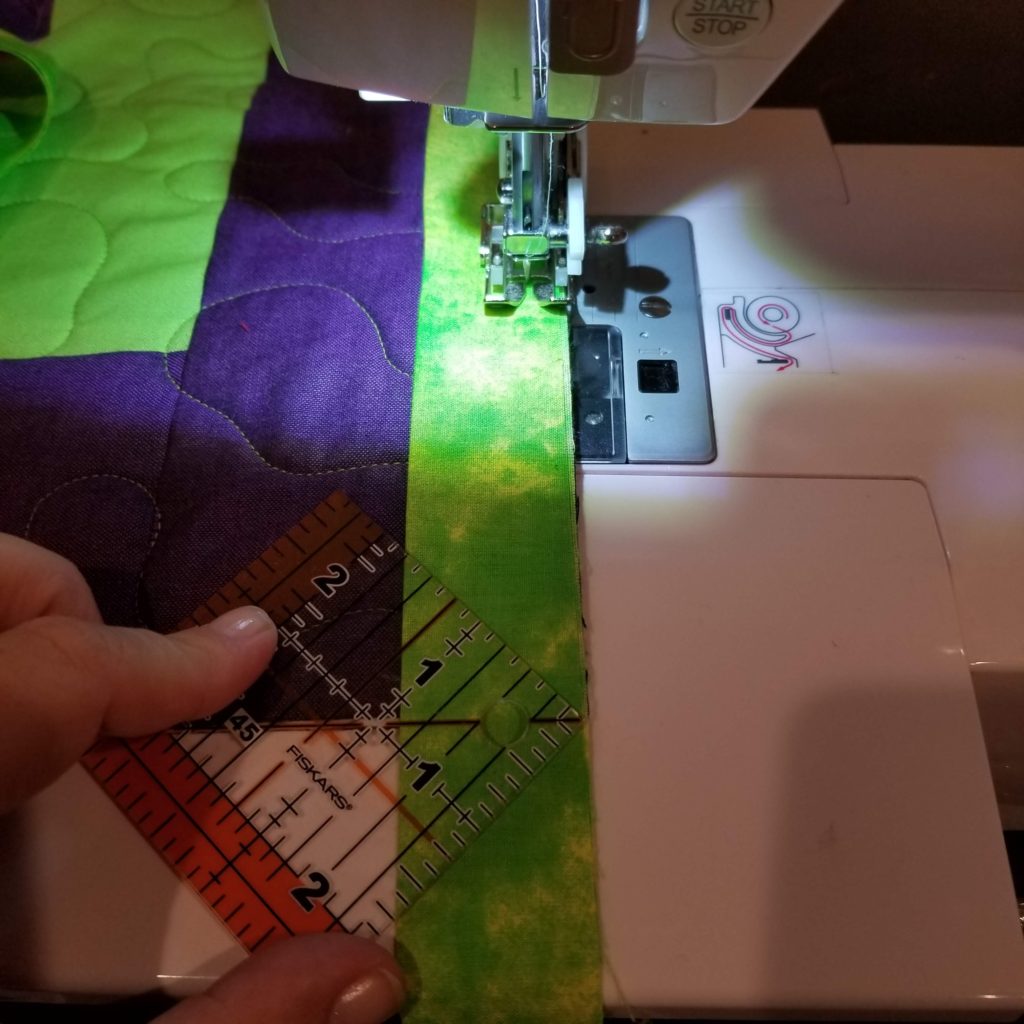
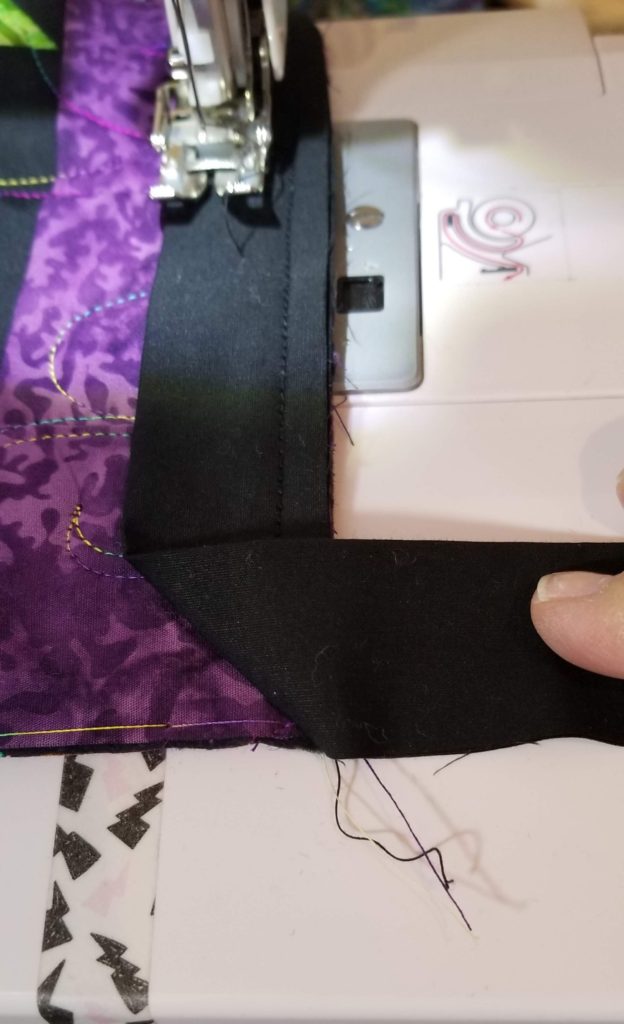
Stitch to within a couple of inches from the corner, being careful to keep a consistent 1/4″ seam allowance. I like to use this little bitty ruler and mark a 45 degree line line. This helps me to get a perfect miter.
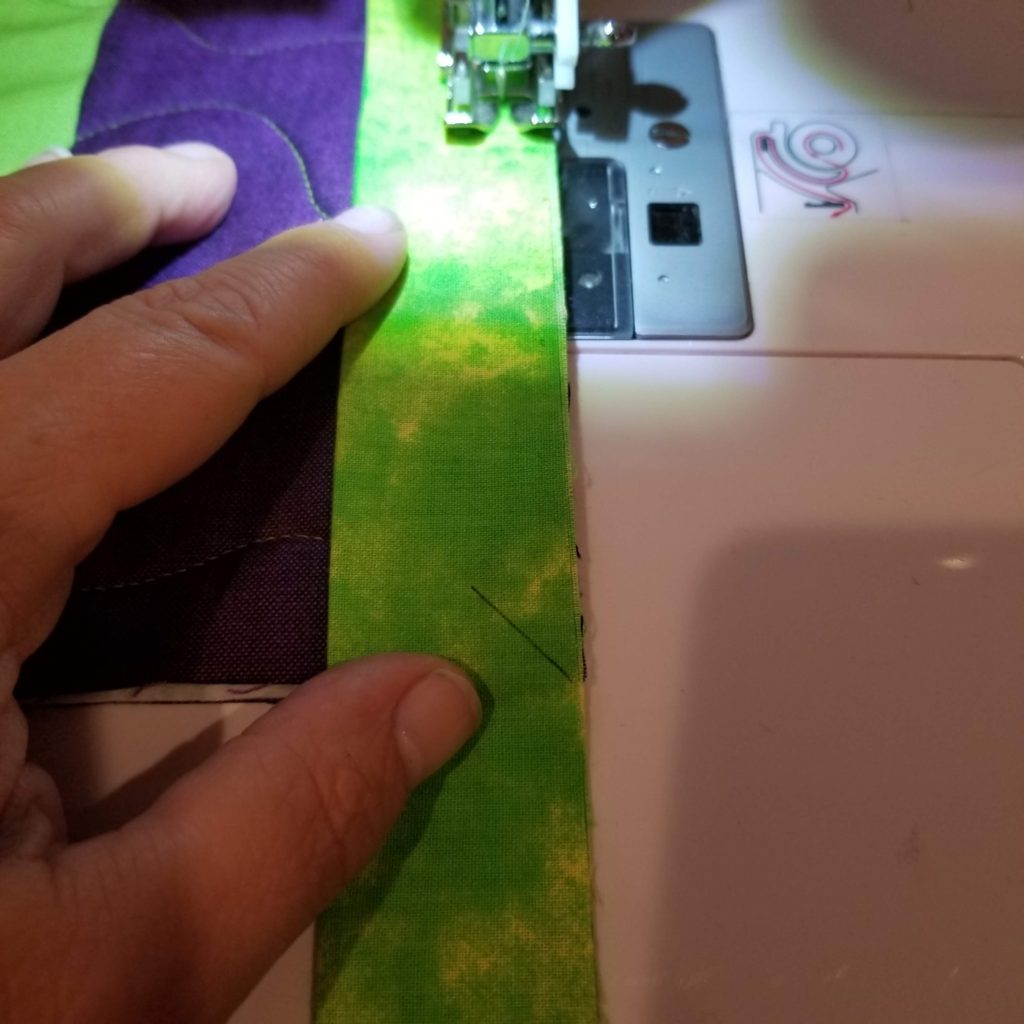
When you are 1/4″ away from the corner (and hit your marked line), drop your needle, raise your presser foot, turn the quilt, lower your presser foot, and sew along your marked line to the corner of the quilt.

Lift your needle, and pull the quilt out a bit.
For these next few photos, I have an older project I took photos of. I forgot to take pics of this step today! Gah.
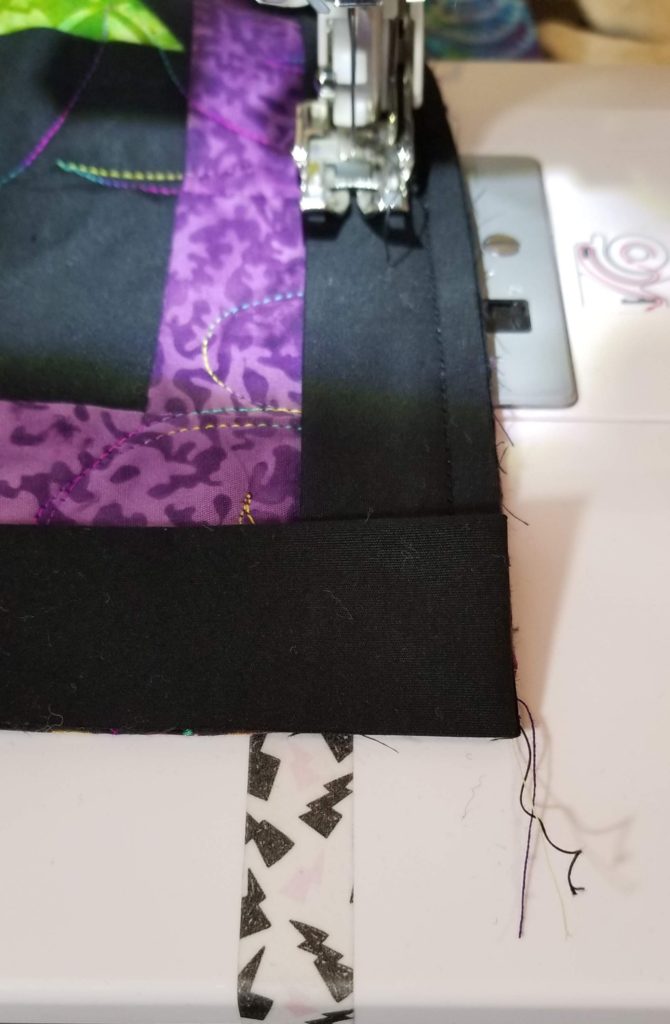
Fold your binding over and to the right, making an L. Fold it back, lining it up along the quilt edge again.
Sew straight down from the edge of the quilt. Miter each corner as you go. Continue around, until you are 8 – 12″ from your starting point.
Clip the one end of your binding to about 6″.
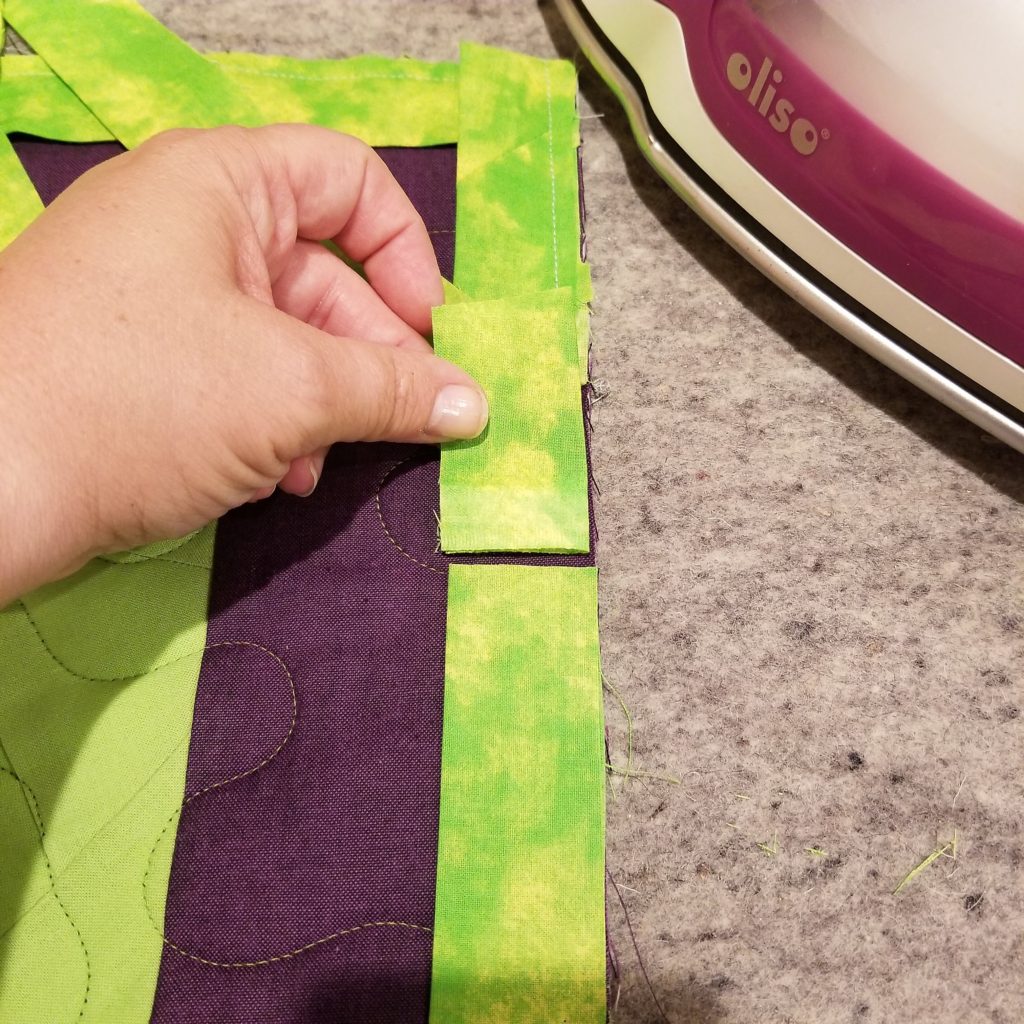
Overlap the two pieces of binding, and trim the longer one so that you have a 2 1/2″ tail.
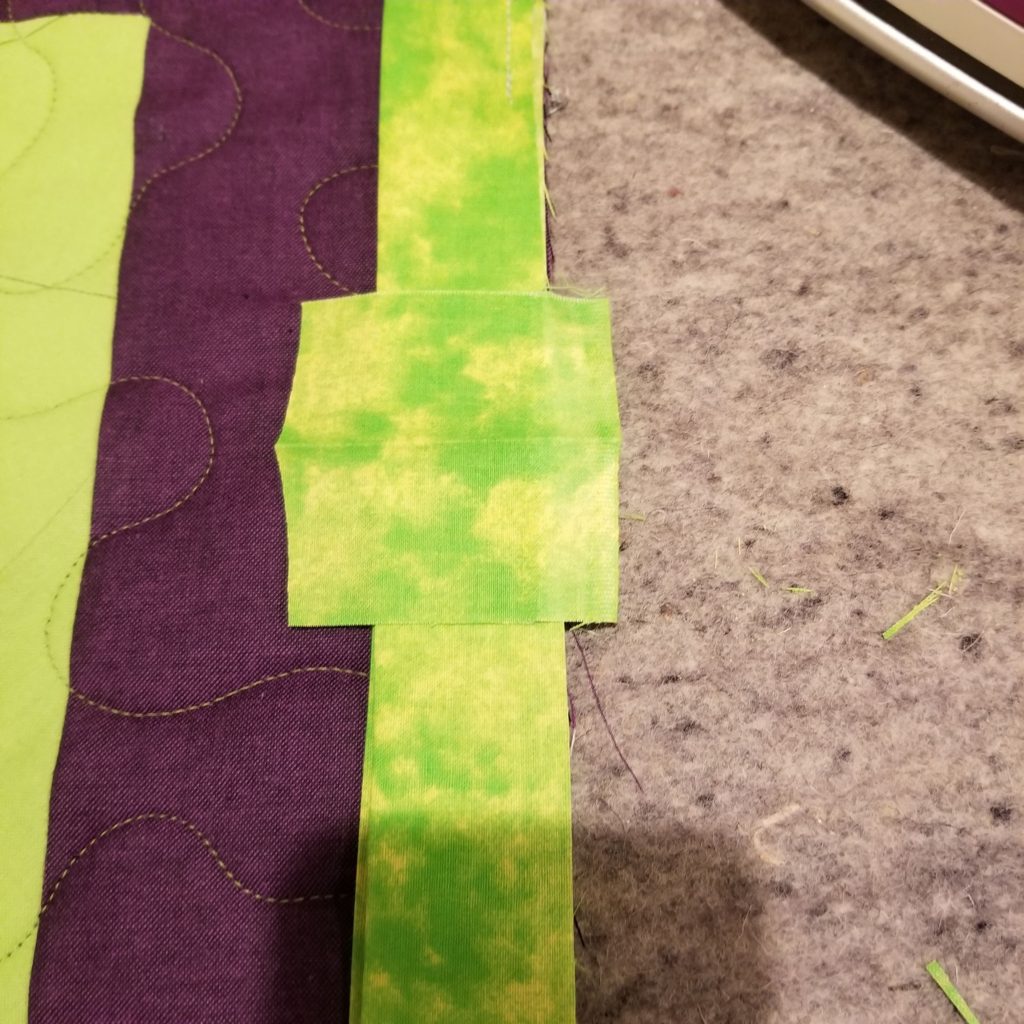
You can use a piece of your binding as your ruler if you open it up. This way, if you are using something other than a 2 1/2″ strip you will still get an accurate joining.
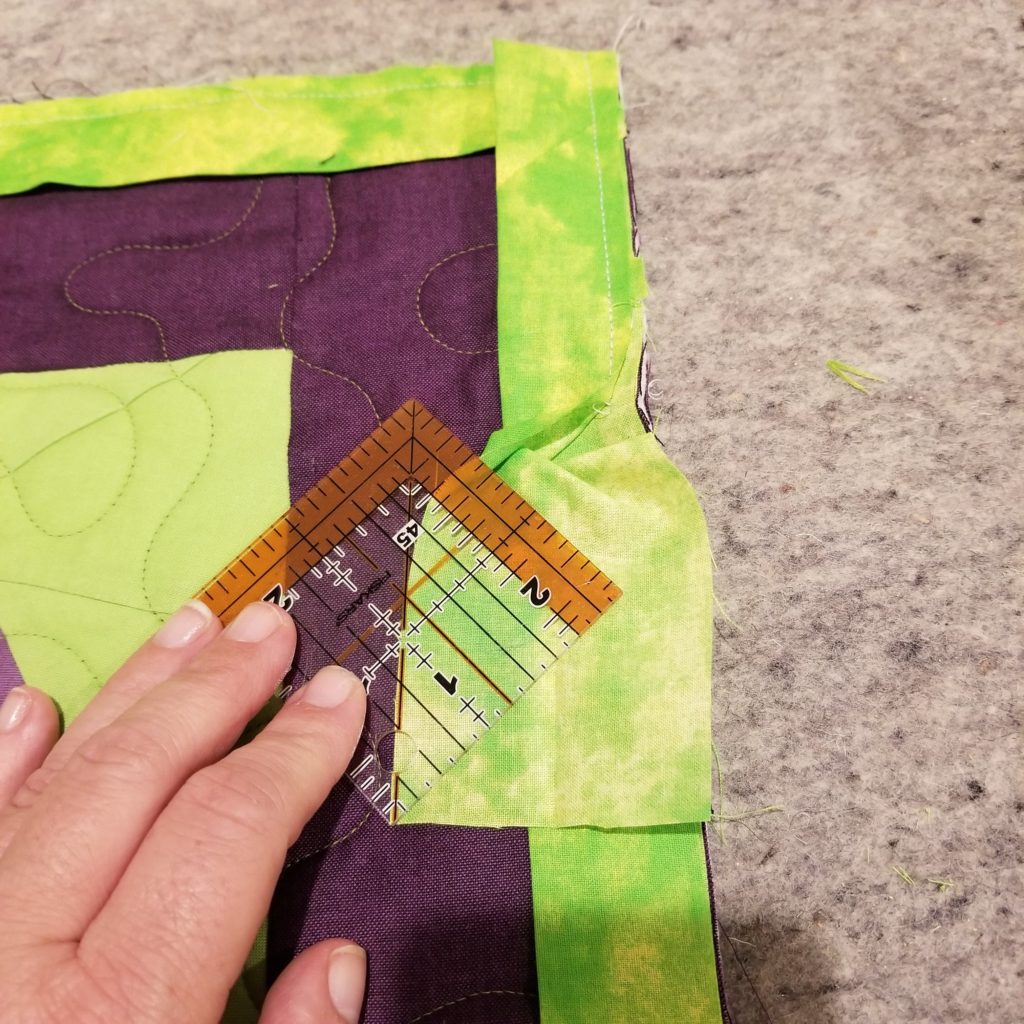
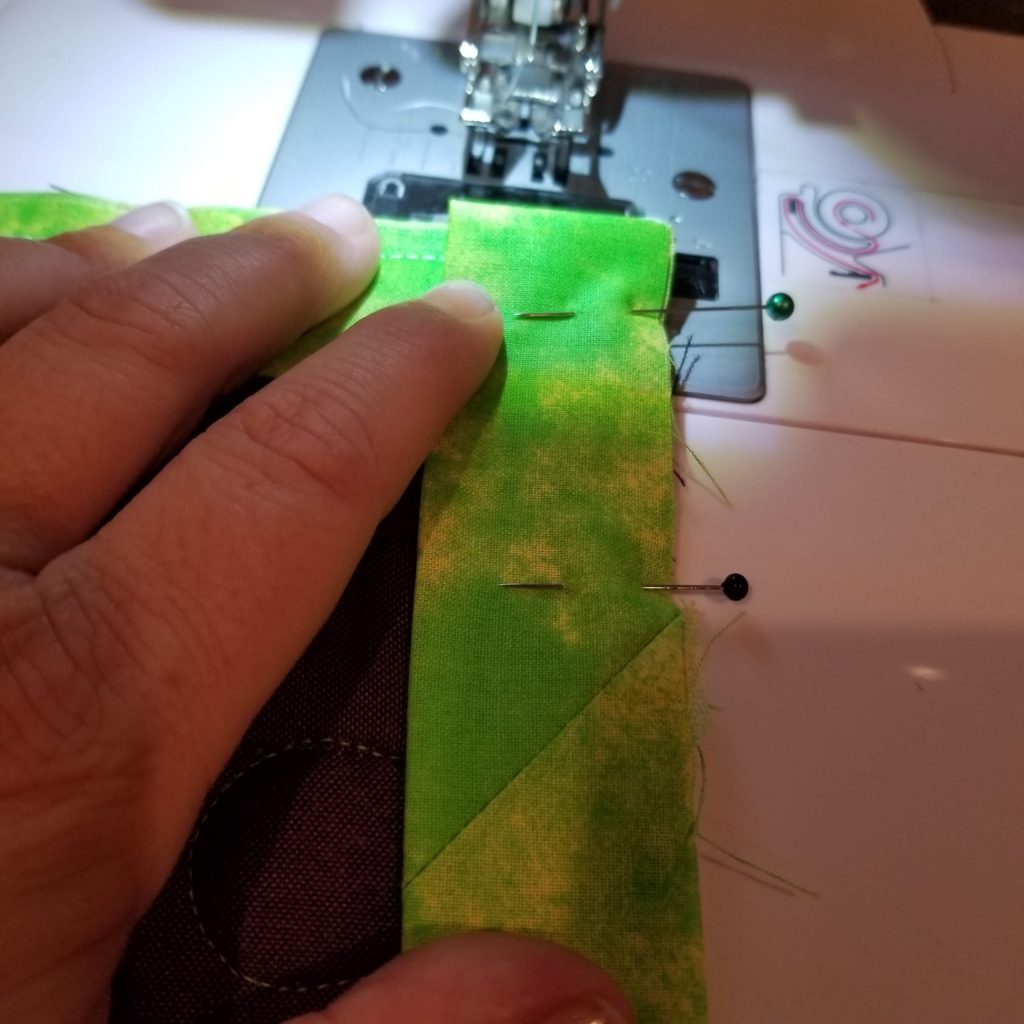
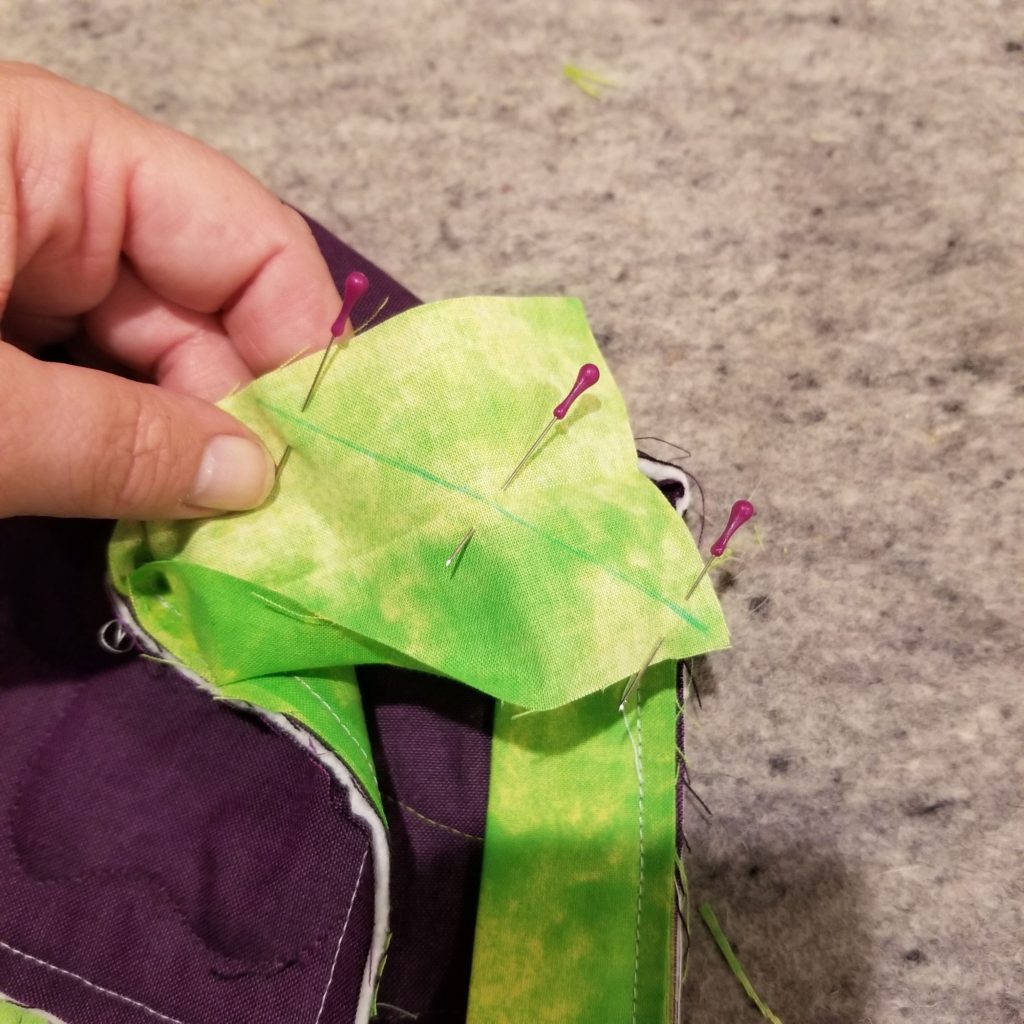
Open the piece of binding on the left (top), and on the wrong side of the fabric mark a line on a 45 degree angle from the bottom left corner up and to the right.
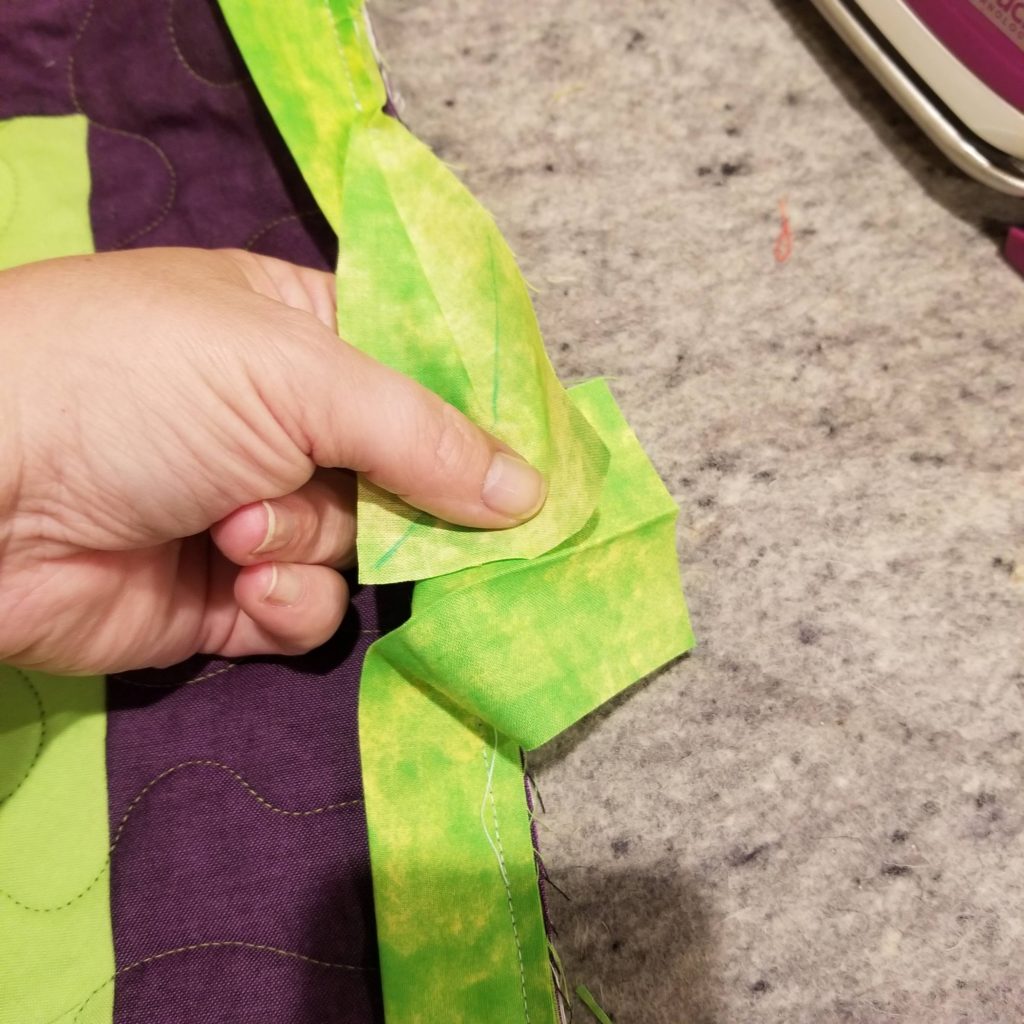
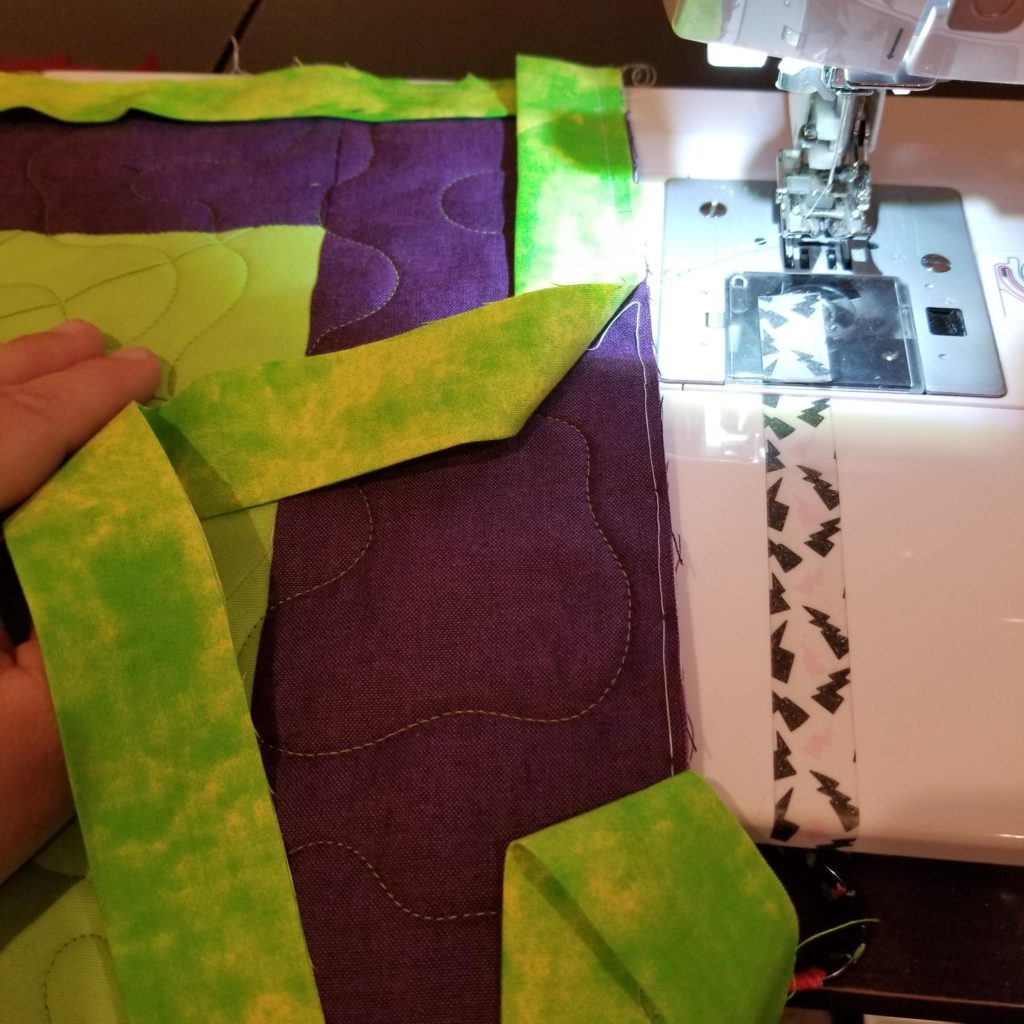
Open both tails and pin together. The tail on the bottom turns to the right, and the tail coming from the top stays straight.
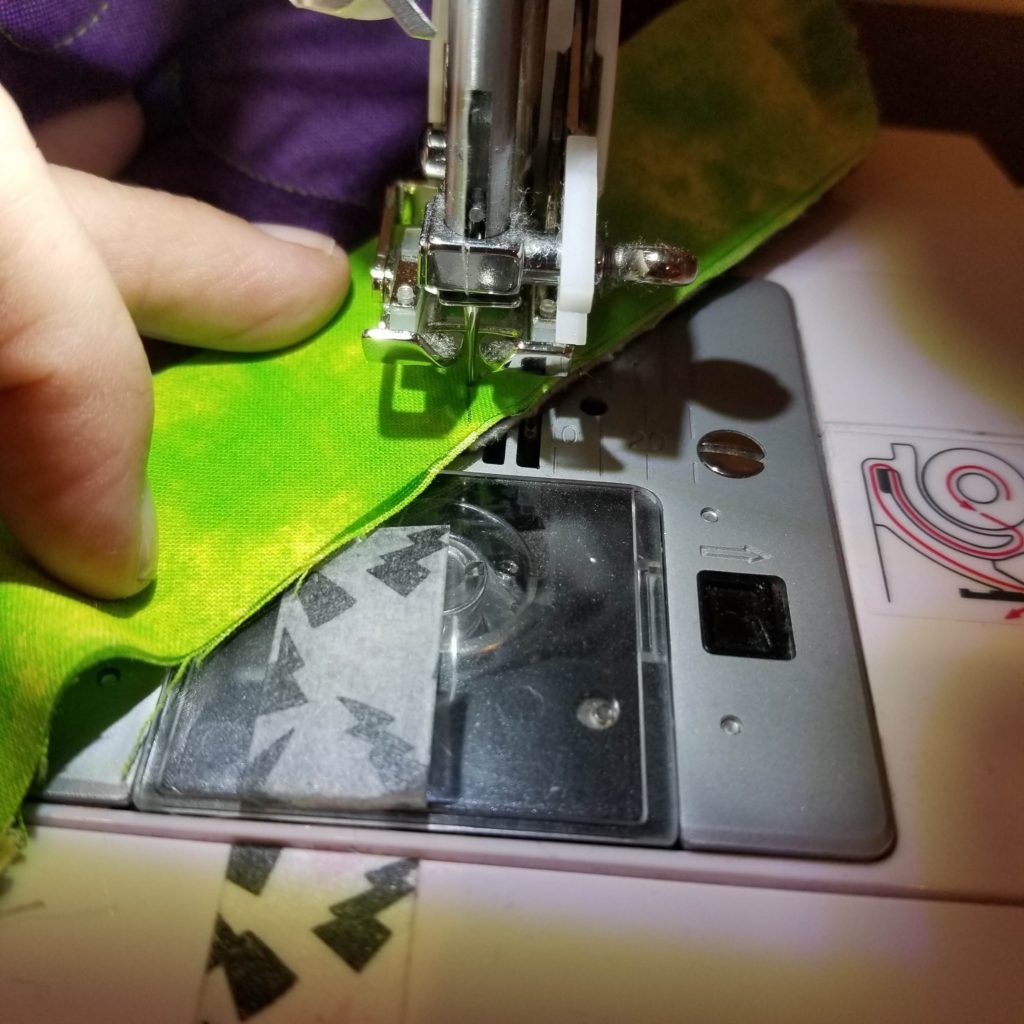
Sew along the marked line. It’s a bit of a struggle, but it works.
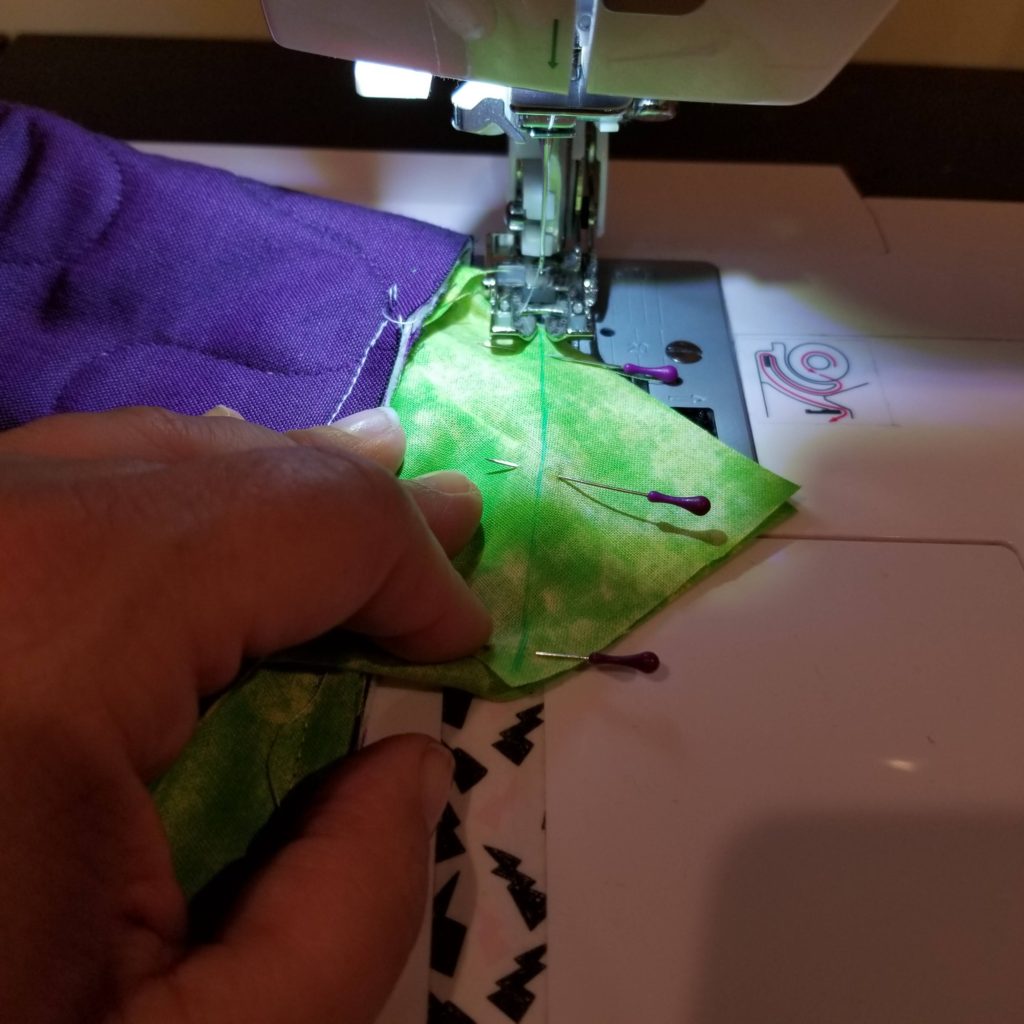
Trim, press seams open with your fingers, and pin to the quilt top. Stitch it onto the quilt.
**If my instructions for this joining technique don’t make sense to you, check out Susan’s tutorial. Sometimes we need to hear these things a different way to understand.
Okay. Big sigh of relief. You are halfway done with binding.
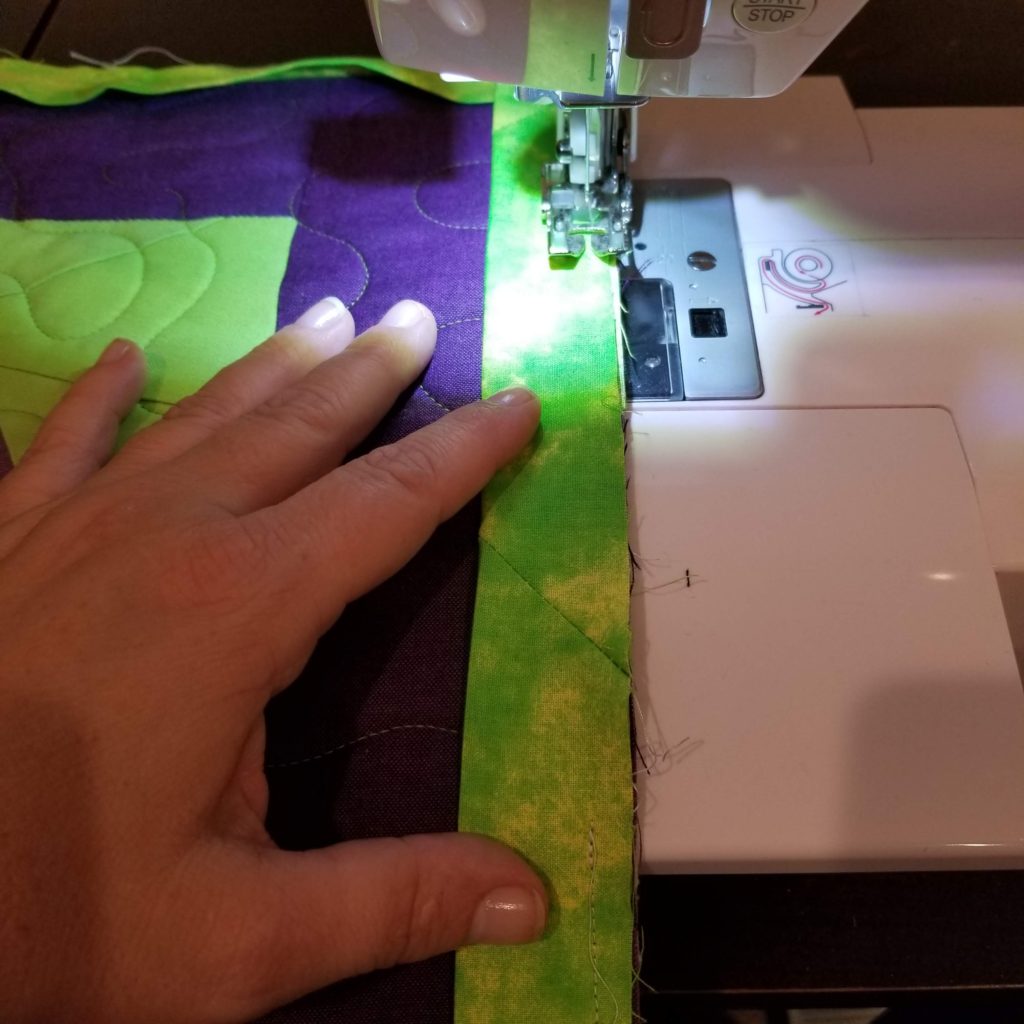
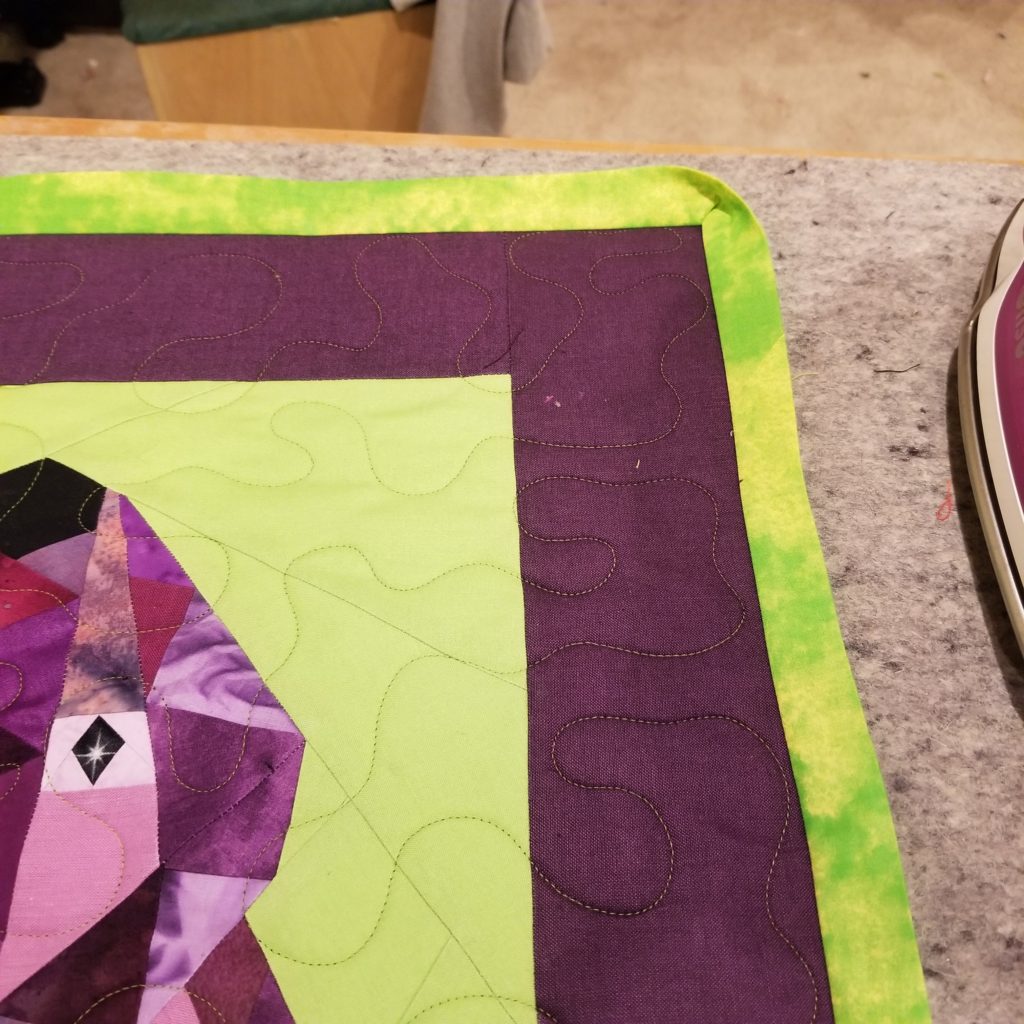
For a super crisp finish, take your quilt to your ironing board, and press the binding open from the front. This is a fussy step, but makes for a really beautiful binding.
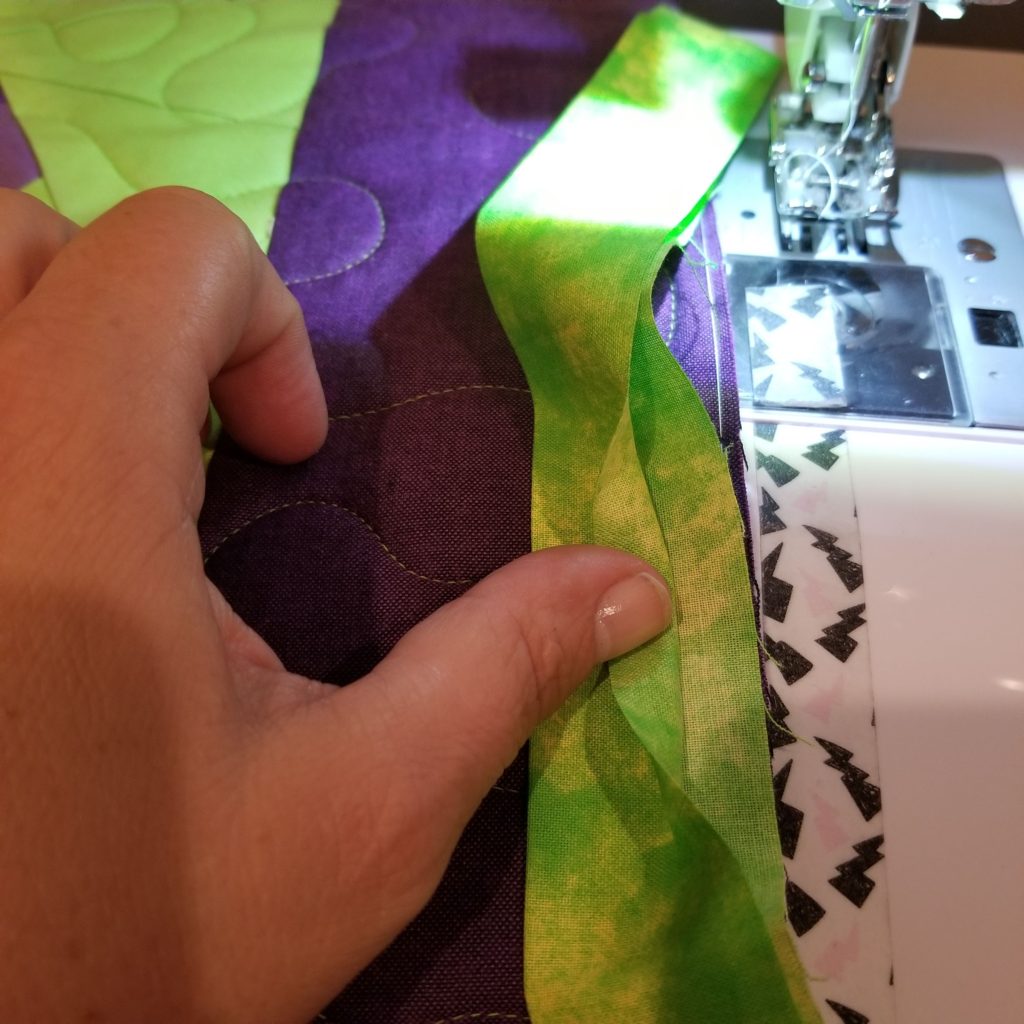
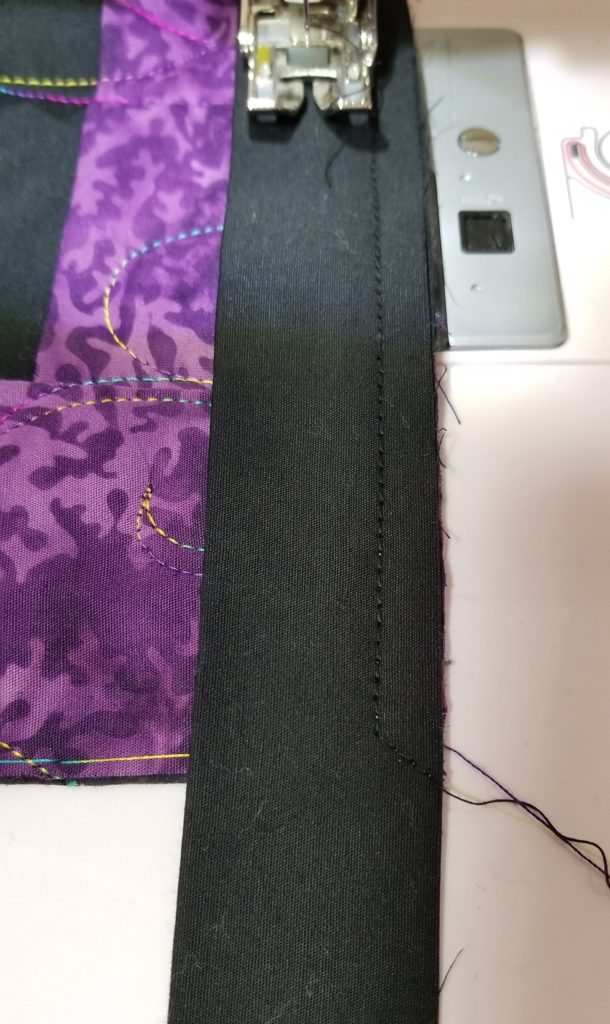
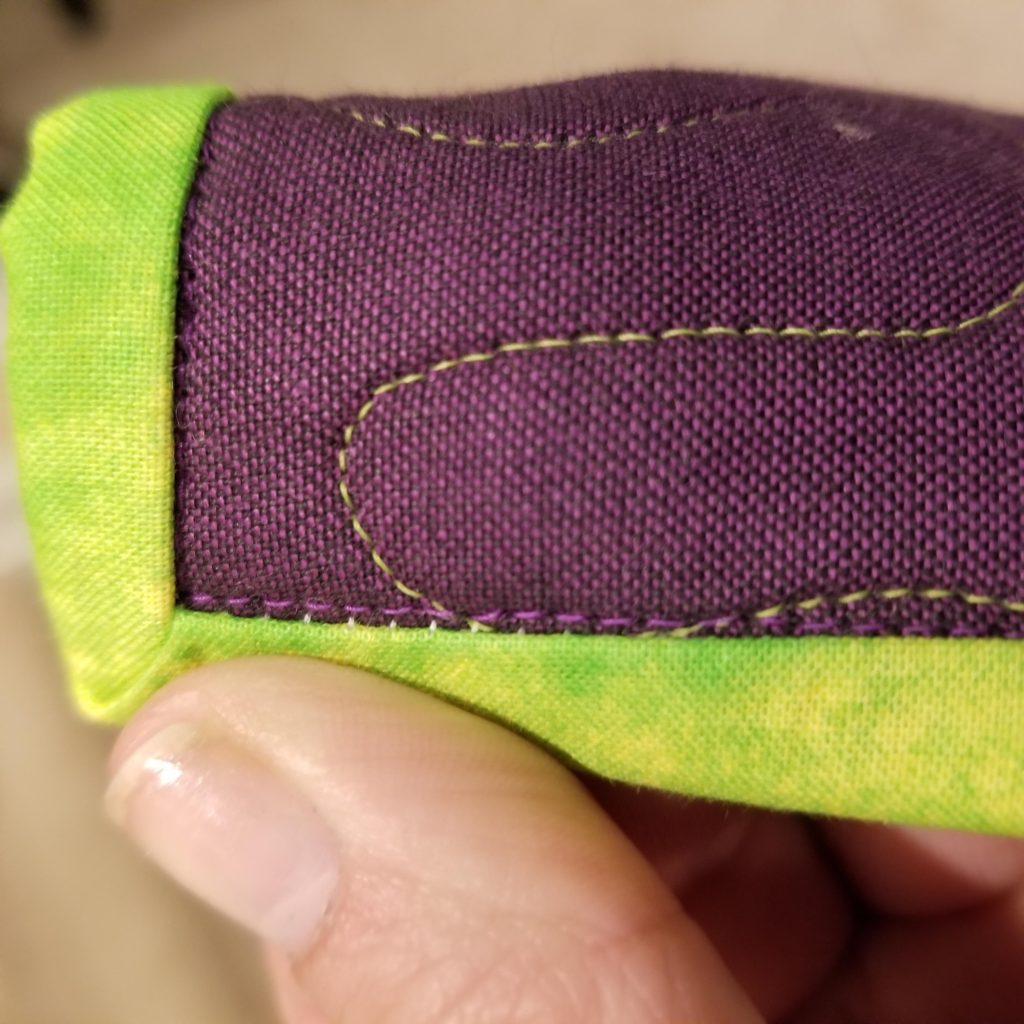
The next fussy bit is this. Wind a bobbin in thread matching your binding. Matching thread covers a multitude of sins. Your top thread should match your top if possible. You will be stitching in the ditch of the binding. (I’m using a contrast thread on the back for this one, so you can see what I’m doing.)
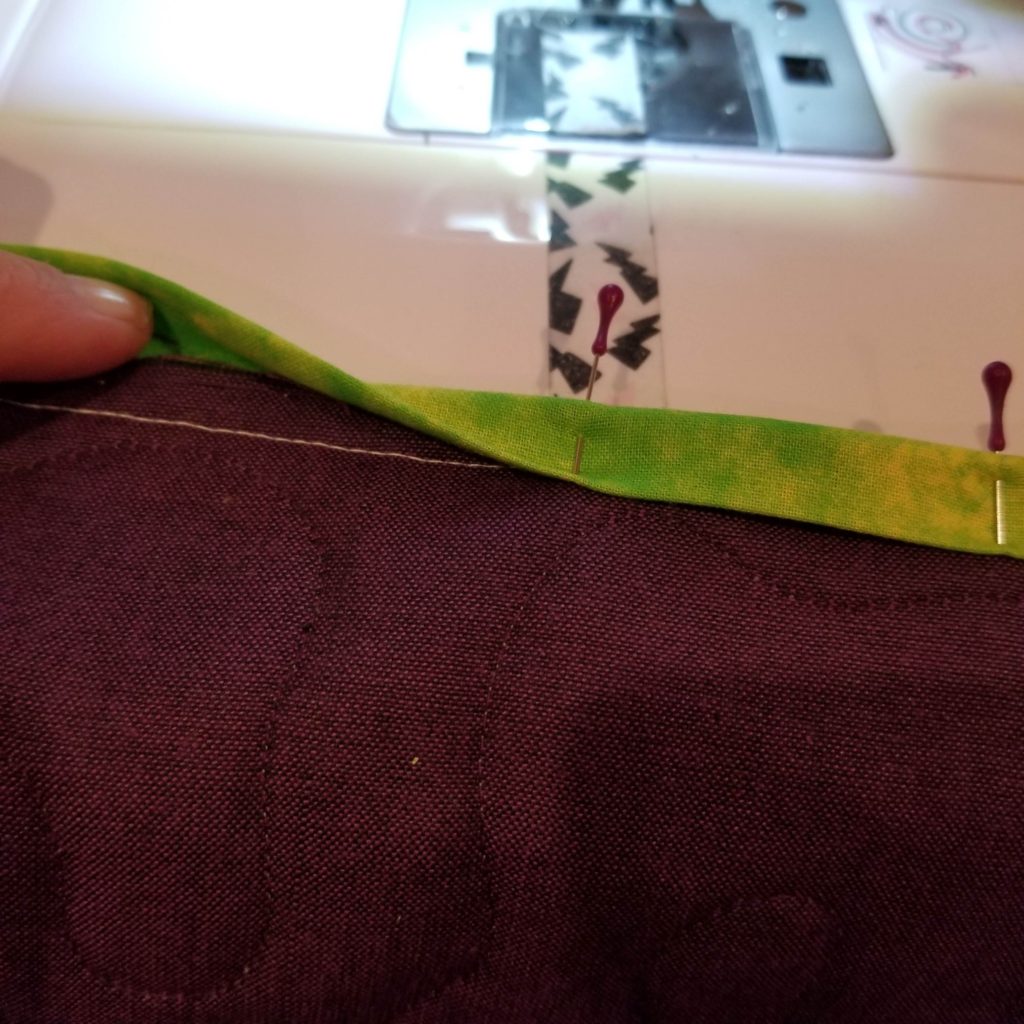
I use a lot of pins on this next bit. I’m a pinner. Turn your binding to the back, making sure you are overlapping your stitching line by about 1/8″. Pin about 6″- 12″ of binding to the quilt top. I do not pin all the way – I grow tired of pins sticking me in the belly or worse, the boobies.
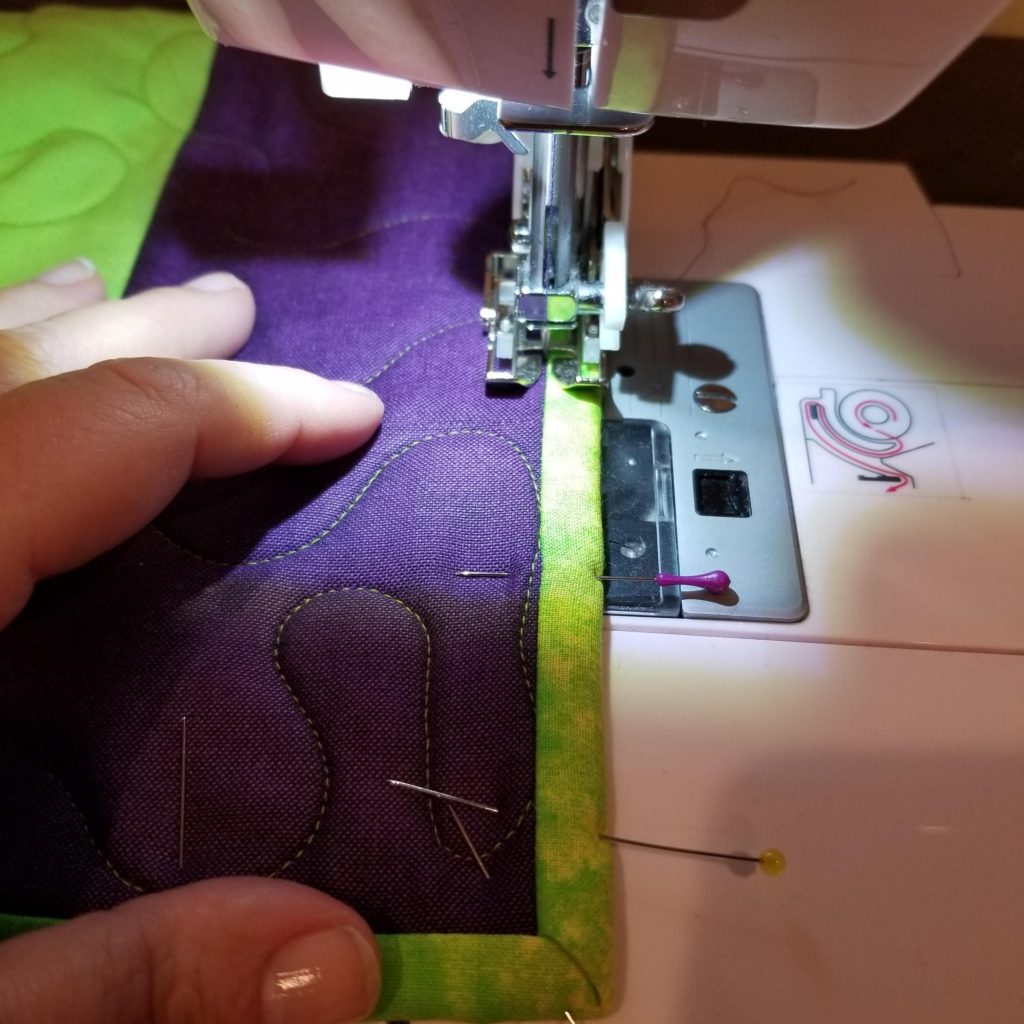
Stitch slowly, from the front of the quilt. Keep your needle in the ditch of the binding. You will be catching your binding on the back, and if you are patient, you will have a nice consistent binding on the back. I do not stitch over my pins. I stitch up to them, then remove them and after a few are out I pin the next section.
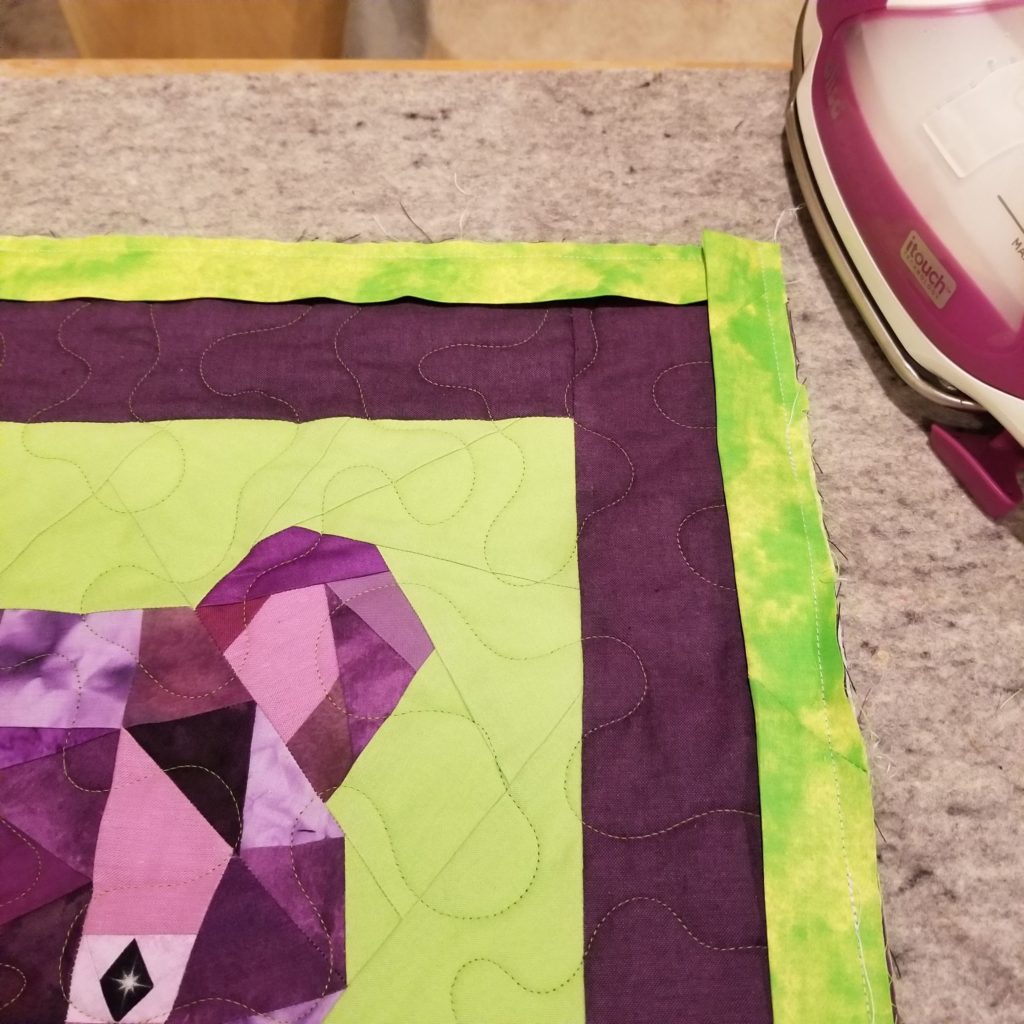
As you approach the corner, pin around it. Check your miter carefully. I like to make sure that the miters are opposite on front and back, to reduce bulk. I use a couple of pins at each corner – I hate it when I miss the corner and have to catch them by hand. Go all the way around your quilt.
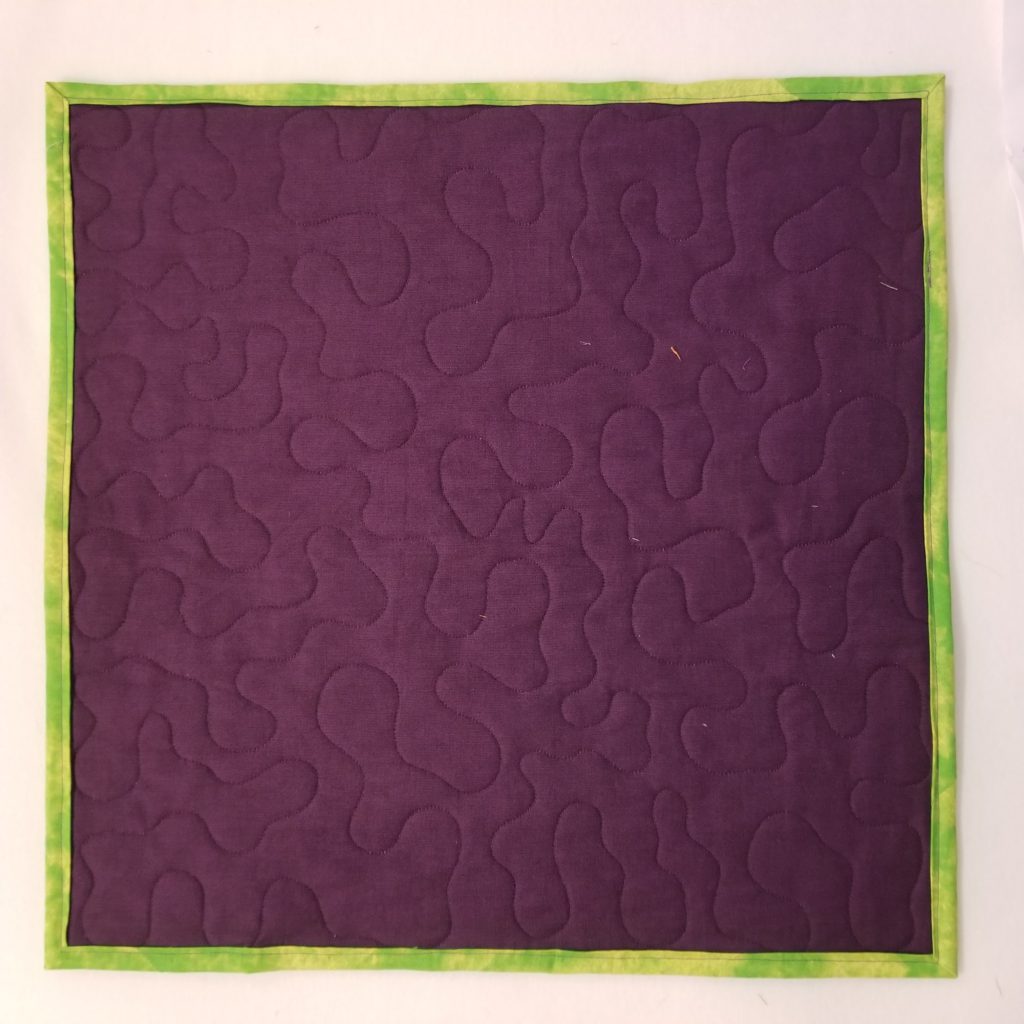
Now, another big sigh. You should be done. Flip over the quilt, and examine it, making sure you didn’t miss any spots. Corners can be tricky. If I missed anything, I take a few hand stitches to secure it.
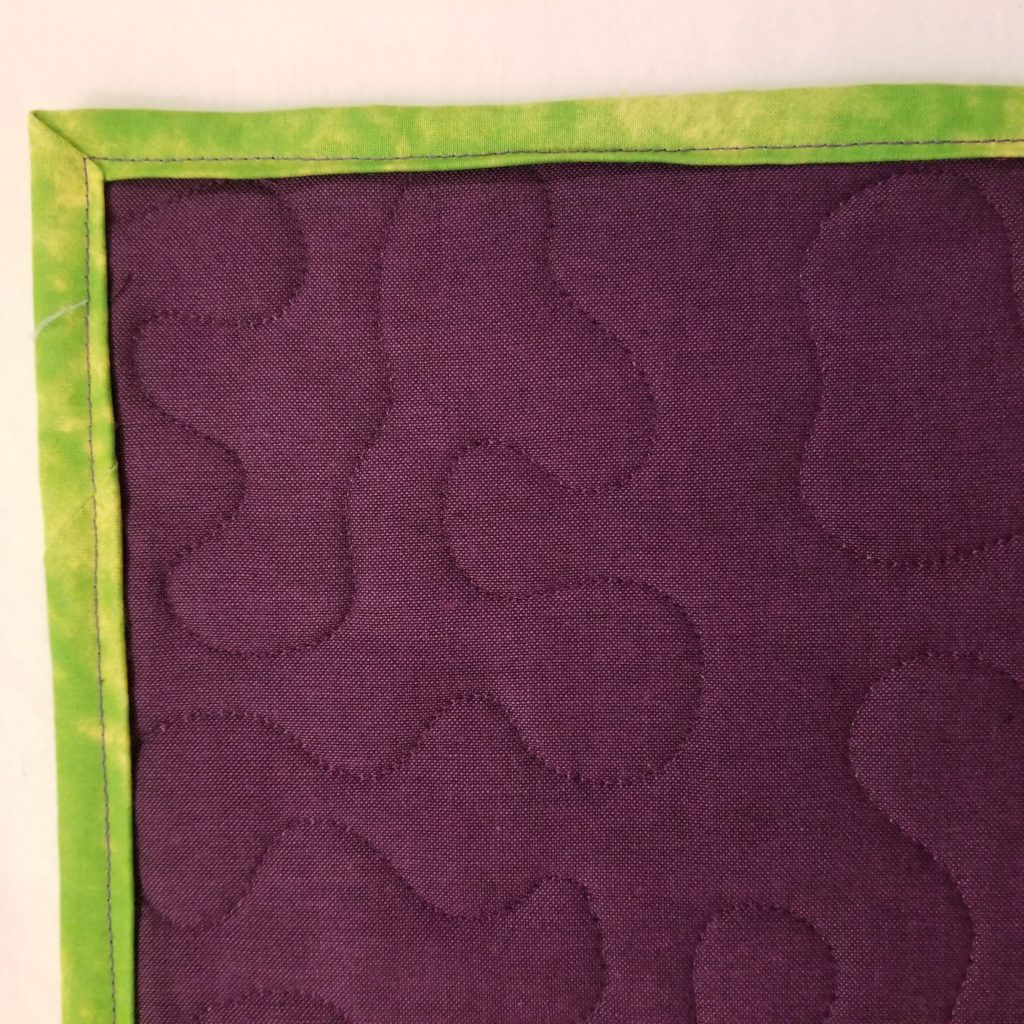
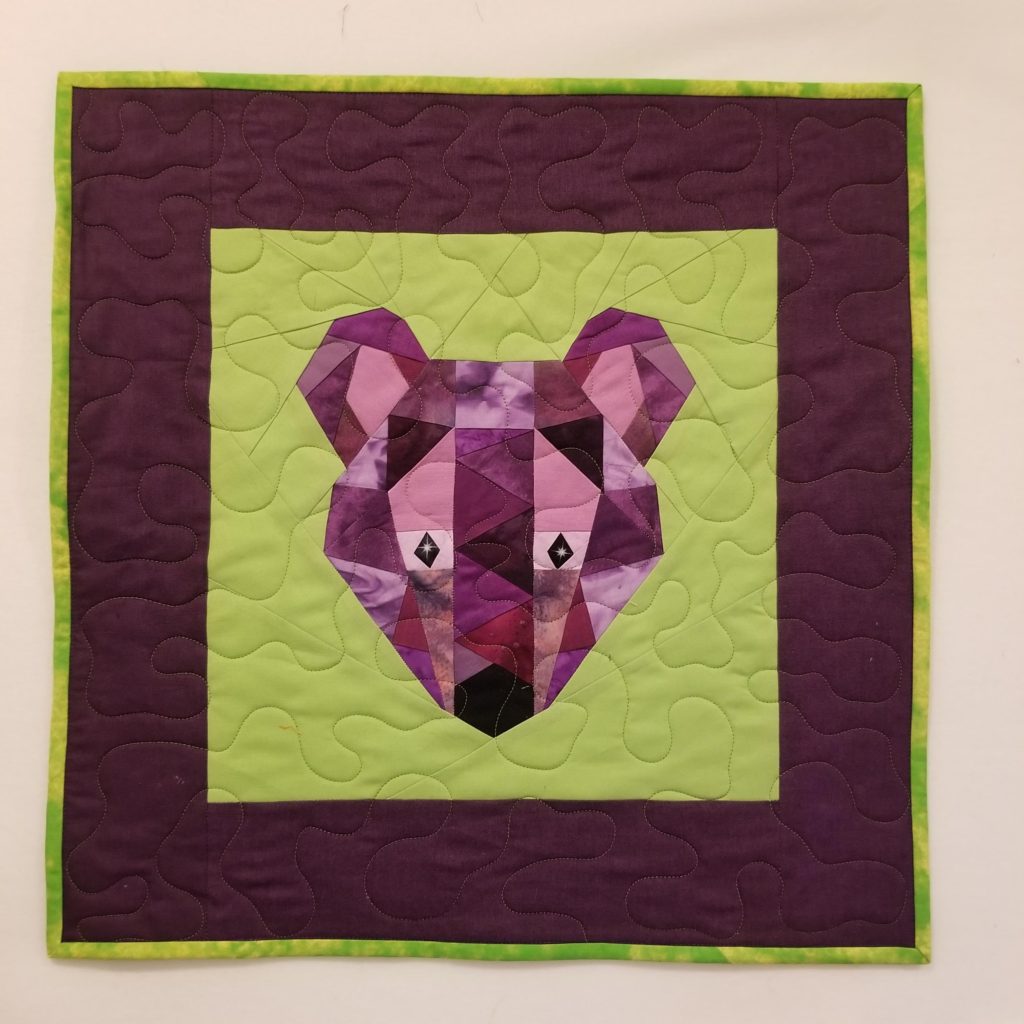
This little bear is a quilt block I made while testing the Barmy Bear pattern for Joann at UnicornHarts. It will be donated to my quilt guild’s Dolly Quilt Program. It is so cute – as part of a preschool graduation ceremony a local senior center gives each child a teddy bear and a quilt. It is a great way to use up orphan blocks and try new techniques.
This is a super close-up view of the front of the binding. The purple stitches are the ones securing my binding to the back.
Make sure you check out the rest of the tutorials being prepared this month. There is so much useful info here.
Day 1 – September 1 – Sam Hunter: Sewing Long Seams Without Stretching – huntersdesignstudio.com
Day 2 – September 2 – Susan Arnold – Joining Binding the Easy Way – quiltfabrication.com
Day 3 – September 3 – Angie Wilson – Fussy cutting tips and techniques – www.gnomeangel.com
Day 4 – September 4 – Andi Stanfield – No-Mark HST: Let your machine be your guide – truebluequilts.com/blog/
Day 5 – September 5 – Bobbie Gentili – Say YES to Y-seams – geekybobbin.com
Day 6 – September 6 – Mel Beach – 5 Reasons to Say Woo Hoo! to School Glue – pieceloveandhappiness.blogspot.com
Day 7 – September 7 – Laura Piland – 7 Ways to Use a Laser on Your Sewing Machine – www.sliceofpiquilts.com
Day 8 – September 8 – Suzy Webster – How to solve loops in free motion quilting – www.websterquilt.com
Day 9 – September 9 – Tara Miller – Accurate Stitch-and-Flip Corners – quiltdistrict.com
Day 10 – September 10 – Latifah Saafir – Accurate Seams Using Masking Tape! – latifahsaafirstudios.com
Day 11 – September 11 – Sarah Ruiz – The Magic of Glue Basting – saroy.net
Day 12 – September 12 – Jen Shaffer – Ways to stop your ruler from slipping while cutting – patternsbyjen.blogspot.com
Day 13 – September 13 – Cheryl Sleboda – Basics of ruching (a vintage fabric manipulation technique) – muppin.com
Day 14 – September 14 – Raylee Bielenberg – Choosing quilting designs for your quilt – www.sunflowerstitcheries.com
Day 15 – September 15 – Jen Strauser – Accurate and Attractive Machine binding – dizzyquilter.com
Day 16 – September 16 – Jane Davidson – Matching points for all types of intersections – quiltjane.com
Day 17 – September 17 – Teresa Coates – Starch and starch alternatives – teresacoates.com
Day 18 – September 18 – Jen Frost – Benefits of spray basting – faithandfabricdesign.com
Day 19 – September 19 – Sandra Starley – Getting started with Hand Quilting – utahquiltappraiser.blogspot.com
Day 20 – September 20 – Karen Platt – Drunkard’s Path Made Easy – karenplatt.co.uk/blog/
Day 21 – September 21 – Kris Driessen – All Kinds of Square (in a Square) – scrapdash.com
Day 22 – September 22 – Sarah Goer – Planned Improv Piecing – sarahgoerquilts.com
Day 23 – September 23 – Kathy Bruckman – Organizing kits for on-the-go sewing – kathyskwiltsandmore.blogspot.com
Day 24 – September 24 – Cheryl Daines Brown – The Secret to Flat Quilt Tops: Borders – quilterchic.com
Day 25 – September 25 – Cherry Guidry – Pre-assembling fusible applique – cherryblossomsquilting.com
Day 26 – September 26 – Laura Chaney – Getting started with English Paper Piecing – prairiesewnstudios.com
Day 27 – September 27 – Ebony Love – Cutting Bias Strips from a Rectangle – lovebugstudios.com
Day 28 – September 28 – Tammy Silvers – Working with heavier weight threads in your machine – tamarinis.typepad.com
Day 29 – September 29 – Kathy Nutley – Create a perfect facing or frame with 90 degree angles – quiltingsbykathy.com
Day 30 – September 3 – Joanne Harris – Using Leaders and Enders – quiltsbyjoanne.blogspot.com
Some of the links I use are affiliate links. If you use them to make a purchase, I make a small commission. Thank you!
Hi. I’m not sure how I missed the first 14 days of this Blog Hop. I am very excited to come back every day and read another Bloggers smart tip. More and more often I am machine binding my quilts too, so your post struck all the right notes for me. I will definitely try pressing my binding to the back before I sew next time.
Yay! Better late than never. I hope my tips help!
Thank you for sharing this! Cute little quilt!
Thanks, Chris! I guess I should make another little one for the small quilt raffle.
Jen, this is fabulous. I’ve been doing something similar, but will take the precision marking and add that to my binding technique. I love that you mark the diagonal corner. I’ve found that I love having a line to follow more than just winging it. Thanks for this. I have been executing flange bindings to attach the binding to the back then SITD in the flange on the front, but that never lets me not use a border since I don’t know exactly where the quilt blocks will end. Great job on the tutorial I’ll check out some of the others.
Thanks, Dawn! I’ve only tried flange binding once. I did pup ng once, too. There are so many fun techniques to try!
Perfect description of my favorite way to do machine binding. The hint about drawing that line is particularly helpful. I don’t love pinning but don’t mind using clips and they work nicely with this technique.
I just figured out drawing that darn line. I’m so happy it works so well. I am definitely in the clip hating minority.
Thanks for the tip of drawing the diagonal line – that will help a lot!
It has helped me a ton!
Great post! I machine bind all my projects and happy to report I use most of the same steps you do — your tiny ruler tip was genius! I will start adding that to my binding process!
Great post! I too machine bind all of my projects , happy to report my steps are almost identical to yours! The small ruler tip is genius I’ll definitely be adding that to my binding process!
Love your tips about corners on bindings.
Thanks! I hope they help you.
Great reading youur post